Buttons, Badges & Pins - People Power Blog
Tell Your Story with ChattySnaps Keychains November 30 2017
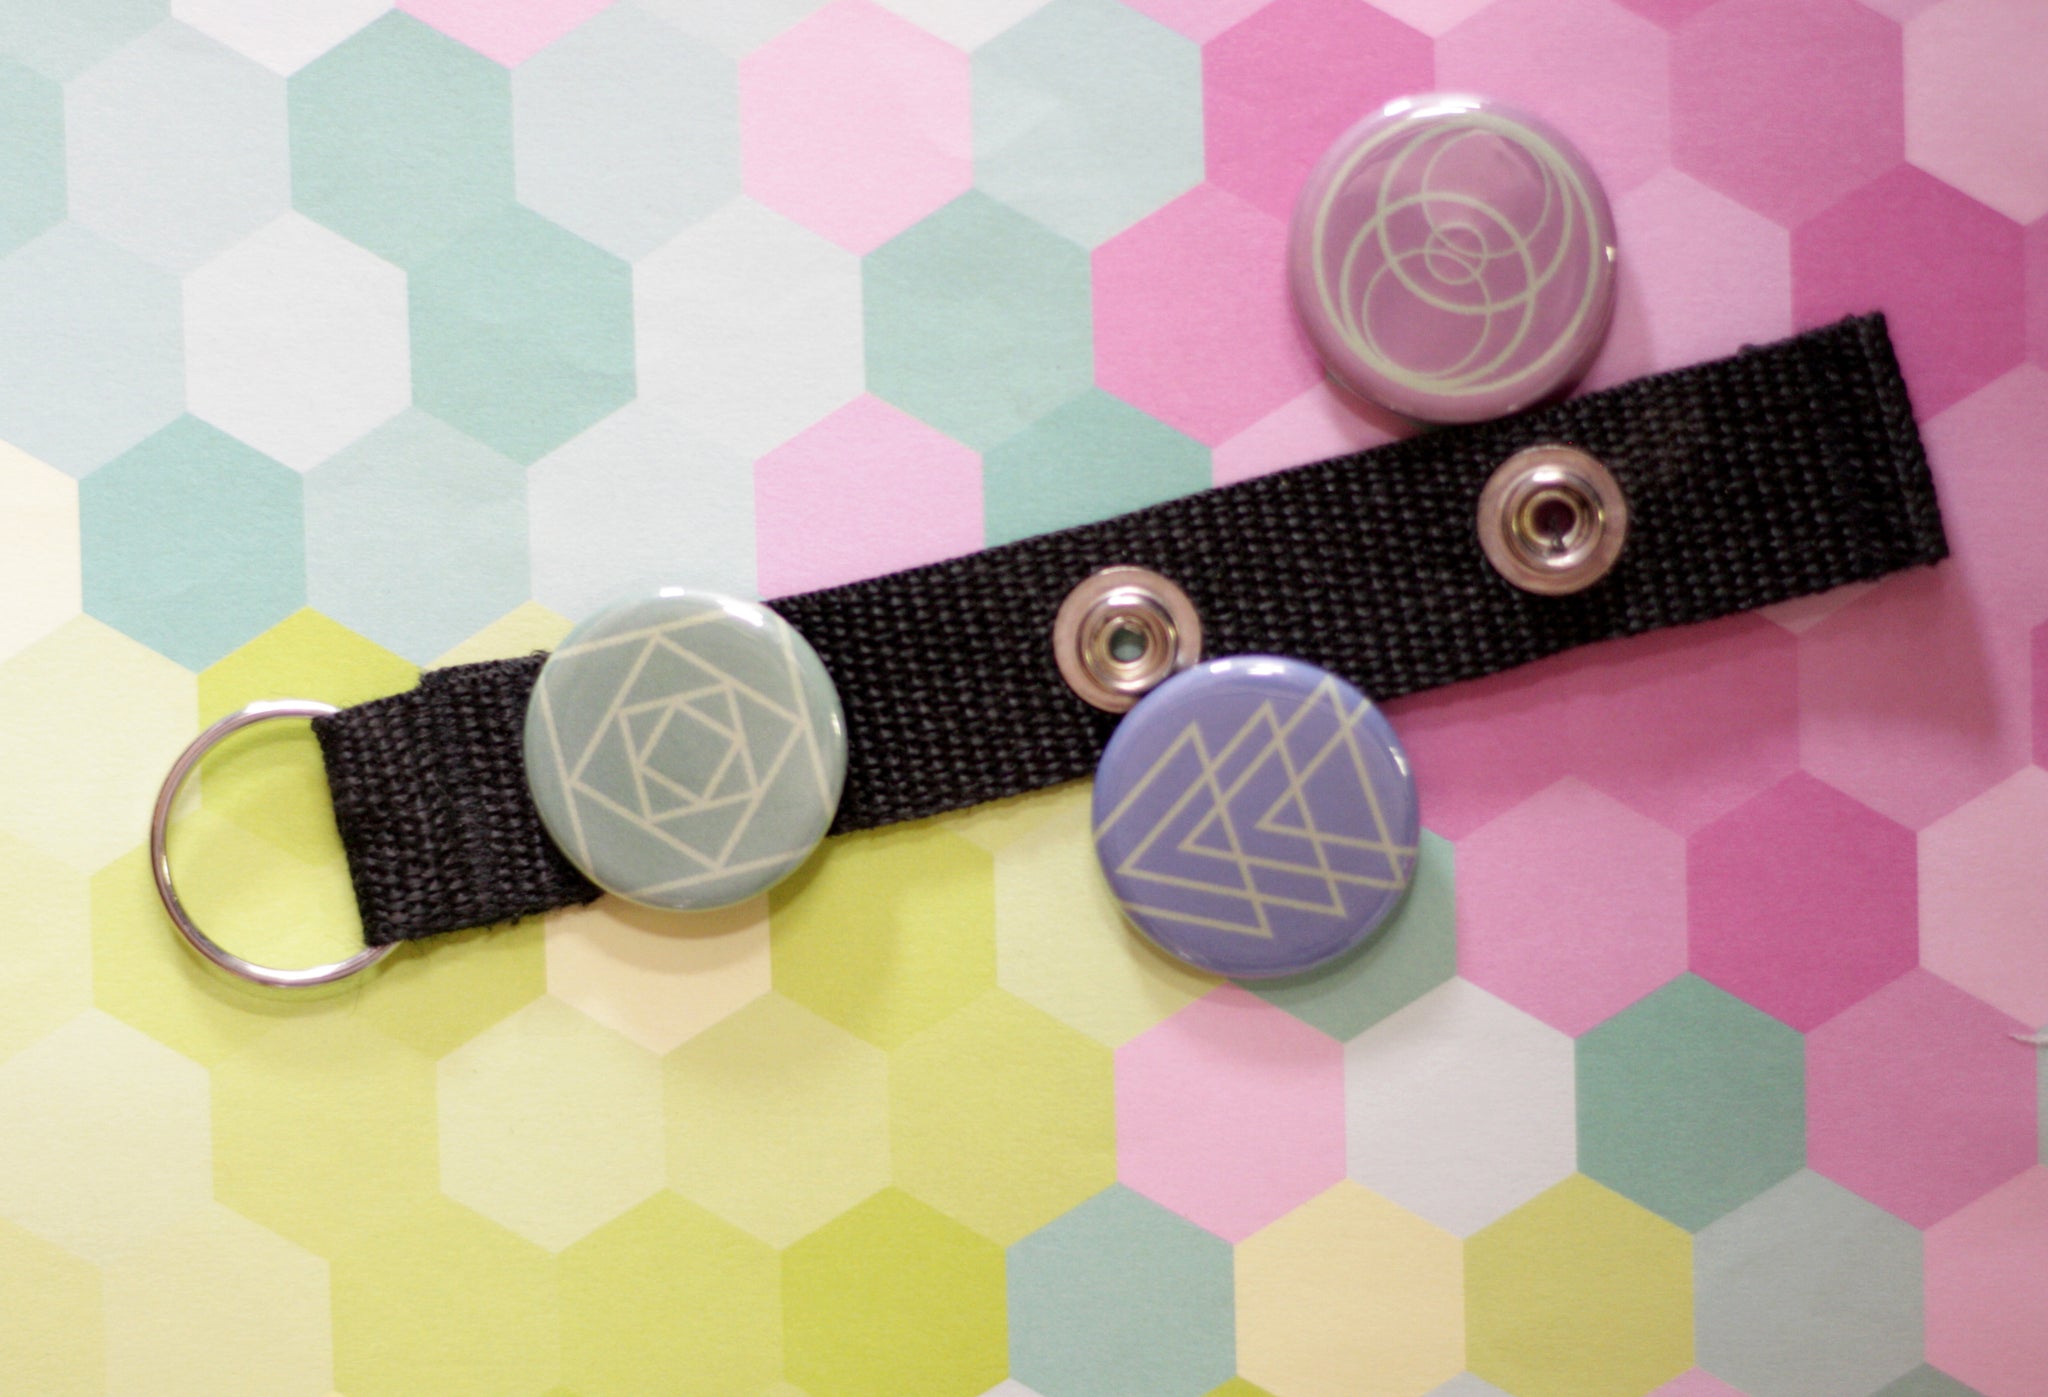
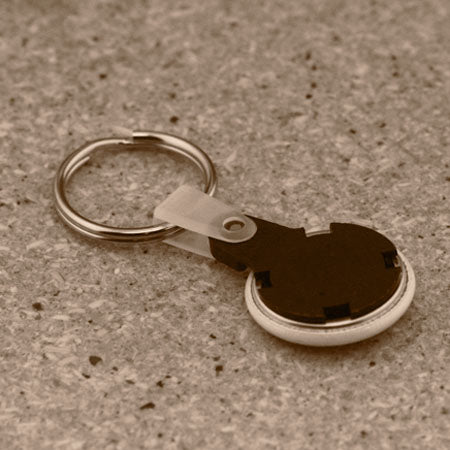
Introducing ChattySnaps Keychain
This totally unique button keychain is turning the keychain world on its head, and we want to shout about ChattySnaps from the rooftops!
Why are ChattySnaps so special?
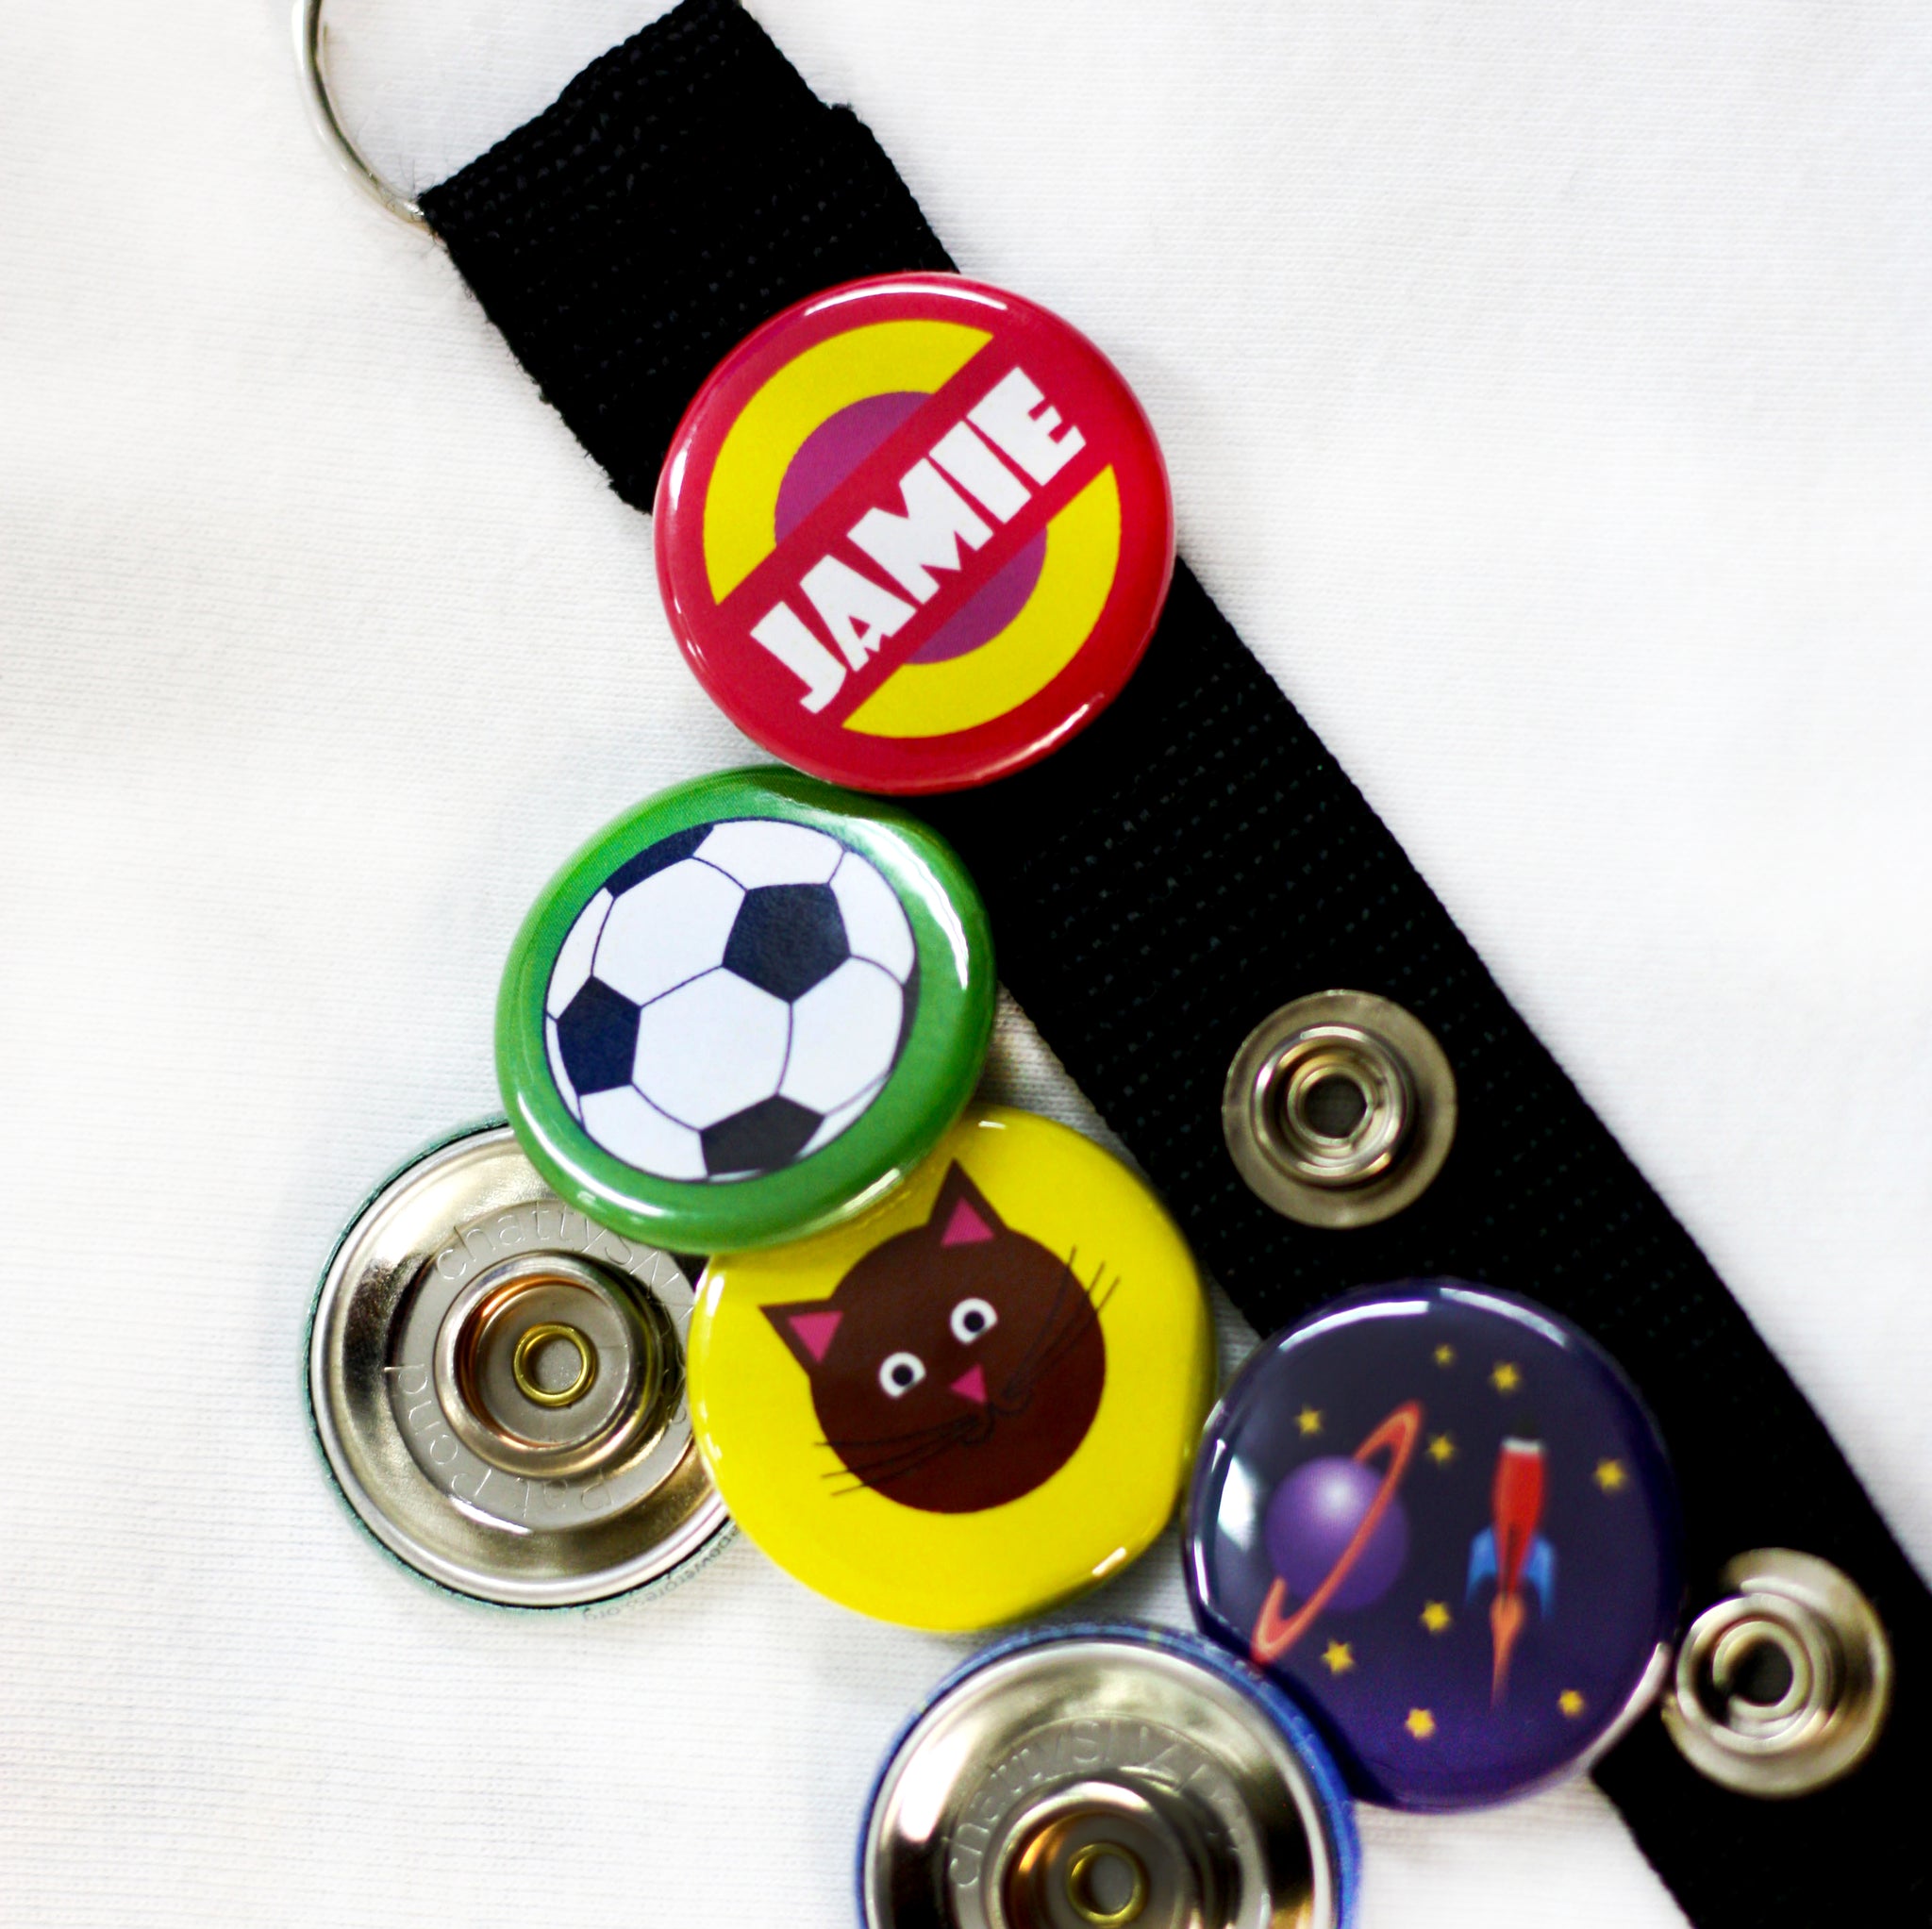
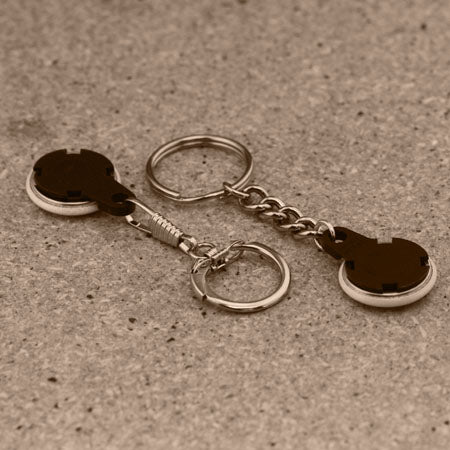
ChattySnaps Keychains allow you to sport not one, not two, but THREE buttons at a time and if that's not wild enough, the buttons are easily interchangeable so you can change your keychain as often as you change your socks :)
Just snap off the old, and snap on the new.
How do ChattySnaps Keychains Work?
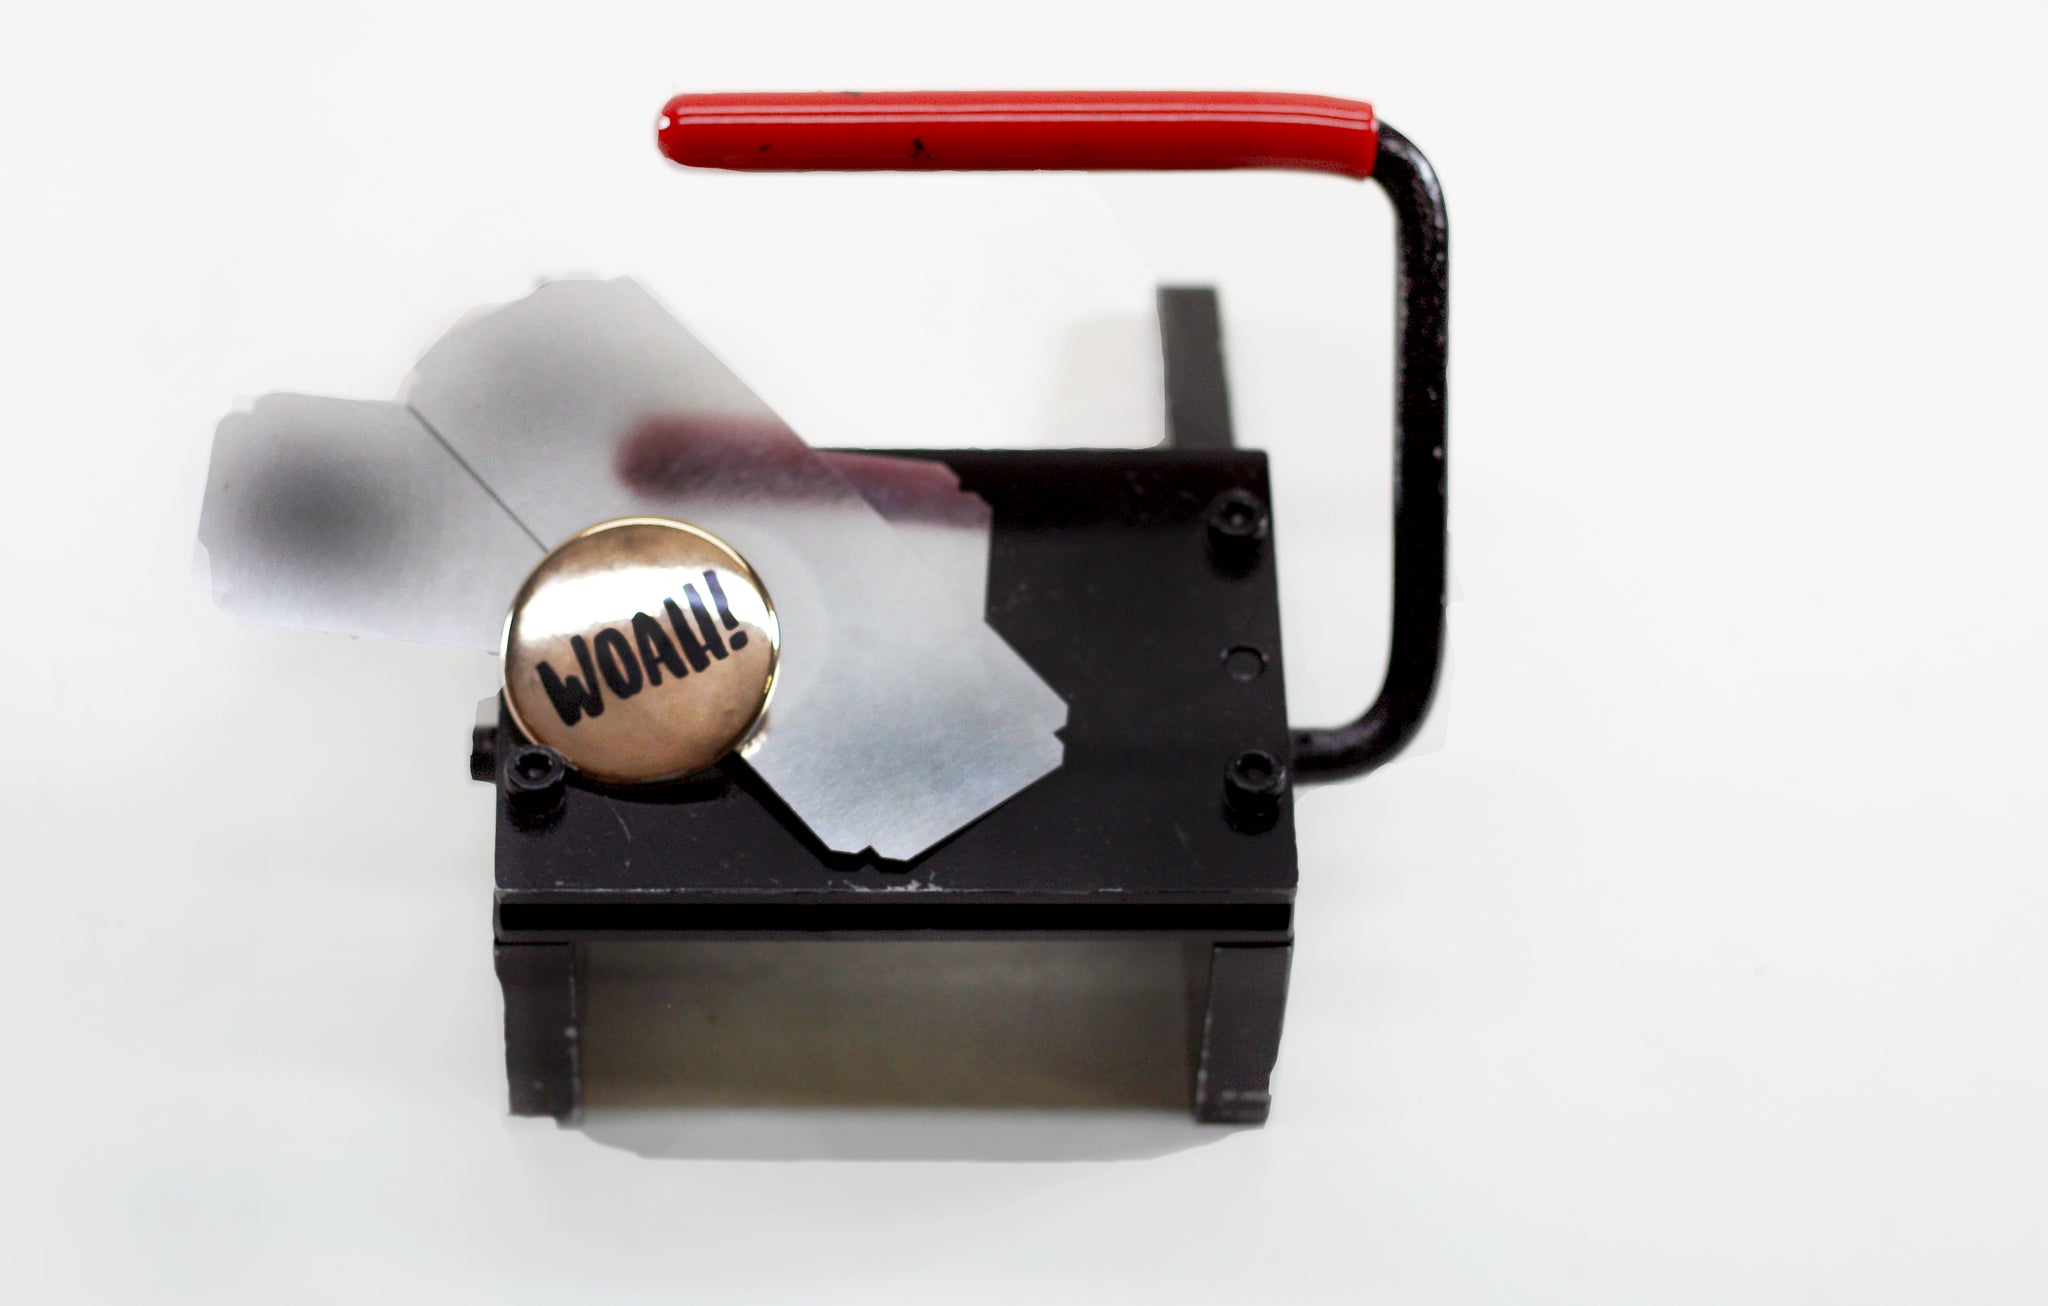
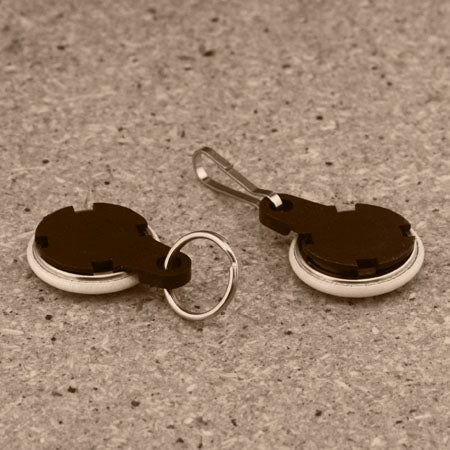
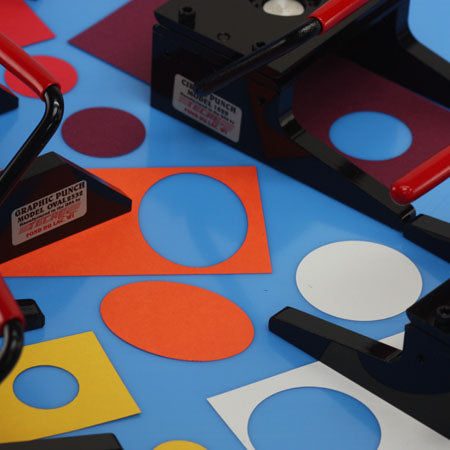
Making your very own ChattySnaps button is a breeze. The buttons are made exactly like a standard pinback button, and even use standard shells and mylar.
- Place your shell, artwork, and mylar into the button press.
- Press like usual
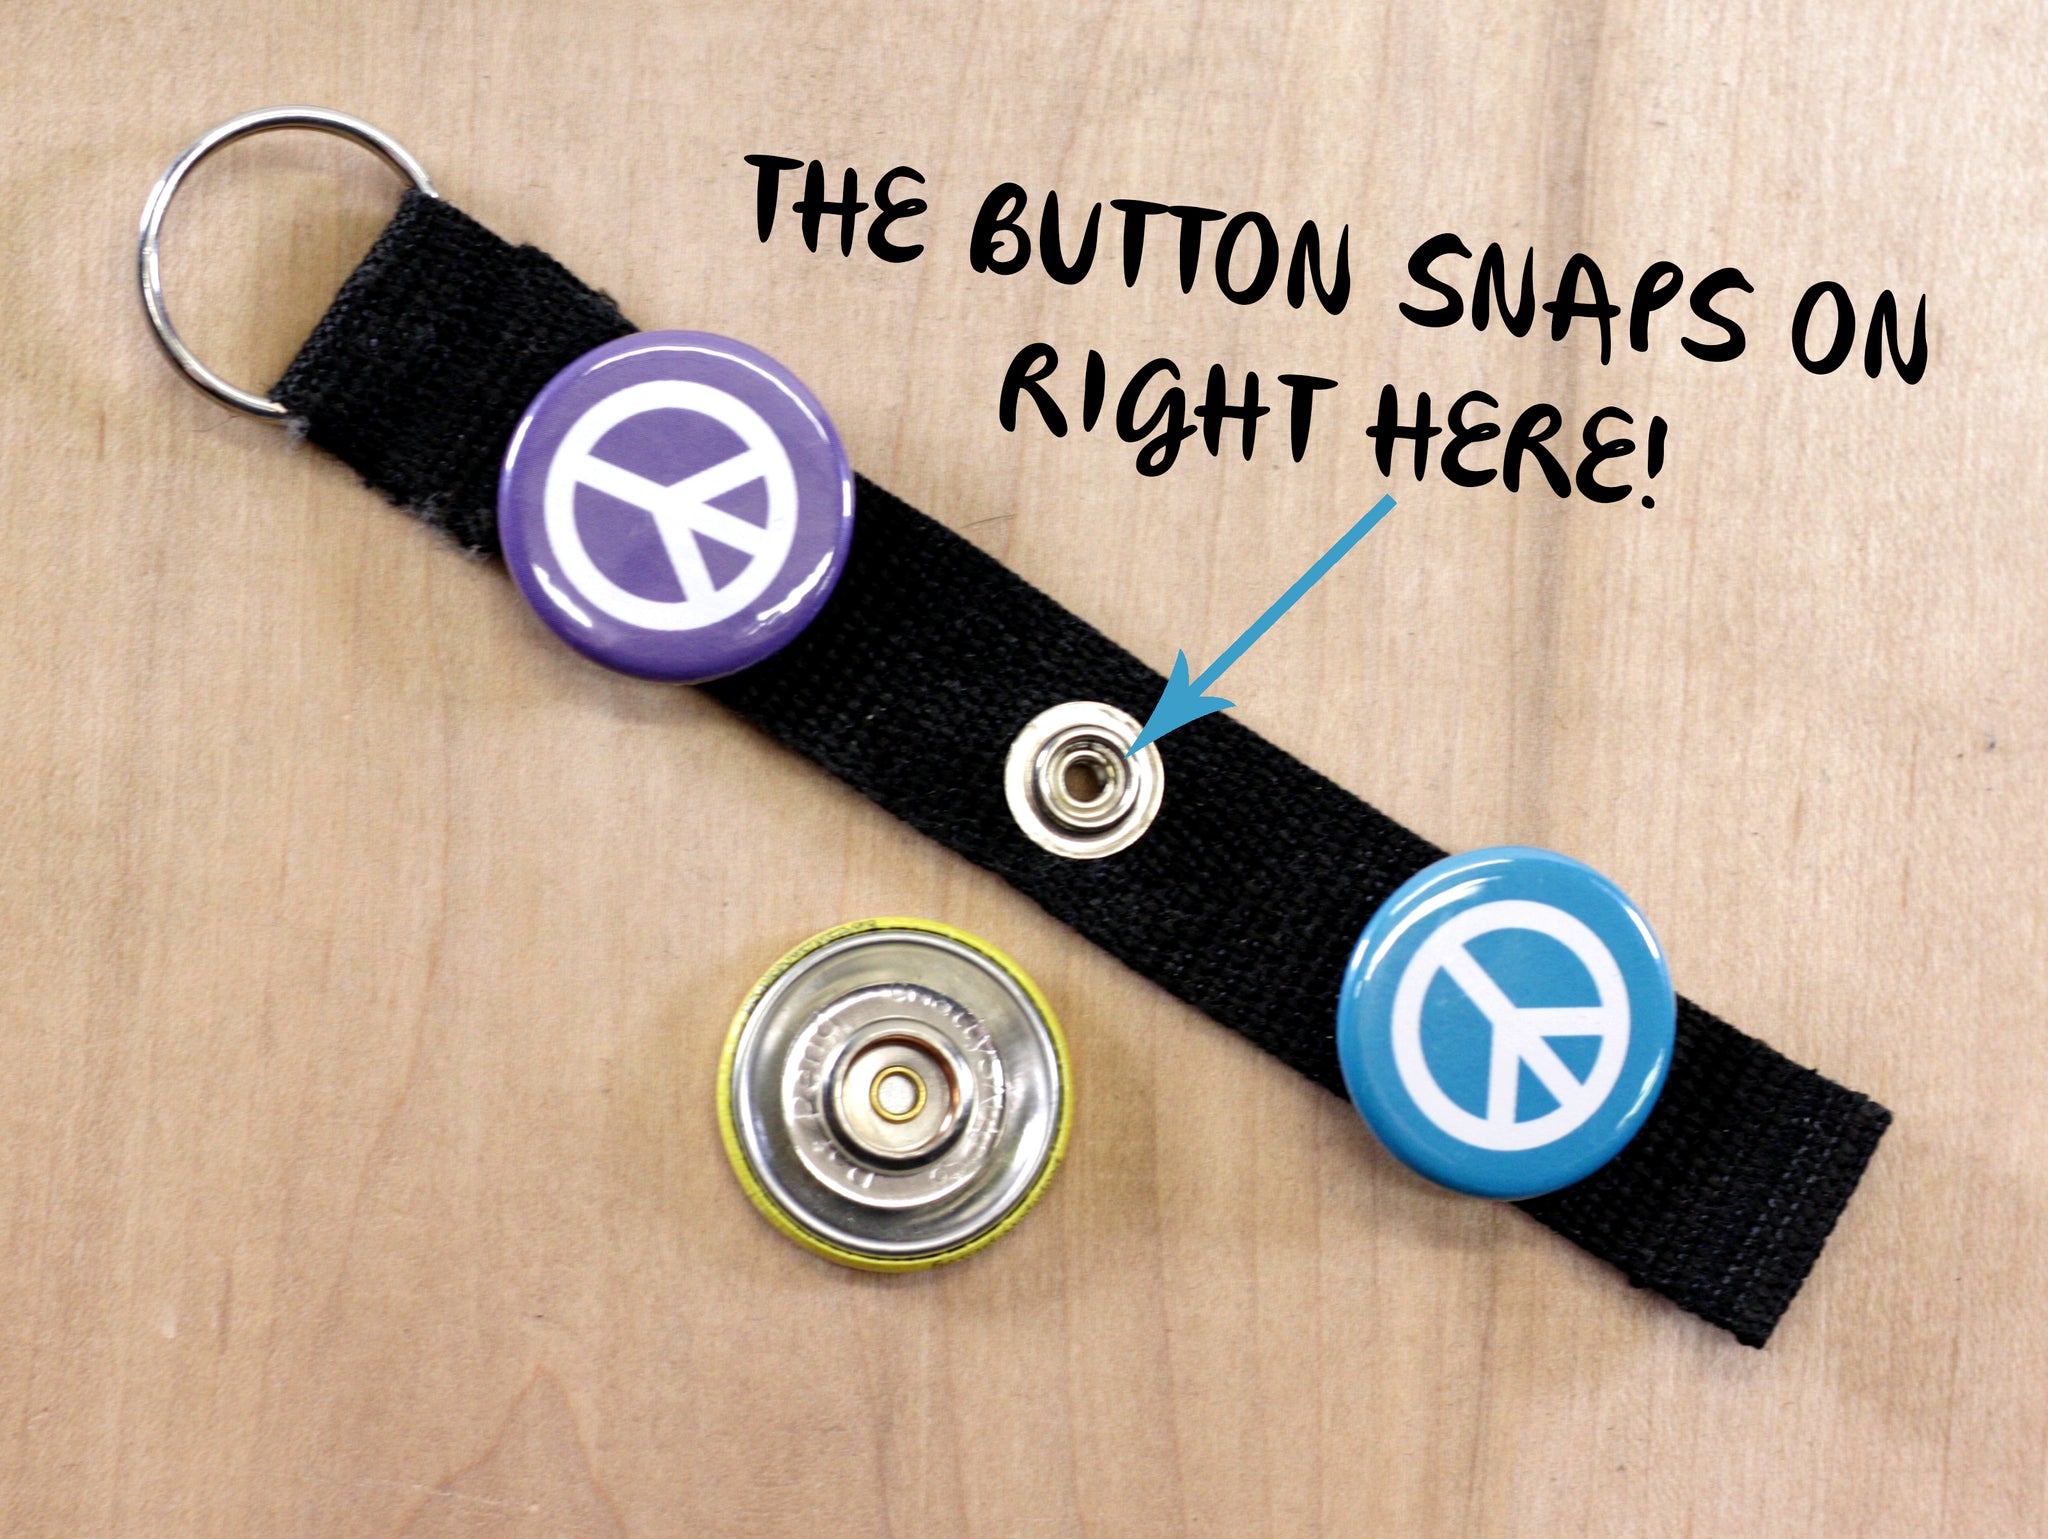
- Put in the ChattySnaps back into the button press, just like you would with a pinned back. Make sure the “snappy” side is facing down.
- Press, and Voila!
- Snap the buttons onto your key ring strap
- Smile, because you are now the proud owner of a ChattySnaps Keychain :)
Stay tuned for the ChattySnaps How-To Video on the Button Guy YouTube Channel! You'll see how making button keychians can be a SNAP :)
![]()
![]()
![]()
![]()
Read more »
Introducing The Super-Dooper, Multi-Purpose, Graphic Punch Cleaner! November 10 2017
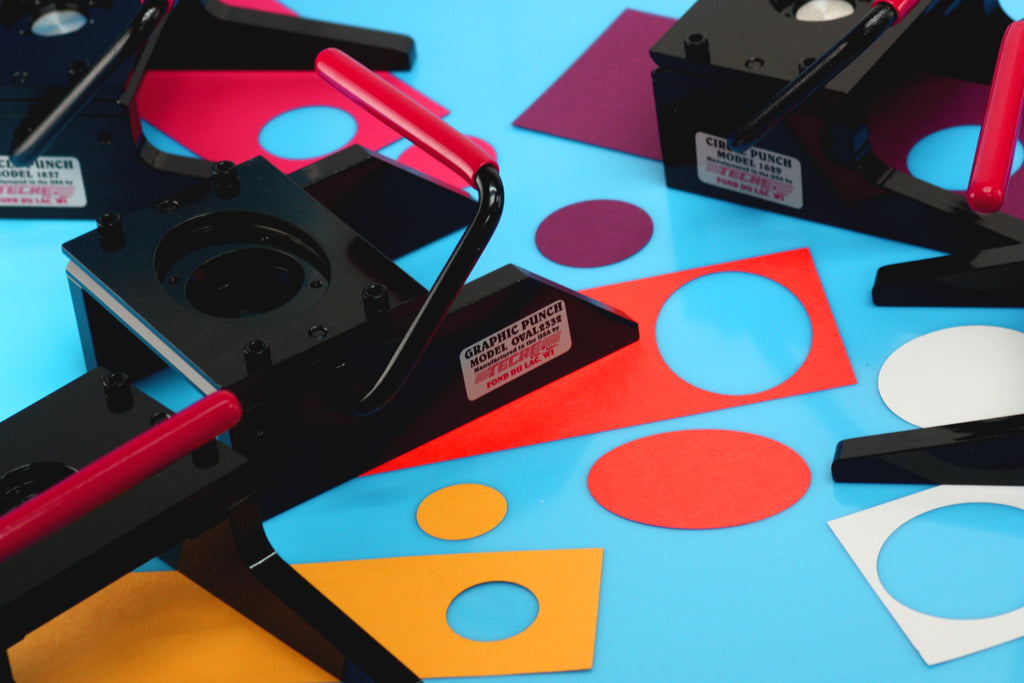
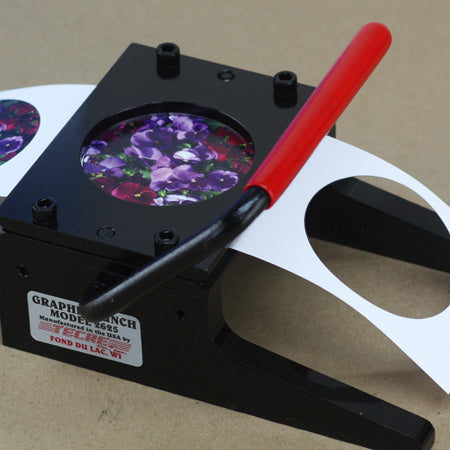
Button maker maintenance is important to keep your hand press is good working condition. However, the graphic punch does a lot of work too, and every once in a while, also needs some TLC. We are now carrying a new tool to clean your graphic punch and avoid costly circle cutter repairs!
Thanks to the Graphic Punch Cleaner, graphic punch repair has never been easier! Add this product to your button making toolbox so that you can fix your graphic punch on the spot.
Just slide the paper thin piece of metal in the slot where the paper is inserted, and slowly move it around to clear out small bits of paper, adhesive, and whatever else gets stuck in there! Seconds later, you'll have a graph punch that's like new again!
NEW! Check out this video to see just how this handy little tool works along with some other maintenance tips for your circle cutter.
![]()
![]()
![]()
![]()
Read more »
FLEX1000 and FLEX2000 Hobby Button Maker Manuals Now Available Online June 16 2017
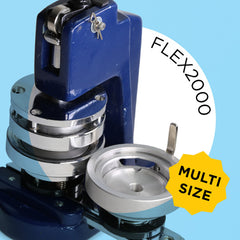
If you have a FLEX1000 or FLEX2000 hobby button maker and have lost the instruction manual that was sent with your start-up kit, don't worry! You can now download the instruction manual for each model here.
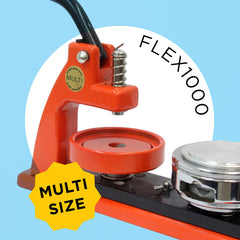
Download the FLEX1000 Instruction Manual (No Rings) here.
Download the FLEX2000 Instruction Manual here.
Just a note about any reference to rings. Our newer models don't require the plastic rings so if you see any reference to them, but you never received the rings, don't worry. Your version of the machine does not use plastic rings. Not sure, give us a call and we can help you out.
Keep it paperless and access online whenever you need it or print it out if you'd like a tangible copy. The choice is now yours.
Even if you don't have one of our all-metal FLEX machines you can take a peek to walk through the steps and see how it works!
And for the visual folks out there, here are the Button Guy videos showing you the FLEX1000 and FLEX2000 button makers in action. See how both hobby pin machines work:
![]()
![]()
![]()
![]()
Read more »
Fun Giveaway Idea for Spring Trade Shows with 2.5” x 3.5” Rectangle Magnets and Pocket Mirrors May 09 2017
Hooray, it’s Spring!
Besides warmer weather, it is also time for Spring trade shows and the start of a busy wedding season. Want a great, fun giveaway idea? 2.5” x 3.5” Rectangle Magnets and Pocket Mirrors are the answer!
TWO new Button Guy videos!
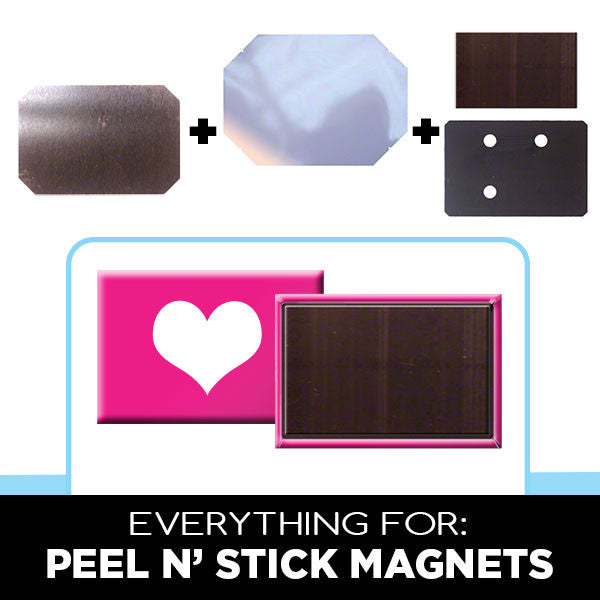
Learn how simple it is to make 2.5” x 3.5” Rectangle Magnets and Pocket Mirrors with two new videos from The Button Guy! The first video walks you through making 2.5” x 3.5” Peel n' Stick Rectangle Magnets.
The second new Button Guy video shows the step-by-step process of making 2.5” x 3.5” Rectangle Purse/Pocket Mirrors. Making mirrors is fun, but there are a few tricks here that will help you be successful.
Why this size?
The 2.5" x 3.5" rectangle is great size for making magnets and mirrors because you get maximum surface space to display your artwork. With a bigger mirror you have a practical item to sell or give away to Spring trade show and wedding guests. People will actually want to stick these mirrors in their purse or bag to use all the time!
Getting started!
To get started you will need the 2.5” x 3.5” Rectangle Button Maker Kit. This machine also comes with pinback parts. To make magnets, you will need to order 2.5” x 3.5” Rectangle Peel n’ Stick Magnets and to make pocket mirrors, you will need to order 2.5” x 3.5” Rectangle Pocket Mirrors.
If you are loving this fun giveaway idea, but not ready to get your own button maker or don't have the time to make them - we did say busy wedding season - then we can do it for you! We have many design options available so you can send us your artwork or we can design from scratch or we can do something in between.
See the options for custom 2.5" x 3.5" peel n' stick rectangle magnets.
Check out the choices for custom 2.5" x 3.5" rectangle pocket/purse mirrors here.
Take a look to see all of our custom magnet sizes here and all of our custom mirror sizes here.
![]()
![]()
![]()
![]()
Read more »
Making Metallic Silver & Gold Buttons with Dura-Lar April 26 2017
We're really excited about making metallic gold and silver buttons with Dura-Lar!!
Using Dura-Lar Film is the easiest way to make Do-It-Yourself buttons that look lavish and luxurious.
In this video, Dura-Lar is used with Gold and Silver Reversible Metallic Dura-Lar to make gorgeous, shiny, pinback buttons that are great for holidays and special occasions. Check it out!
The SILVER & GOLD DURA-LAR used in this video is reversible, with gold on one side and silver on the other. The Metallic Dura-Lar Foil is 2mm thick, comes in standard 8.5 x 11" sheets, and has an EXTREMELY reflective mirror-like finish. Doesn't that sound awesome for a button??!
**When making Dura-Lar Buttons, it is the Glossy or Matte Dura-Lar that goes through the printer, and NOT the metallic Dura-Lar! The metallic Dura-Lar foil goes behind the transparent Dura-Lar film. **
|
|

|

Curious to see some other examples of buttons made with Dura-Lar Film and reflective Metallic Dura-Lar Foil? Here are some older blog posts that feature buttons with special finishes! Which one do you like the best?
Instructional Video: Making Buttons with Dura-LarGet That New Year's Sparkle All Year Long With Holographic Foil
Buttons for Chinese New Year: Year of the Rooster
Feeling Lucky? It's St. Patrick's Day
![]()
![]()
![]()
![]()
Read more »
Say it With a 2” x 3” Rectangle Fridge Magnet: Great for Personal Statement Gifts, Promotional Giveaways and More! April 24 2017
The 2" x 3” Rectangle Fridge Magnet is a great versatile choice. A popular size for family photos and personal statement gifts, this magnet is a favourite souvenir shop idea and for real estate promotional giveaways too.
See the process of making a 2" x 3” Rectangle Fridge Magnet in this new video from The Button Guy. This video will show you important tips to successfully make magnets with the 2” x 3” rectangle button maker.
This essential advice includes how to cut your artwork, how to properly apply the peel n’ stick magnet and why it is important to let your magnets sit on a flat surface for 24 hours before hanging them on another surface.
Once you see how easy it is to make 2" x 3” Rectangle Fridge Magnets you will be able to get busy. Some projects include:
- Decorating your locker or fridge with family photos and other art
- Making personalized statement gifts for friends and family
- Creating promotional giveaways for your business to hand out to clients and at trade shows and conferences
- Designing your artwork like a postcard for your city's attractions for a great souvenir shop idea

To get started you will need the 2 x 3” Rectangle Button Maker Kit. This machine will also make pinback buttons so you can really have some fun! You will also need all the supplies to make 2 x 3” Rectangle Peel n’ Stick Magnets.
Loving the idea of these fridge magnets, but not ready to invest in a button maker? We can make Custom 2 x 3” Rectangle Magnets for you with the design of your choice. Check out the other custom magnet sizes we have available.
![]()
![]()
![]()
![]()
Read more »
Standard 2" Buttons: What's up with the Plastic Back? March 01 2017
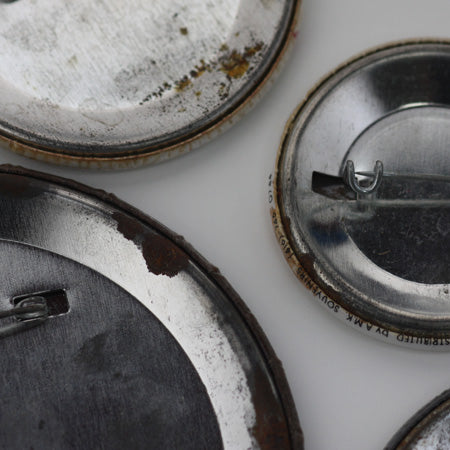
If you've ever looked into getting a Standard 2" Round Button Maker, you may have noticed that the 2" Pinned Back is a little different than every other size of button. It's made of black plastic instead of metal.
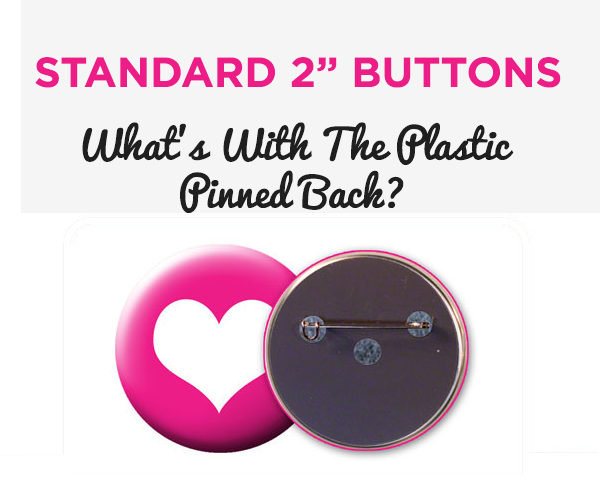
There is reasoning behind the 2" Plastic Back, and you're gonna find out all about it!
First, start off with this video on "How to Make 2 Inch Round Buttons with Plastic Pinned Backs" courtesy of The Button Guy!
HOW TO MAKE 2" BUTTONS WITH PLASTIC PINNED BACKS
Now that you know how a Standard 2" Button is Made, we'll fill you in on the mysterious black plastic backing!
THIRD PRESS OPERATION
When a button is made with a plastic backing, the edge of the button gets crimped at a 45 degree angle. For a pinback button, this 45 degree crimp will hold the button together no problem. The problem with this crimp becomes obvious if you try and mount that button on a plaque, scrap book, or card. It just doesn't lay flat!
The Standard 1", 2", and 6" Round Buttons can be subject to a "Third Press Operation" patented by Tecre. This simply means that the the button gets pressed one extra time in the the pick up die, which flattens the edge completely. The button, now with a flattened back, can be adhered to whatever you like using double sided sticky foam disks or other adhesives.
So now you know what's up the the plastic back! Yay 2 inch buttons :)
![]()
![]()
![]()
![]()
Read more »
Video: How to Make DIY Button Bracelet Charms February 20 2017
In a recent post, we featured Magnetic Button Bracelets with 1" Flatback Button Charms.
There are plenty of Charm Collections available for all of our magnetic jewelry, but it's so fun and satisfying to make a collection of your own!
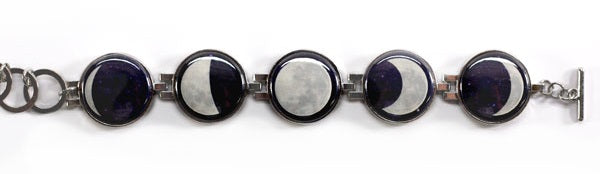
Make charms with your initials, pics of your pet, or just a pretty design that you doodled. There's no wrong way to DIY your own button charms, but there's definitely a correct way to make them!
This How-To Video will help you make awesome charms for use with Single Charm Magnetic Button Bracelets and 5 Bezel Magnetic Button Bracelets :)
If you like the idea of DIY 1" Flatback Button Charms but would rather have us make them for ya, that's no problem at all!
Just give us a call at (416) 204-1984 or email info@peoplepowerpress.org for a quote :)
Read more »
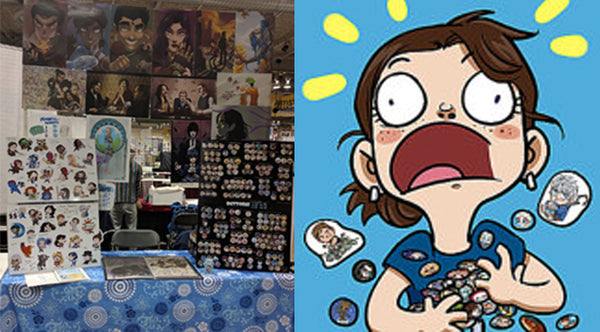
Button Making Business: Convention Tips from a Pro February 08 2017
Fan conventions seem to get bigger every year and art buttons are one of the hottest artist alley sellers. Whether you are ordering custom buttons made with your artwork or firing up your own button press to make your own, buttons are a great and low-cost way to get your art in the hands of your con-going customers.
We get lots of requests for tips and advice for selling buttons at conventions and although we dipped our toes in at FanExpo 2013 we asked artist and convention veteran Allie of "Allieeeps!" for her top Artist Alley Button tips!
PPP: How long have you been doing artist Alleys at Conventions?
Allie: I've been doing artist alley for 10 years now and selling buttons for the last 9.
PPP: You sell prints and other art as well, but buttons have become a big part of your art business!
A: Over time they have definitely become my biggest sellers! Which is great because they're my favorite thing to do. People are more inclined to spend a few dollars on a button than many dollars on a print.
PPP: We get a lot of questions about what con-goers are likely to respond to art-wise. What kind of artwork/characters do you find are the most popular ones (original vs. popular characters)? What sizes work best for fan buttons?
A: Pre-existing characters outsell original characters by an extremely large margin. But it doesn't necessarily follow that a popular thing will outsell an unpopular thing. Game of Thrones is extremely popular for instance but my GoT buttons never do well. And some buttons that were popular a year ago are impossible to sell now. At the same time, nostalgia can be a big factor in sales, and if you do something lesser known you might be the only table that has it and therefore less competition. My best advice is to make buttons for what YOU love because then even if they don't sell well you'll have a fun time making them!
PPP: Can fans find your buttons online?
-Yes I sell buttons online. I'm definitely a smaller seller though, I know many people who are always having to restock because their online store is so successful. I'm not sure what the secret is but I don't mind making very few sales online, it keeps my non-work life from getting too crazy.
PPP: This is really great advice for seasoned sellers and newbies alike! Can we shout out your favorite convention to table at?
A: Favorite convention goes to Calgary Expo. It's massive but not overwhelming and the people are so nice and excited about the artists alley. Plus it's always exciting to get to travel a little for a con.
Check out Allie's art and buttons on Etsy and DeviantArt
Inspired to make your own buttons or interested in starting your own fan button business? Start by checking out our button making start-up kits and custom button services!
![]()
![]()
![]()
![]()
Read more »
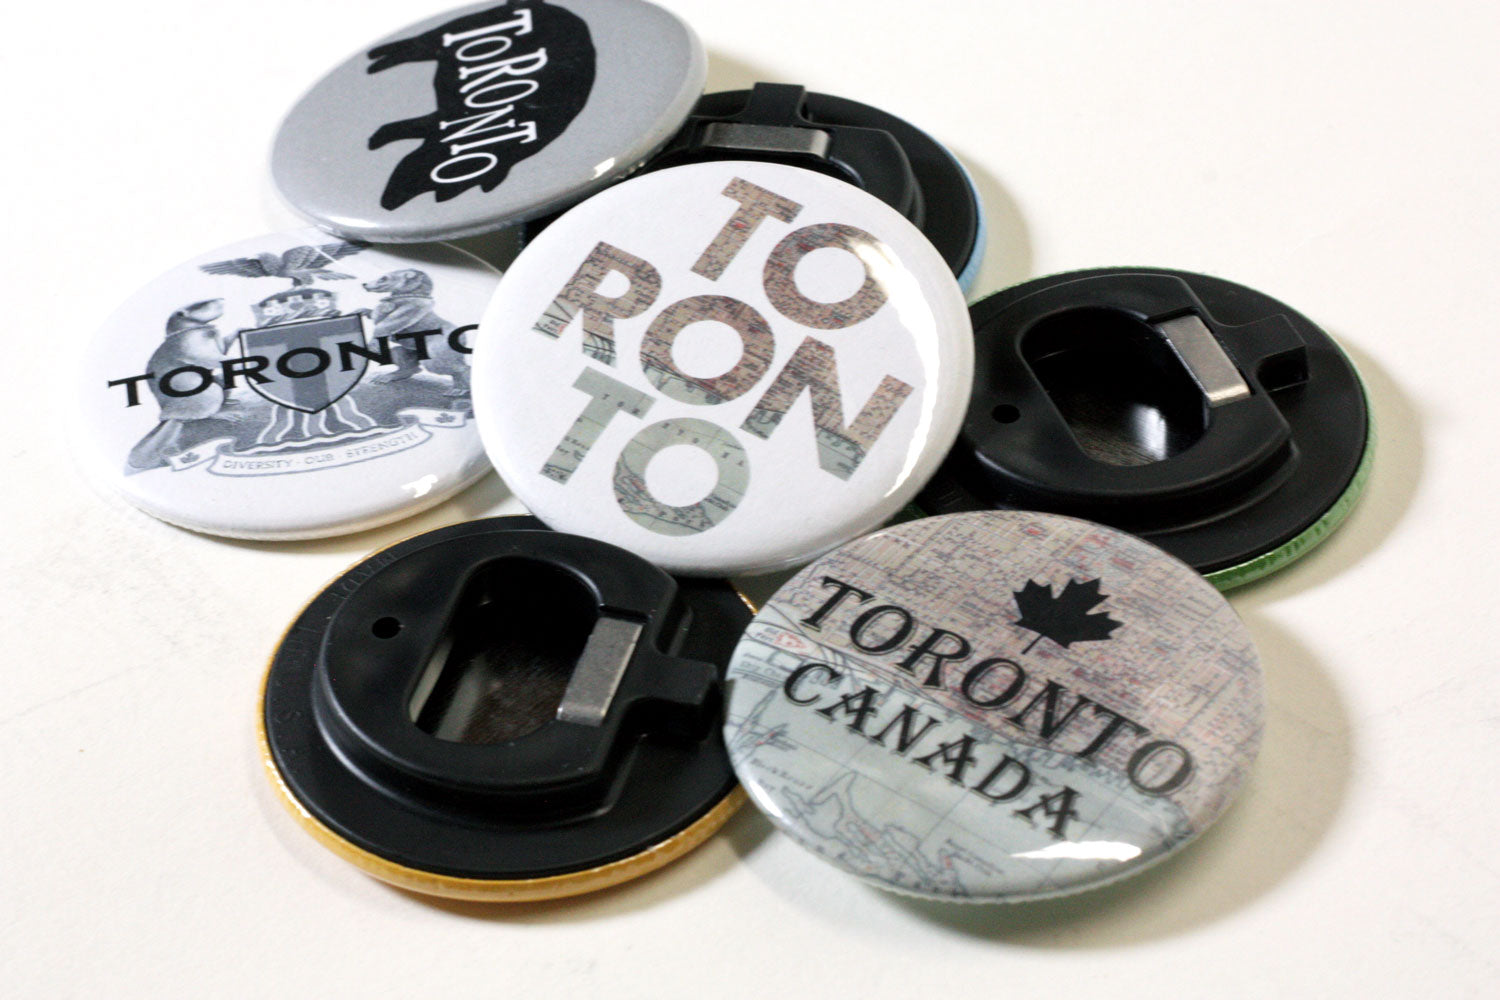
Make Your Own Button Bottle Opener on a 2-1/4" Machine January 31 2017
There are lots of neat things that can be made on a Standard 2-1/4" Round Button Maker.
This How-To Video show you Step-By-Step How to Make Custom Button Bottle Openers on a Standard 2-1/4" Round Hand Press.
The instructions cover all types of bottle openers which include Metal Pocket Bottle Openers, Metal Keyring Bottle Openers, Black Pocket Bottle Openers, Black Keyring Bottle Openers, and Fridge Magnet Bottle Openers. Take a look!
To order parts for Button Bottle Openers, just go to the product page for Parts & Supplies for Standard 2-1/4" Button Makers. Click the dropdown menu entitled "what do you need?" and then pick your parts!
2-1/4" Button Bottle Opener Kits come with everything you need to make bottle openers (mylar, shell, bottle opener back, keyring, etc.) and are available in packs of 100, 500, and 1000 units.
We can make your Custom Button Bottle Openers too!
Get in touch with us at (416) 204-1984 or email us at info@peoplepowerpress.org for a quote!
![]()
![]()
![]()
![]()
Read more »
New Video: How to Make Magnetic Button Name Tags January 12 2017
We get lots of inquiries about how to make Magnetic Button Name Tags that you can wear without putting a hole through your clothing. They're a great pinback button alternative for formal events, work functions, or any situation where fancy clothes are required (because they don't put a hold through the fabric).
Here's a step-by-step video of how to make Magnetic Button Name Tags of your own using standard button parts and Rare Earth Magnets!
Below is a list of supplies you need to make a DIY Magnetic Name Tag of your own. You can make magnetic button name tags in any standard round button size ranging from 1" all the way up to 3-1/2".
 |
What You Need to Make Magnetic Button Name Tags: - Button Hand Press (Standard Hand Press, Flex1000, Flex2000, or Flex3000 Machine) - Button Shell - Flat Back (instead of a pinned back) - 3mm Mylar - Button Artwork |
FLAT BACK BUTTON PARTS FOR MAGNETIC BUTTON NAME TAGS
Everything for Flat Back Buttons are available kits in the following standard round sizes: 1", 1-1/4", 1-1/2" 1-3/4", 2-1/4", 2-1/2", 3", and 3-1/2".
The "Everything for Flat Back Button" kit includes button shells, flat backs, and 3mm mylar. The Rare Earth Magnets are not included, but they are available here.
RARE EARTH MAGNETS FOR MAGNETIC BUTTON NAME TAGS
These Flat Back Buttons are easily turned into Magnetic Button Name Tags when paired with the strong but mighty Rare Earth Magnet :)
Rare Earth Magnets are available in four sizes: 1/4" Round, 1/2" Round, 3/4" Round, and 1" Round. All sizes of these Rare Earth Magnets measure 1/8" in depth.
*** PLEASE NOTE THAT RARE EARTH MAGNETS SHOULD NOT BE USED BY THOSE WHO USE A PACE MAKER. THEY ARE EXTREMELY STRONG ***
WE ALSO MAKE CUSTOM MAGNETIC BUTTON NAME TAGS
Don't have the time to make Magnetic Button Name Tags for your next event? Have us make them for you :)
If you would like to order Custom Magnetic Button Name Tags, please contact us a info@peoplepowerpress.org or give us a call at (416) 204-1984.
The Custom Magnets currently available on the site are Peel n' Stick Fridge Magnets, not Magnetic Button Name Tags, and CANNOT be worn on clothing.
![]()
![]()
![]()
![]()
Read more »
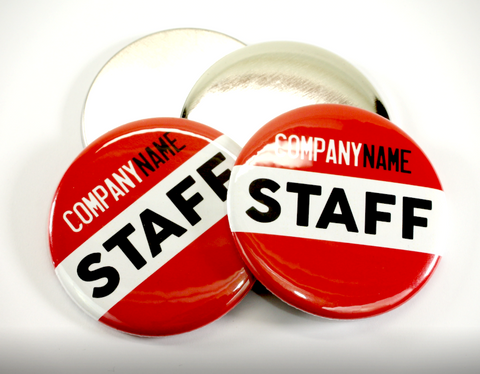
Keychains Two Ways: Learn how to make Split Ring and Snake Keychains with your Model 150 Button Maker January 10 2017
Button Keychains are practical, easy to make, and come in lots of different styles and sizes to suit any taste.
Button keychains allow you to take a special picture with you everywhere you go! You can rep your favorite band, show off the cutest picture EVER of your cat, oh the possibilities!
The videos below show you how to make a 1-1/2" Round Split Ring Keychain, as well as a 1-1/2" Round Snake Keychain. Both styles are pressed on a Model #150 Hand Press and use Standard 1-1/2" Round Parts.
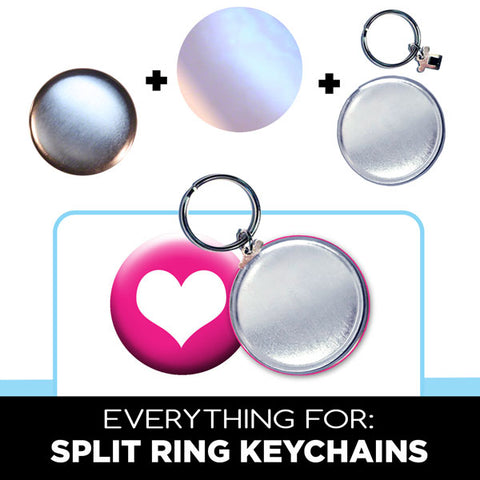 |
Supplies used to make Split Ring Keychains on the Model #150 Button Maker: - Standard 1-1/2" Round Button Shell - Standard 1-1/2" Round Slot Back - Standard 1-1/2" Round Mylar (3mm) - Split Ring with Tab - Button Artwork |
You can find "EVERYTHING for Split Ring KEYCHAINS" kit in the drop down product menu when you click through the link. This kit includes the button shells, slot backs, 3mm mylar, and split rings with tabs (everything except the artwork). They are available in packs of 10, 25, 100, 500, and 1000 units.
1-1/2" Split Ring Keychains are also available with a Versa Back instead of a Slot Back. Learn how to press a button keychain using a Versa Back here.
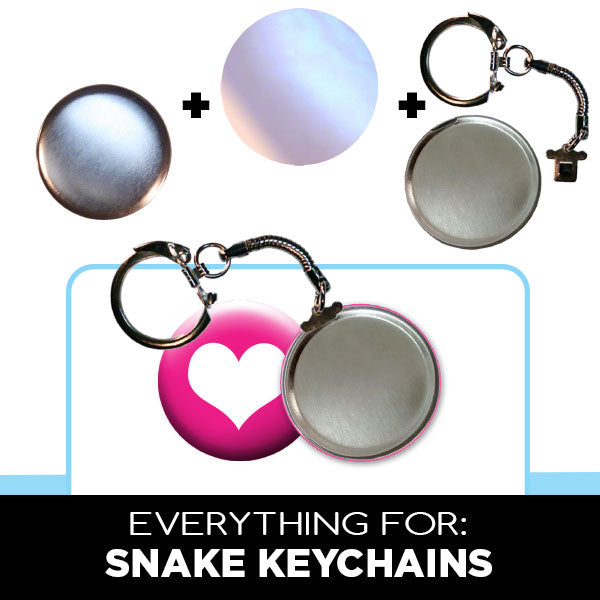 |
Supplies used to make Snake Keychains on the Model #150 Button Maker: - Standard 1-1/2" Round Button Shell - Standard 1-1/2" Round Slot Back - Standard 1-1/2" Round Mylar (3mm) - Snake Keychain with Tab - Button Artwork |
CUSTOM BUTTON KEYCHAINS
Not really a Do-It-Yourself type? No worries, we can totally make custom keychains in various styles and sizes for ya! Take a look at all of our custom button keychain options, including the 1-1/2" Split Ring and 1-1/2" Snake Keychain featured in this post!
MORE BUTTON KEYCHAIN RESOURCES
Learn more about all of the different types of keychains that we offer! Check out these blog posts for lots of great info on keychain parts and more How-To Videos courtesy of The Button Guy on YouTube :)
Read more »
Get That New Year's Sparkle All Year Long With Holographic Foil December 30 2016
Make your own shiny and sparkly buttons with new Holographic foil from People Power Press! When paired with artwork printed Dura-Lar this holographic foil can be used to make glittery holographic buttons at home!
Dura-Lar is another product that is great for any button maker who wants give their buttons some extra pizazz. If you're curious, take a peek at our post about How to Make Buttons with Dura-Lar Film.
Don't know how to use holographic foil for button making? Well take a look at this How-To Video from The Button Guy and you'll know what you're doing in no time :)
There are many different colors and styles of holographic foil too! Pictured below are Holographic Red, Holographic Gold Disco, Holographic Blue, Holographic Silver Disco, and Holographic Silver Glitter! Not pictured is a super fun Hologrphic Rainbow Foil which can be seen when you click through the link.
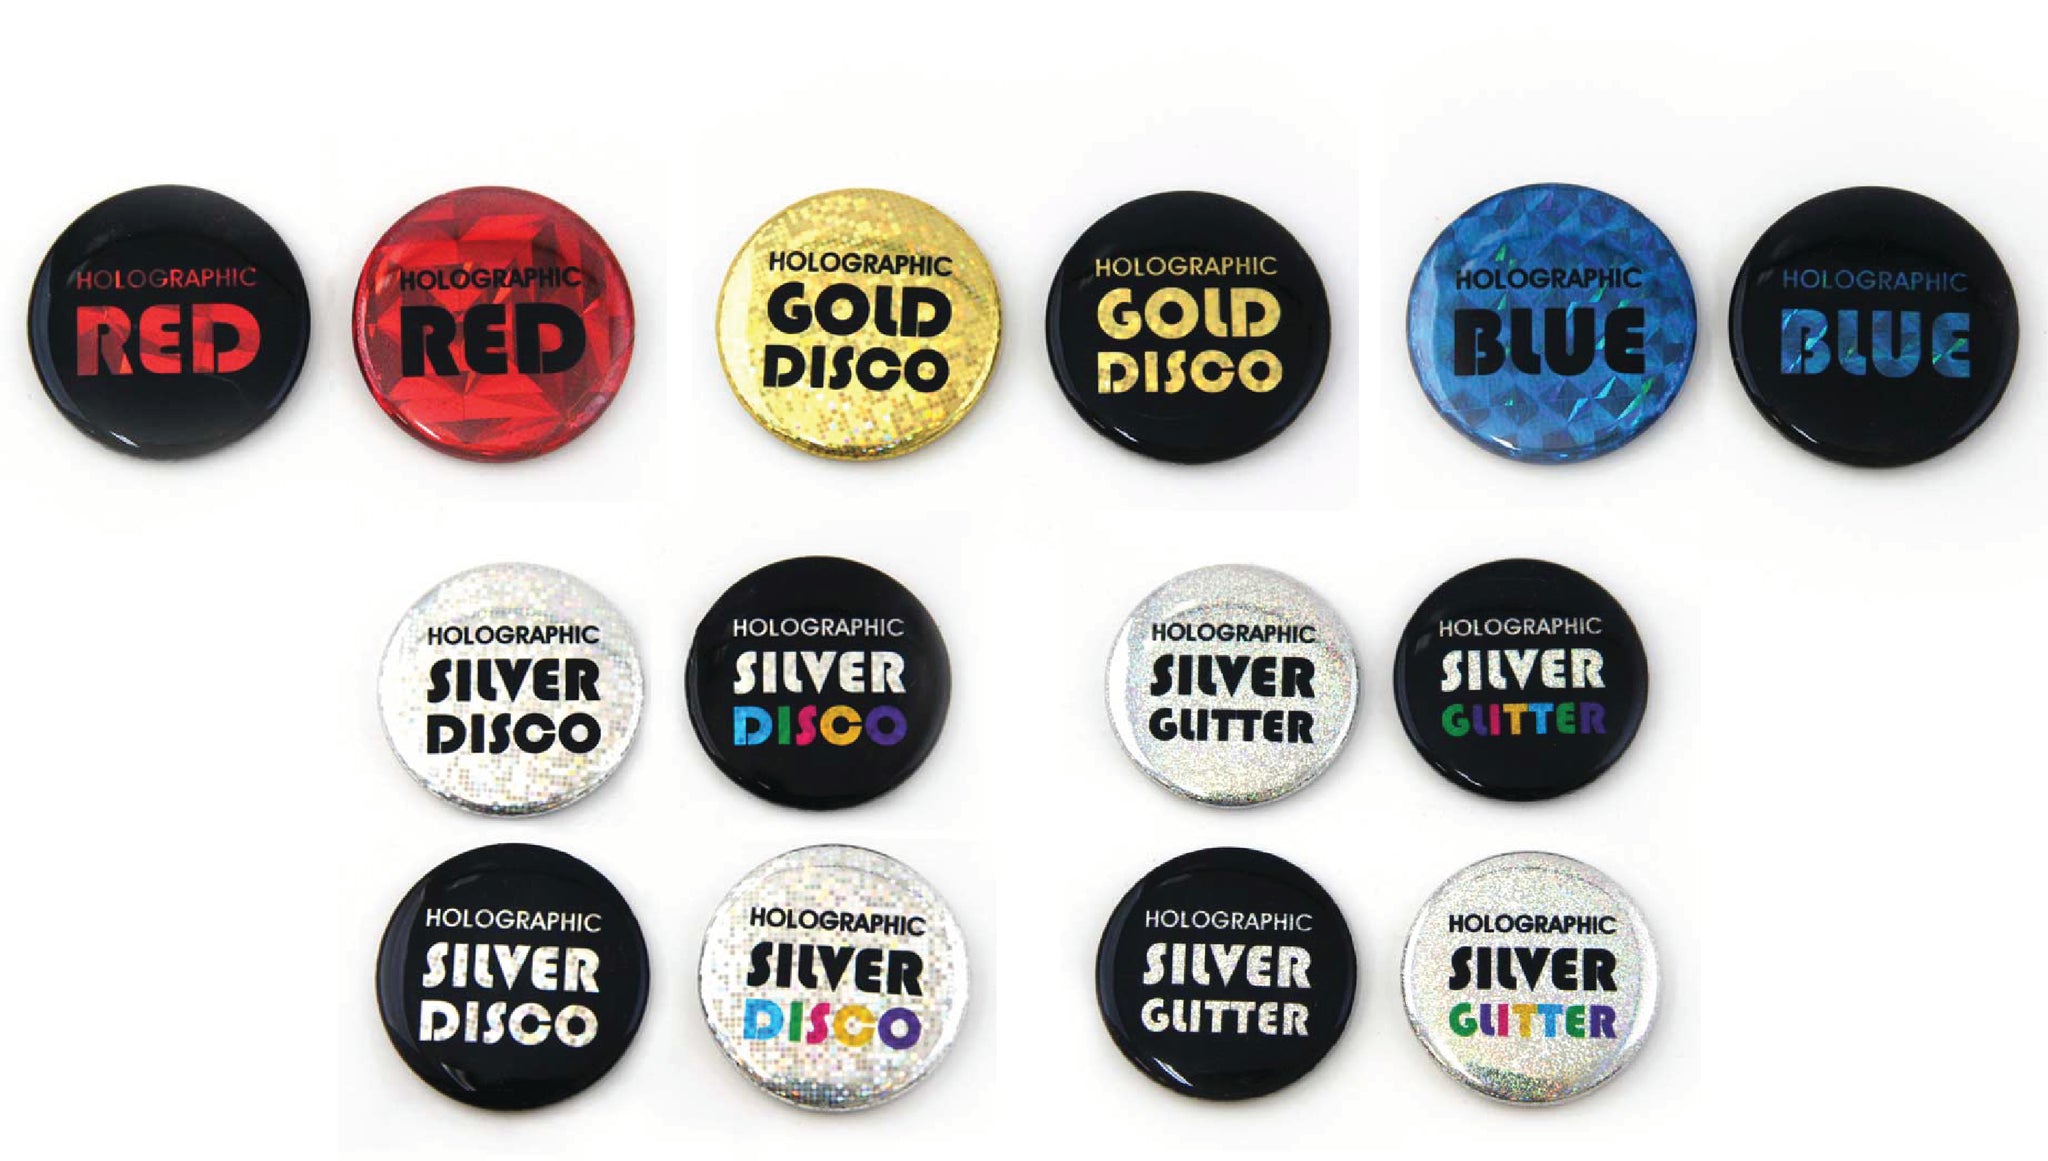
All of the button artwork above were printed on Dura-Lar Film and this printed Dura-Lar was then placed right on top of the holographic foil to get this fabulously glittery finish.
Button designs using holographic foil tend to be most successful when paired with simple clean digital artwork. Black and solid bold colours look great!
![]()
![]()
![]()
![]()
.
Read more »
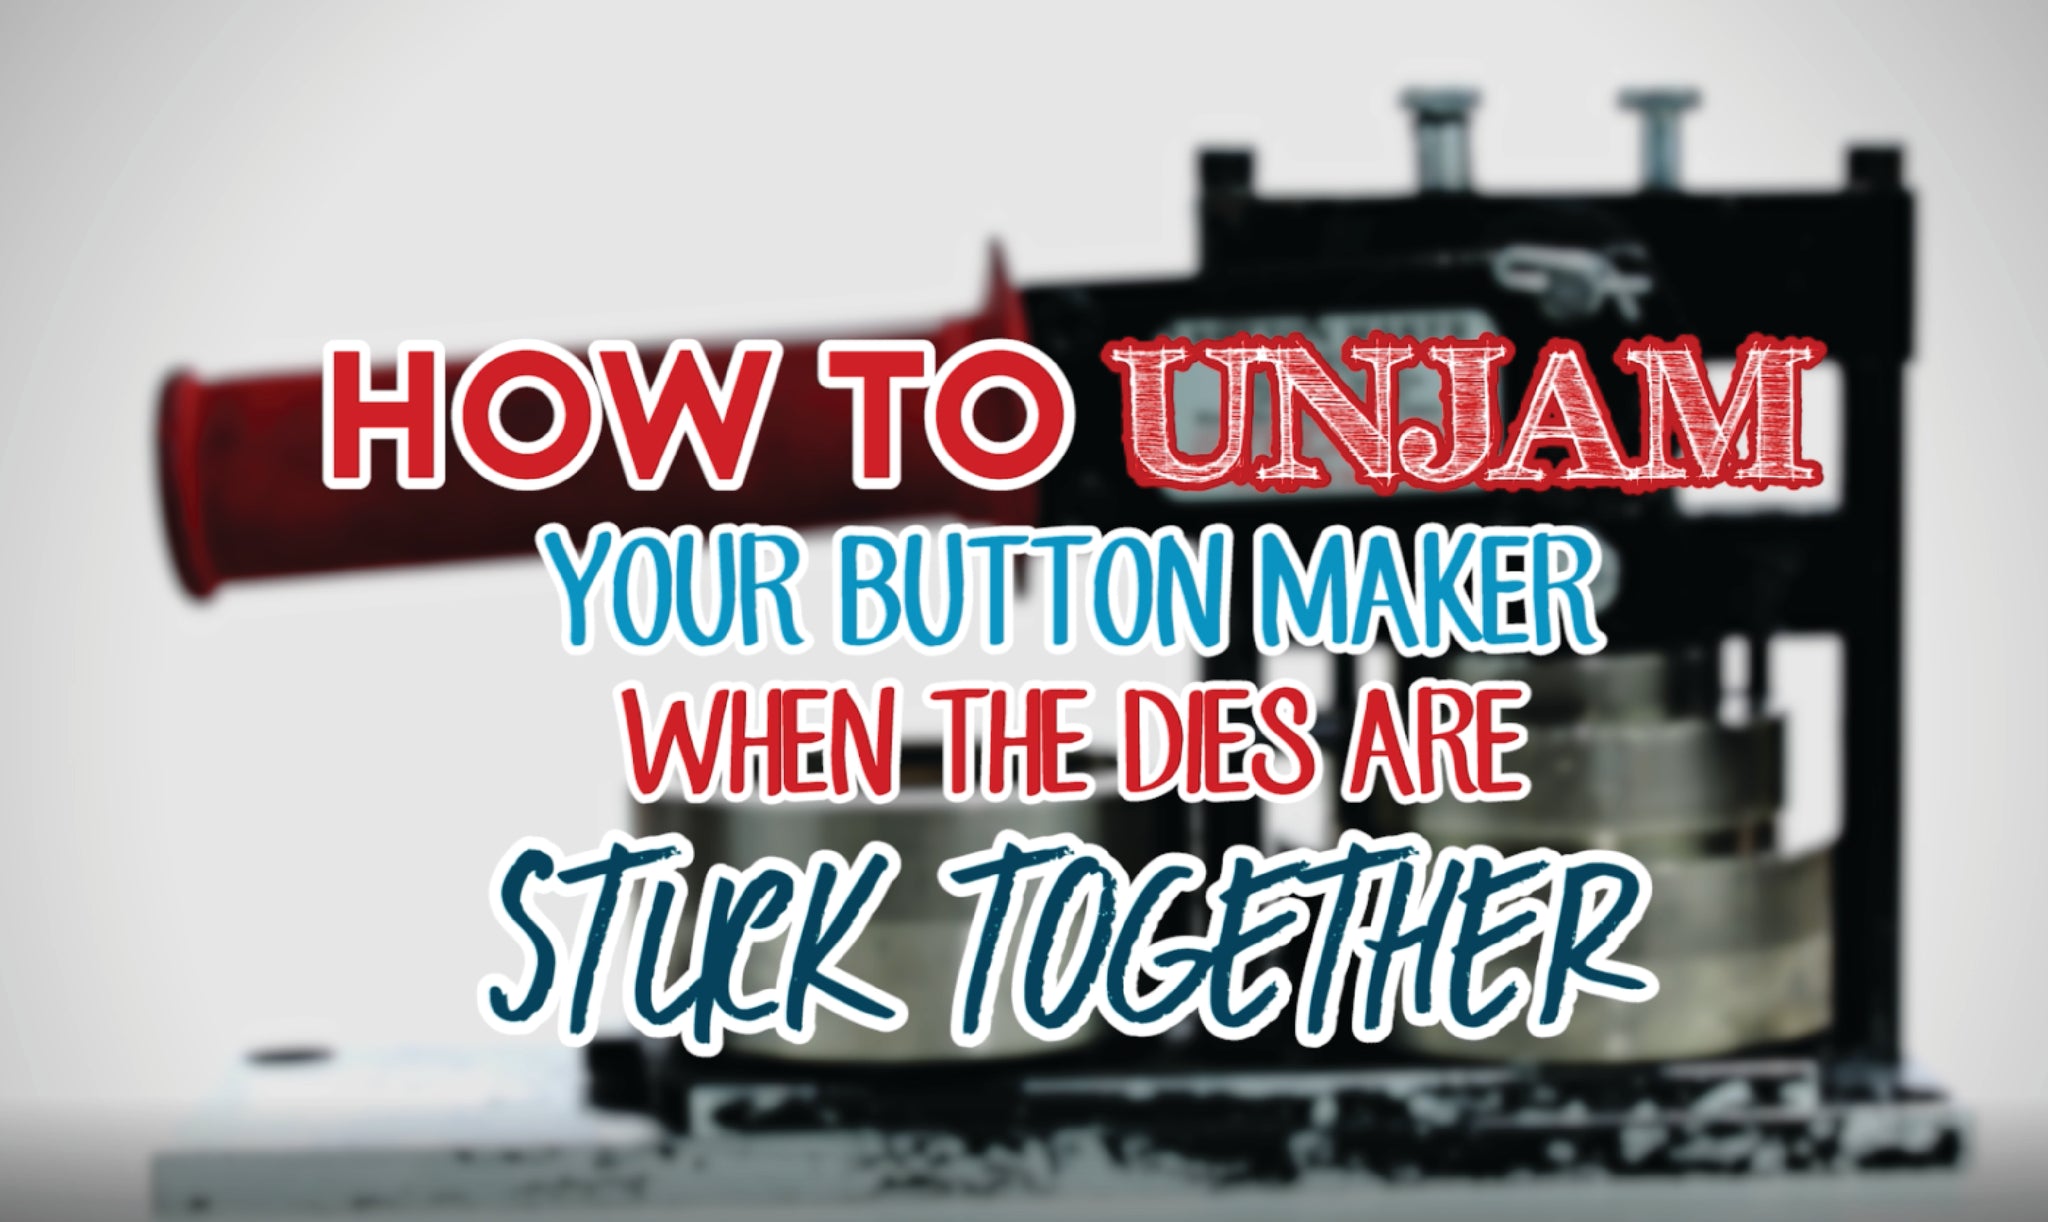
New Video: How to Unjam Your Button Maker When the Dies are Stuck Together December 23 2016
Nine times out of 10, when a customer brings in a broken machine it turns out to be nothing more than a jam (which is great news)!
A button maker jam is something that is easily remedied at home, and often requires nothing more than some elbow grease and a bit of patience.
This video will teach you everything you need to know about how to un-jam your button maker when the top and bottom dies are stuck together. Hopefully it will save you unneeded stress, and an unneeded emergency visit to the button store!
THINGS YOU MAY NEED TO UNJAM YOUR MACHINE
- A large rubber mallet. Please don't use a metal hammer on your hand press!
KNOW YOUR HAND PRESS
Use this simple diagram to navigate your hand press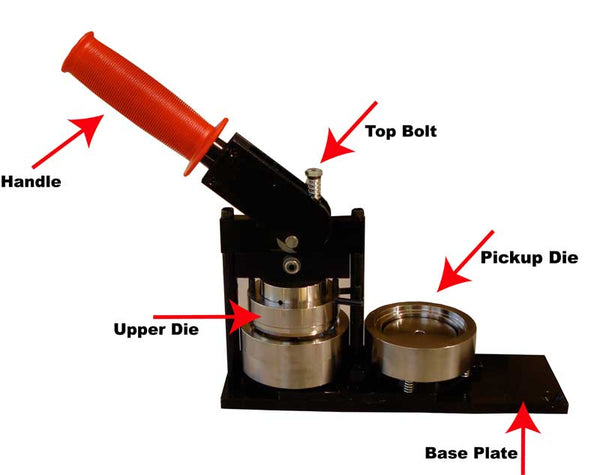
- Hold the handle firmly in the upright position.
- Confidently hit the bottom die that is NOT stuck with the rubber mallet. Don't be shy! The mallet is rubber and the machine is super sturdy.
- Once the bottom die is released from the clutches of the top die, eject the cause of the jam by lifting the outer part of upper die. Hopefully it will pop right out!
- If the jammed button shell / artwork doesn't come out by lifting the outer part of the upper die, try pressing the button over an empty crimp die (the deeper one where the pinned back go). Usually the button will release after pressing as usual.
Though knowing how to unjam your button maker when the dies are stuck together is a really good skill to have, so is knowing how to avoid a button maker jam in the first place :) Luckily The Button Guy already has a great How-To Video for just that! SWEET!
![]()
![]()
![]()
![]()
Read more »
How-To: Design-Your-Own Bridal Shower Buttons September 26 2016
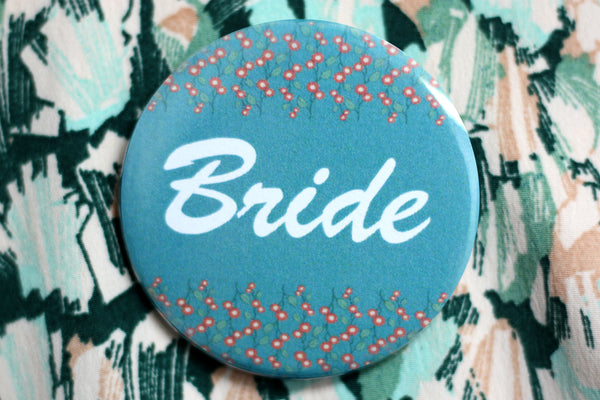
A perfect way to honour guests and attendants on your special day - and keep track of who's-who at a party for newcomers - beautiful Bridal Shower Buttons!
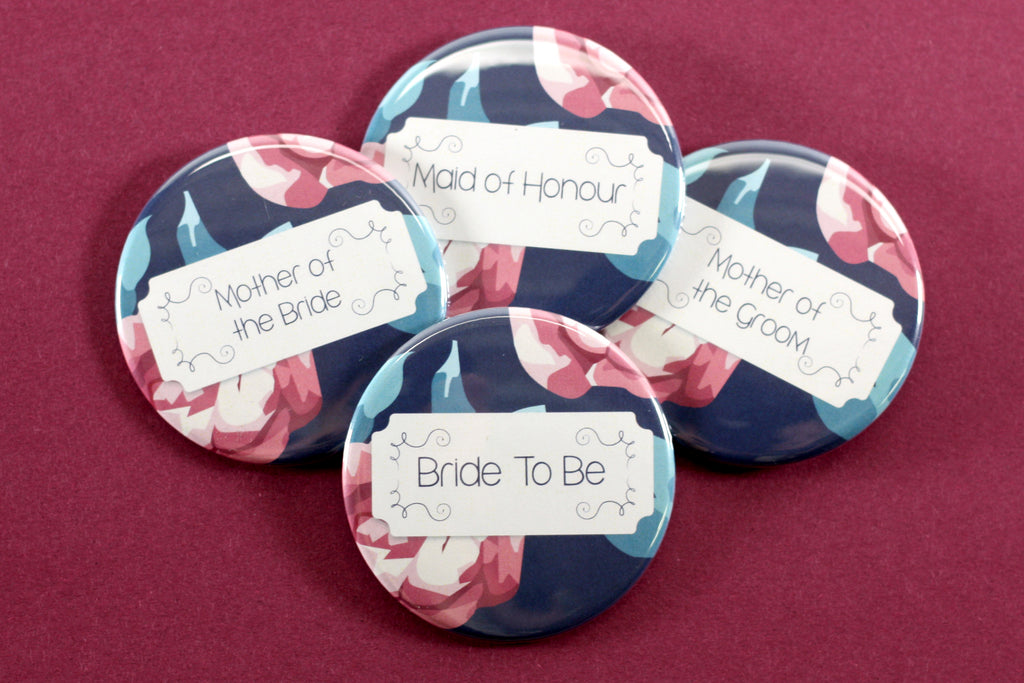
Buttons can be designed to match your wedding or party colours and make a great way to help break the ice!
You can Design Your Own buttons online on the Button Guy's Online Button Designer or using our downloadable templates!
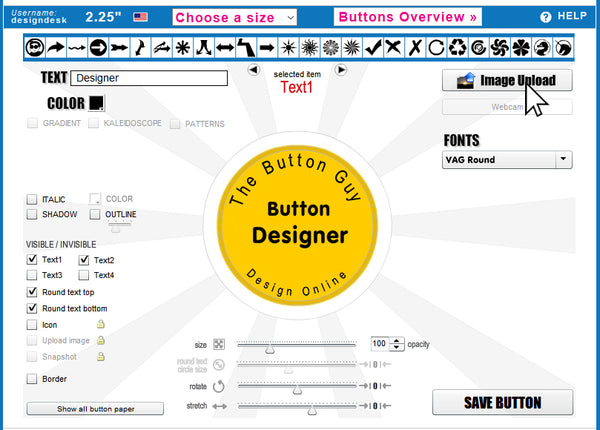
Design-Your-Own Bridal Shower Buttons in Button Designer
Before you start you might want to familiarize yourself with Button Designer by watching this video tutorial - it will guide you through the basics of designing a button and help you with the following steps:
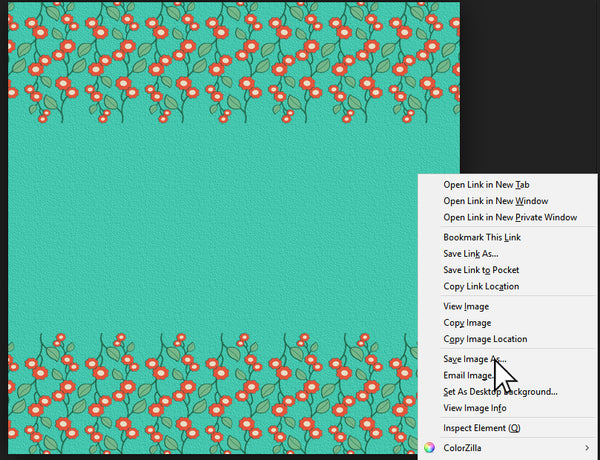 |
1. Choose Your Artwork: Find a background and save it to your computer. I chose this one because it has a nice framing element that will showcase the name. A great place for free pattern and backgrounds is Public Domain Pictures |
 |
2. Upload Your Artwork: Create a FREE account on the Button Guy Online Button Designer. Choose which size of button you'd like to make and upload your pattern. |
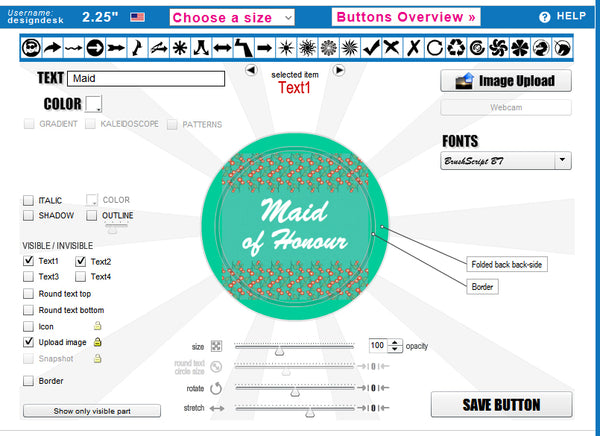 |
3. Design Your Button: Choose which lines of text you would like to be visible and pick a font and a font colour. Make sure it stands out against the background. (Tip: Change the background colour from the default Yellow to a colour that matches your uploaded artwork) |
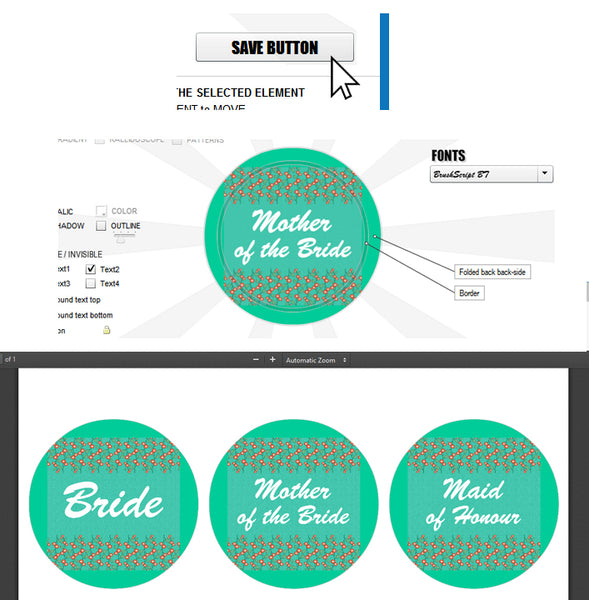 |
4. Save Your Designs: Once you have finished adding a name click the [Save Button] Button, your design is now saved and you can change the text without uploading the background again. Repeat these steps until you have all your buttons - you can see them all in "Buttons Overview". |
 |
5.Your Buttons Are Ready to Make! If you are making your own buttons at home you can follow the steps on Button Designer to print out your own artwork - or you can order custom buttons with your designs from us! |
![]()
![]()
![]()
![]()

Read more »
Great Ideas: Displays for your Button Business September 19 2016
We get a lot of question from our busy button makers about running your own button business and one of them is about displaying buttons for sale. We have some bright ideas no matter what size, style and type of product you're making!
Boards:

Buttons:
Bulletin boards are a great way to display buttons because you can stick the pins right in! You can also DIY a bulletin board by covering foam board with fabric or paper, you could even add a fancy frame!
This kind of display works well if you have lots of different designs to choose from!
Magnets:
We found that the best way to display magnets is by having them do what they do best - STICK! Buttons look great displayed on a board - you can even make your own out of a cookie sheet. Since magnets stick to almost anything metal you can get creative - why not display them on a locker door or even a paint can?
Binders:

Most Everything:
If you have lots of different designs that you want to categorize, or lots of different types of products that won't all fit on a board - why not display your buttons in a button binder! We've made this one from page protectors designed for business cards which will fit anything up to a 2.5" button. The pockets will fit things that are harder to stick onto a board, like pocket mirrors, keychains, and bottle openers. If you choose a clear type, you'll be able to see easily what the back of each item is like!
This kind of display would be great for conventions too! You can use dividers to section your binder by theme and customers can browse it like a catalogue.
Bowls, Baskets and Bins:
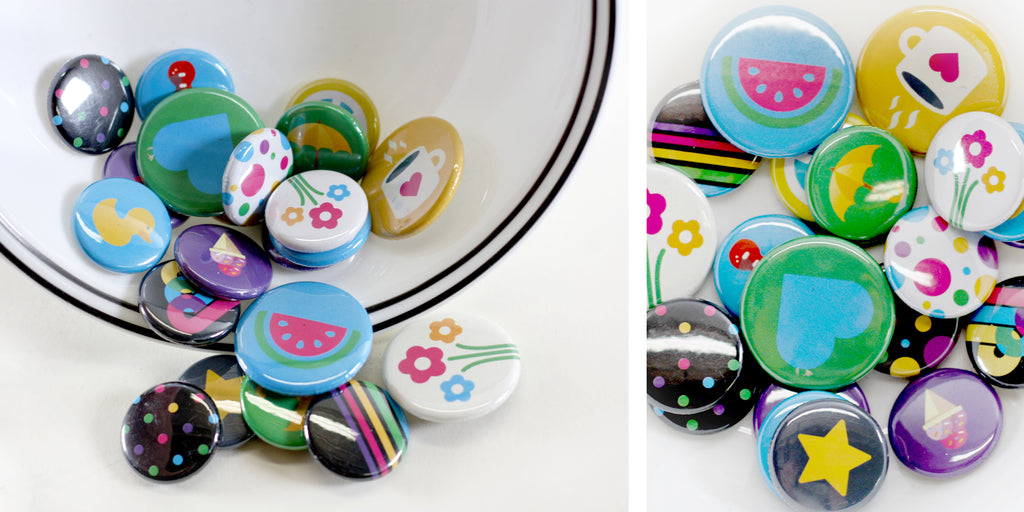
If you have lots of different designs or items that you want to mix together, don't forget the tried and true basket-o-buttons! Lots of folks like to rummage through a little bowl to pick a favorite design (or two, or three!). Displaying your buttons in a cute container is a perfect solution if you're not very crafty, or ran out of time to come up with a different brilliant idea! Just make sure the pins on your buttons are closed - ouch!
![]()
![]()
![]()
![]()
Read more »
Cool for School (And Lots More!): Zipper Pulls from People Power Press September 13 2016

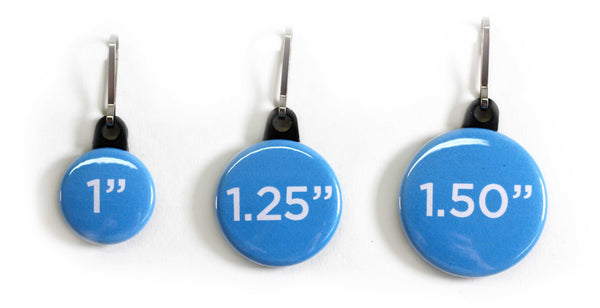
Want to teach your button machine something versatile? Try Versaback Zipper Pulls! Zipper pulls are perfect for backpacks, pencil cases, suitcases and gym bags! But they don't just pull zippers! They also make great keychains, ID tags, decorations, luggage tags, and even gift tags!

Zipper pulls work best with Versaback inserts which are compatible with standard 1", 1.25" and 1.5" parts for Tecre and Flex machines. If you're already rocking Versabacks in your machine you can find "Just the Pulls" here.

Ready to try making your own? Check out our Video Tutorial:
![]()
![]()
![]()
![]()
Read more »
Shoelace Buttons: Do-It-Yourself or Custom Made Just for You! August 02 2016
What's your favorite pair of shoes?
Whether it's a crisp new pair of summer sneakers, or that trusty pair that have been through thick and thin (and a puddle or two...), it's nice to show your shoes that they're appreciated.
The best way to say "thanks shoes," is to make them a button of their very own!
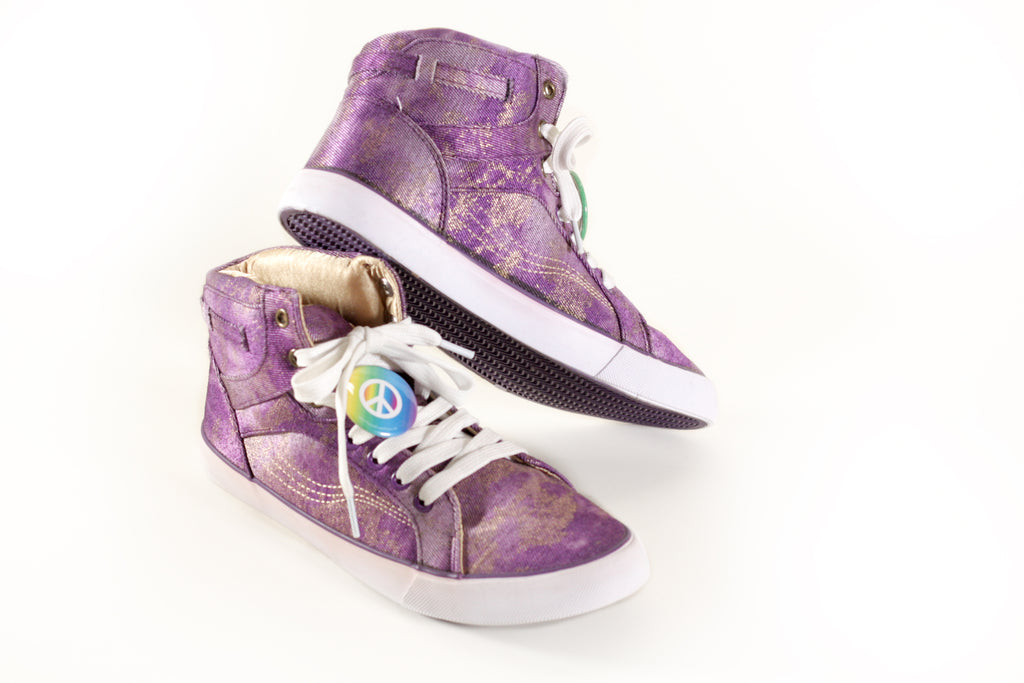
DO-IT-YOURSELF SHOELACE BUTTONS
These snazzy DIY Shoelace Buttons are sure to put a spring in your step :)
If you want to try your hand at this great DIY project, take a peek at the How-To Video below courtesy of The Button Guy!
The Shoelace Buttons come in a ton of different sizes and all of the parts you need to make your own can be found on our website!
WHAT'S THE DIFFERENCE BETWEEN "FLAT" & "INDENTED" SHOE LACE BUTTONS?
"Flat" Sneaker Buttons have a smooth, flat back from which the "shoelace clip" protrudes. These are great if you and your buttons like to let loose and dangle and jangle about.
"Indented" Sneaker Buttons have a recessed back, so the clip sits deep into the button. This, in turn, pulls your shoelace tighter and keeps the button nice and snug. These are great if you and your buttons like a nice, orderly, approach to self expression.
CUSTOM MADE SHOELACE BUTTONS
If you like these Shoelace Buttons but DIY isn't really your thing, Custom Shoe Lace Buttons are available too! Just send us an image, or have our design team create something awesome just for you!
![]()
![]()
![]()
![]()
Read more »
Keychains 101 - Part 2: Types of Keychains July 22 2016
INTRODUCTION: WHAT TYPES OF KEYCHAINS DO WE CARRY?
In Keychains 101 - Part 1, we talked about the difference between versa back and slot back keychains. Now we're ready for the fun stuff!
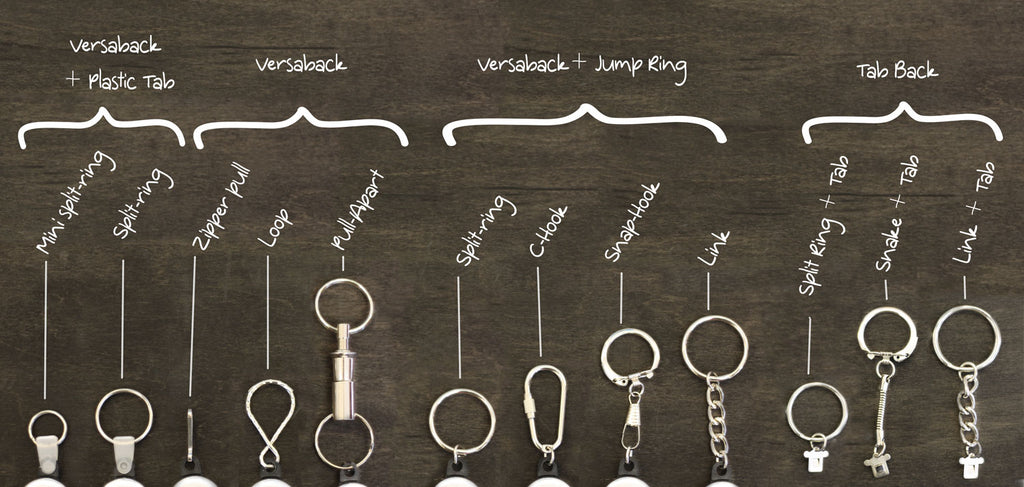
We carry 7 different types of keychain closures, all of which are in the image above.
*NOTE: Image shows C-Hook keychain style, which has been discontinued by the manufacturer.*
The Mini Split-Ring Keychain can be used with a Jump Ring, or a Plastic Tab. They are available for keychains made with 1", 1-1/4" and 1-1/2" button parts. It's basically just a wee little version of the standard Split-Ring Keychain.
The Split-Ring Keychain is super versatile and can be used with any size button keychain. The smaller button sizes often use a Mini-Split Ring because it's more proportional to the smaller button parts. Button Keychains that are 1-3/4", 2-1/4", 2-1/2", 3" and 3-1/2" in size use the Split-Ring along with a Tab and Slot Back.
The Zipper Pull is meant to be worn on a zipper, but can be used like a keychain, too. Zipper Pulls are most often used with a 1", 1-1/4" or 1-1/2" button and versa back.
The Loop Keychain is one of the fancier styles, but it's also really practical. Available for 1", 1-1/4", and 1-1/2" buttons, the Loop can be used with just a Versa Back (pictured above), or with a jump ring. (We recommend the jump ring for easier assembly and our kits do include the jump ring).
The Pull-Apart Keychain is unique because the part that attaches to the keys can be removed from the rest of the keychain with nothing more than a click :) Contact us at info@peoplepowerpress.org or give us a call at 1-866-996-1984 for details.
The Snap Hook Keychain closes with a hinged snap hook (sort of like those airtight swing top jars). This type of keychian is available for 1", 1-1/4", and 1-1/2" buttons and is used with a versa back. The Snap Hook is also compatible with 2" round buttons, as well as 2-1/2" X 3-1/2" rectangular buttons when used with Welded Up Eyes.
The Snake Keychain is essentially the same as a Snap Hook Keychain, but for use with larger buttons ranging in size from 1-3/4", 2-1/4", 2-1/2", 3", and 3-1/2". The Snake keychian is attached to a Slotted Back with a "Tab".
Last, but certainly not least, is The Link Keychain. This style has a really classic keychain look, and is comprised of a Split Ring on the end of a metal chain. For button keychains 1", 1-1/4", and 1-1/2" in size, the Link Keychain can be attached to a versa back with a jump ring. If you're using button parts 1-3/4", 2-1/4", 2-1/2", 3", or 3-1/2" in size, it attaches to a slot back via a Tab.
Hope that this post about the types of keychains that we offer was helpful :)
If you have any questions about the products you read about here or any products available on peoplepowerpress.org, feel free to give us a call at (416) 204-1984 or email us at info@peoplepowerpress.org
If How-To Videos are more your style, you can find lots on The Button Guy YouTube Channel!
![]()
![]()
![]()
![]()
Read more »
Get Patio-Ready with DIY and Custom Coasters July 07 2016

Summer is here! And for us, that means sitting in the backyard and enjoying some sunshine with a lemonade in hand.
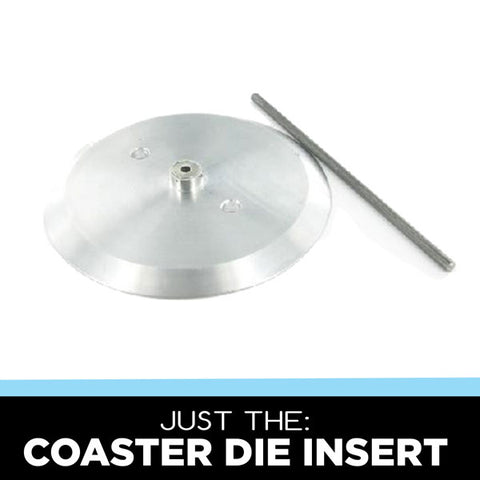
You can get patio-perfect too with some summer button coasters! All you need are the parts, a press and coaster die insert (also available with in-store rentals!) and a little bit of creativity to make the perfect summer craft!
This How-To video will guide you on your coaster-making journey:
DIY and Custom coasters are the perfect thing for guests to take home at weddings or family reunions. A set of coasters would make an amazing gift for a special occasion or housewarming! We even have customers who have small businesses selling the coasters they make at craft shows and markets!
If you make some coasters, buttons, or magnets that you think the world should see, post a picture on Facebook, Twitter, or Instagram and tag us :) We love to show off the creations of our fellow buttoneers!
You can order custom coasters here!
Or supplies to make your own with your 3.5" Button Machine
to make coasters with your 3.5" button machine you will also need a Coaster Die Insert.
![]()
![]()
![]()
![]()
Read more »
Introducing Make-A-Button at People Power Press June 27 2016
We've been working hard at turning our storefront into the best Maker Space it can be! Some of our favourite new additions to the shop is our Button Bar and Make-A-Button Punch Cards!
Now whether you want to Make-A-Button or rent a machine in-store, there is a great place for you to work on your button creations. Don't worry, the kids table is still around for all of our young button enthusiasts too!
Not sure how the whole Make-A-Button thing works? That's A-Okay! Sit back, relax, and enjoy the video: Introducing Make-A-Button at People Power Press :)
![]()
![]()
![]()
![]()
Read more »
Machine Tune-Ups and Maintenance Services May 10 2016
Every once in a while your trusty hand press might benefit from a bit of TLC.
People Power Press can help you keep that machine in tip-top condition with our maintenance services :) If your machine needs a little more than a simple tune-up, there is also advanced maintenance available.
If you want to try to do a machine tune-up on your own, we have resources for that too! Check out this comprehensive video showing you how to maintain your machine.
Below is a checklist that's a great reference if you're attempting a tune-up on your own. The machine diagram below will help you figure out where all of the parts are on your machine:
- Check, lubricate and tighten top bolts & shim - silicon spray
- Check Lubricate and tighten handle - silicon spray
- Lubricate beveled edge on crimp die - silicon stick
- Lubricate top die - silicon stick
- Lubricate between die table and base plate - lithium grease
- Check and tighten brass bolts and flat head bolts on underside of base plate

Next time your machine is in need of a tune-up feel free to get in touch :) We can help you place an order for maintenance services, or guide you through any tune-up troubles you may experience!
![]()
![]()
![]()
![]()
Read more »
What Magnet is Best For You? May 02 2016
"I should try making magnets instead of pinback buttons."
If you're a button maker, this phrase has probably crossed your mind before. It's easy to say, but when it comes down to it, branching out from pinback buttons to the world of magnets can be a little overwhelming.
Below is a bit of information about each type of magnet that we carry: Peel n' Stick Magnets, Ceramic Magnets, and Rare Earth Magnets. Each type is used / made in a different way. Being aware of the differences will make it super easy to select what magnet is best for your project!
Peel n' Stick Magnets
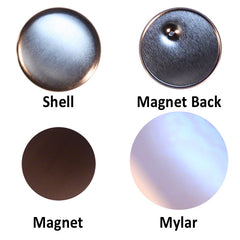
|
- Pressed like a regular pinback button, but use a flatback instead of a pinned back. After the button is pressed, the magnet is placed on like a sticker at the end. - Best for holding up 1-3 pieces of paper on the fridge. - Available for making magnets in the following sizes: ROUND: 7/8", 1", 1-1/4", 1-1/2", 1-3/4", 2", 2-1/4", 2-1/2", 3", and 3-1/2" SQUARE: 1-1/2" x 1-1/2", 2" x 2", and 3" x 3" RECTANGLE: 1-3/4" x 2-3/4", 2" x 3", 2-1/2" x 3-1/2", and 1-1/2" x 4-1/2"
|
Ceramic Magnets
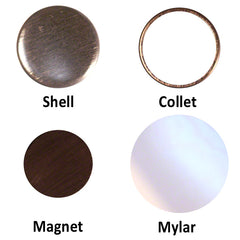
|
- Unlike the Peel n' Stick, the Ceramic Magnet uses a collet to hold the magnet inside the button shell. It's made like a 1" Lock Pin Button, but the magnet is placed INSIDE the collet before pressing. - Can hold up to 10 pieces of paper on the fridge. - Available for making magnets in the following sizes: ROUND: 7/8", 1", 1-1/4", 1-1/2", 1-3/4", and 2-1/4"
|
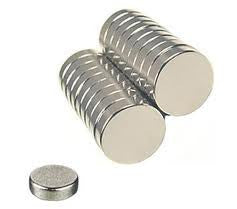
Rare Earth Magnets
|
- Rare Earth Magnets are not intended for making "fridge magnets." - To be used as a pinback alternative, allowing one to wear a button without putting a hole in their clothing. - Used in combination with flatback buttons, and placed on the INSIDE of clothing to hold the button on. - Available in the following sizes: 1/4" x 1/8", 1/2" x 1/8", 3/4" x 1/8", and 1" x 1/8" - THESE MAGNETS ARE SUPER STRONG! |
With this teeny bit of product knowledge, selecting the best magnet for you will now be easy-peasy! Added bonus: With all of these newly acquired magnet facts, you'll be a hoot at parties :)
Happy Magnet Making Everyone!
![]()
![]()
![]()
![]()
Read more »
Dura-Lar: Mylar's Fancy Cousin April 20 2016
If you make your own buttons, you probably know that mylar is an important part of the button making process.
Did you know that there's an alternative to Mylar that can add a little pizazz to a traditional pinback? This magical material is called Dura-Lar and you should TOTALLY give it a try :)
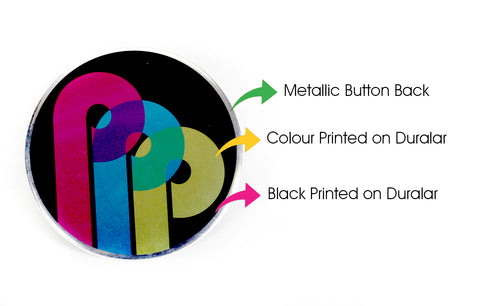
Dura-Lar is a Mylar substitute that you can print onto directly. The finished products vary depending on how you chose to use the Dura-Lar, but in this case, it was used to produce stunning, super shiny buttons! Dura-Lar can be printed on in almost any laser printer.

All of the colours you see are printed directly onto the Dura-Lar, and the metallic silver, is actually just the shell of the button.
If you prefer neon or pastel colours over a metallic finish, we have a great selection of pre-cut paper circles. When used underneath Dura-Lar the colours really pop!
Are sparkles more your thing? Check out THESE little guys made with Dura-Lar and gift wrap. they are sure to add a little glimmer to your day!
![]()
![]()
![]()
![]()
Read more »
Is There a Button Shell Stuck in my Machine? March 22 2016
Have you ever gotten a button part stuck in your machine?
It happens to the best of us, and can be really frustrating. However, there are a few tried and true techniques to getting that button part UN-jammed in no time!
Here is a great how-to video from The Button Guy that shows you how to un-jam that trusty hand-press.
HOW DO MACHINES GET JAMMED IN THE FIRST PLACE?
Most machine jams will probably be the result of using a paper that is too thick, or putting more than 1 shell in the die. Though there are lots of different things that COULD jam a machine, these two scenarios are the most common.
HOW TO AVOID JAMMING YOUR MACHINE.
Though this instructional video makes is super easy to un-jam your machine, its a lot easier to NOT get a machine jammed in the first place. Here's some tips on how to avoid a jam all together.
- The paper is too thick: The best paper to use for button making is your good ole' fashion printer paper. If you try and use paper of a heavier weight, you run the risk of getting the mylar, paper, and shell stuck in the top die when pressing your button. Stick with a paper that is around 28 Lbs and you should be golden!
- There were 2 shells smooshed together and it looked like there was only 1 shell: Sometimes the shells like to piggy-back on each other. Though that sounds kind of cute, this double shell will inevitably lead to a jam, or at the very least, a button than doesn't get crimped properly. If you think there may be two shells stuck together, just throw them against a hard flat surface. Industry secret: the floor works GREAT! The impact will make the shells come apart, no tools or elbow grease required!
![]()
![]()
![]()
![]()
Read more »
Did You Know that The Button Guy is on YouTube? March 08 2016
Last week we posted about Button Designer, a great free resource from The Button Guy.
The Button Guy has yet another resource that goes beyond artwork, and touches on many aspects of the button making process: his very own YouTube channel.

Whether you need to know how to use, make, fix, or design something button related, there is bound to be a video that can help you out!
Here are just a few featured videos:
| HOW TO USE: | HOW TO MAKE: |
| HOW TO FIX: | HOW TO DESIGN: |
|
|
If you're looking for a "How To" video that isn't featured on this blog post, check out The Button Guy's full YouTube Channel!
If you check there, and your question still isn't answered, always feel free to Ask The Button Guy, or call into the shop for some over-the-phone assistance :)
Don't worry about asking us a question that you thing seems strange or silly. If it's button related, GO FOR IT! We love helping our customers have the best button making experience possible :) YAY!
![]()
![]()
![]()
![]()
Read more »
Button-Designer: Quick, Easy, and Free Online March 01 2016

PICTURE IT IF YOU WILL...
It's been a long day, and you still have a bunch buttons to design for that super important thing tomorrow.
Most people would start brewing that late-night cup of coffee, and get ready to hunker down for the long haul...
But not you! You head over to button-designer.com

It's a website that makes it really simple to whip together button designs. And best of all? It's freeeeeee :)
The website allows you to add an uploaded image, text, icons, etc. to a button template of any size. Once you're done, the button design is saved as a PDF print sheet, and is ready to be cut and pressed.
HOW TO USE BUTTON-DESIGER: A STEP BY STEP GUIDE
1. Go to www.button-designer.com
3. Select the size of button you are going to design. We carry the button parts and presses for ALL sizes that button-designer offers.

4. If you would like to upload an image, Click on "Image Upload" and select your file.
5. Click on any element of the button that you wish to change. For example, to change the maple leaf icon, click the icon on the button template.

6. Use the check boxes to turn off the elements you don't want or turn on the elements you do want.

7. Click and drag to move the elements on the button face.

8. Once you're happy with the button design, click the save button. To view the buttons you have saved, go to the button gallery. From there you can print a single button, or create print sheets of one OR multiple designs!

9. Make your buttons
10. Wear you button proudly and get many high-fives and compliments!
YOU CAN USE BUTTON-DESIGNER IF YOU'RE ORDER CUSTOM BUTTONS FROM US TOO!
If you are ordering custom buttons from People Power Press, you can use the Online Button-Designer to create the artwork. All you need to do is provide us with your user name and the image title :) We will retrieve your artwork and produce your custom order!
![]()
![]()
![]()
![]()
Read more »
DIY Project: Mystery Series Pocket Mirrors January 31 2016
We love books around here. We love to read them and normally wouldn't condone taking them apart, but we're going to make an exception with our latest craft project.The thing is, we have all these great looking books in the shop that we use to make our upcycled notebooks. But the pages inside don't always get to be reused.
Well, we've found the perfect way to salvage some of the pages from old vintage books - Mystery Series Pocket Mirrors!

If you have some old books or magazines, you can do the same. Parts for mirrors can be purchased on the same page where you order your button supplies.
As with any artwork you put in your button maker, just make sure the pages aren't so thick they will jam your machine. Then cut, press and carry.
And the images from these old books get to tell a story in a whole new way.
Read more »
Video: How to Make Button Christmas Tree Ornaments December 11 2015
The holidays provide a great opportunity for us button makers and crafty folk.
We get to make personalized gifts for our friends and family and fill our own homes with crafts made by hand – all with our button maker!
One great and fun DIY project is button ornaments. Hang them on your Christmas tree or around the house. This is a great Christmas craft project for kids!
New Video: How to Make Button Tree Ornaments
Available in 5 Different Sizes
To make ornaments you will need Everything for Slotted Backs with Tabs. You can order the complete set of supplies needed to make your ornaments here. The only thing not included is the hook, but you can pick some up at your local craft store.

Don't Have A Button Maker? No Problem!
We have a few ways you can make button ornaments even if you don't own a button maker.
We Will Make Them For You!
Use our templates or use Button Designer (a free online button design program) to create and submit your artwork. You can also take advantage of our full range of our design services.
Contact us for pricing!
Rent A Button Maker
Rent a button maker to make your ornaments at home.
Come to Make Ornaments In Store - Great for Kids Off School!
You can drop into the Toronto store to make an ornament or there is still time to book an ornament workshop party if you'd like to bring in your children and their friends. This is a great idea for those when the kids are off from school!
Call to get more information or to book a spot or contact our Events Team at events@peoplepowerpress.org.
Read more »
Recycle Fabric wtih Fabric Buttons! November 17 2015
Do you have some old clothes or fabric scraps lying around, but don't want to throw them away?
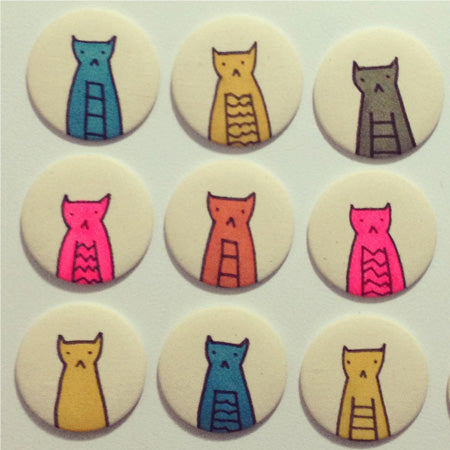
Beautiful fabrics can be used to make great pins, brooches or even earrings with your button maker! Get creative and upcycle some of the materials you have at home.
When using fabric to make buttons, you can get a more textured look to your button than the usual glossy finish that comes with using mylar and paper.
Before you get started, here are some things you should know about how to make fabric buttons with your button maker.
What kind of fabric to use with your button maker
When attempting to make fabric buttons you should know that not all fabric can be used with your button maker.
You need fabric with a high tensile strength - is able to be stretched - otherwise tearing can be a problem and your buttons will tear at the edges.
You will also have trouble pressing a button with fabric if the fabric is too thick. Anytime the fabric, paper or any material is too thick your machine will get jammed.
Testing fabric with your button maker
The only way to really know if your fabric will work with your button maker is to test it.
The button making process does not put a lot of pressure on the fabric, but do a small test before cutting or purchasing a large quantity of fabric.
Cutting your fabric
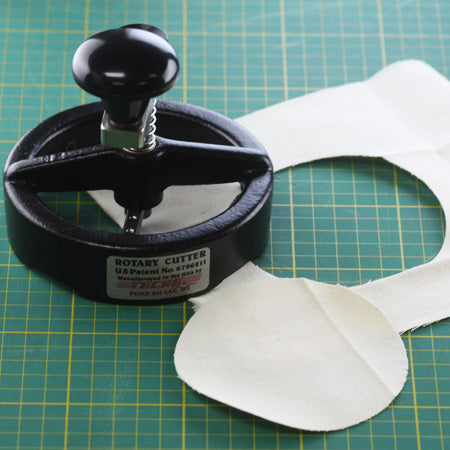
Use a piece of mylar as a guide for cutting your fabric with scissors unless you have a rotary cutter. A fabric pencil will work great to mark where you should cut your fabric.
Graphic punches that often come in button making kits do not work with fabric. Trying to feed fabric through a graphic punch is pretty impossible.
A rotary cutter can work with some types of fabric, but again you will want to test it with the fabric you are planning to use as cuts will differ depending on the kind of fabric.
It's great to switch up your buttons and try new things! Just remember to always test new materials before embarking on a big project!
Want more crafty ideas and tips for button makers? Check us out on Twitter, Facebook and Instagram! And of course we'd love for you to share your fabric button creations with us.
Have a question about another project you'd like to try with your button maker? Let us know and that could be our next how-to blog!
Read more »
How to Make Coasters with Your Button Maker (Practical Craft Ideas!) November 11 2015
How to Make Coasters with Your Button Maker (Practical Craft Ideas!)
Did you know that with the right materials, a handy coaster adapter insert and a little creativity, you can use your 3.5” Button Maker to make one-of-a-kind coasters?

These coasters can give your cup or glass a fun place to land while also protecting your table. Practical and expressive - what a perfect combination!
Coasters are also a great way to create unique and personalized gifts or souvenirs for friends, family and customers. With the holiday season just around the corner, the 3.5” Button Maker Coaster Kit with everything you need to make coasters may be just what you need!
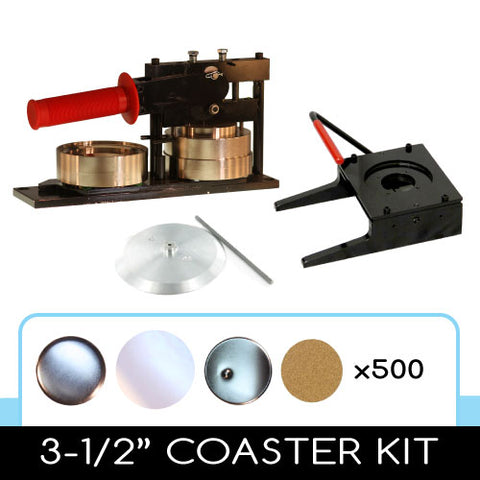
Here’s what you need to get started:
1 ) 3-1/2” Button Maker
2) Coaster adapter insert to help give the coaster a flatter surface than a typical, curved, 3-1/2” button
3) Coaster Parts/Supplies: Shells, Recessed Backs, Cork Discs, and Mylar (for standard glossy coasters) or laminated pre-cut art (for matte or high gloss finish coasters). For standard gloss, just order “Everything you need to make 3-1/2” Round Coasters” from our site and you’ll get everything you need. For matte or high gloss, you’ll need to order laminated pre-cut art separately.
And here’s how to do it!
Decisions, decisions… will you choose laminate matte or glossy finish?
When making coasters with your button maker, you can also make a choice on the finish: glossy, matte, or any other creative finishes you can come up with. Here are some things to consider:
- Laminating eliminates the chance of condensation between the paper and plastic, which is typically a function of humid climates – not being exposed to water. Both laminate and Mylar (the thin plastic sheet) are water resistant and can easily be wiped clean. You just don’t want to submerge the coasters in water, because the structure is made of tin and will rust and b) if it rusts or is sitting up to the brim in water for too long, the water will eventually find its way in through the seams. Regular table surface water and spills shouldn’t be an issue. The cork backing also helps, by raising it off the table.
- Colours pop way better with a high gloss laminate. Less plastic means more light gets to the paper, which creates greater vibrancy.
- Matte laminate feels nicer to the touch. Ooooh, smoooooth and satiny!
- Mylar shows scratches and shows wear more obviously because it is thicker and shiny.
- Matte laminate reduces glare, making the words on the coaster easier to read.
- While a warm mug will NOT melt your coaster, suction does occur between the mylar and the bottom of the mugs. This might result in the coaster lifting with the mug when someone picks it up. It will fall back off, usually on your lap or the floor – like many other coasters that you find at bars or craft shops. Laminate is melted onto the paper and doesn’t separate from the paper image (like mylar does, because it’s just layered, not melted), so no suction happens and the cup lifts off with no problems. : )
Loving the coaster idea, but don’t want to buy a button maker? We can make them for you!
Submit your artwork to us using our templates or using Button Designer (a free online button design program).
You can also take advantage of our full range of design services to have us create your very own custom coasters.
Find out more about custom coaster pricing here or contact us and we will help you create something extra special and unique!
Read more »
Stay Safe This Halloween! Make Reflective Safety Buttons for Trick or Treaters October 30 2015
Safety First! Halloween Themed Reflective Buttons
Going out on Halloween night is something that kids (and adults) look forward to every year. Planning ahead means dressing up in costumes that fit and function, but are also visible! Safety may not be on the minds of little ghouls and goblins, but at People Power Press we want to help make sure everyone has a safe and spooky Halloween! So we've created Halloween-themed reflective buttons.

Staying visible is key when navigating our busy neighbourhood streets, so we are making highly reflective buttons to pin to costumes, jackets and all ghostly gear. These buttons reflect light much like bike reflectors or high visibility construction clothing. Trick-or-treaters can be seen, but the awesomeness of their Halloween costume stays just as visible. No need to hide under spools of reflector tape!
Come into our Toronto shop on Saturday, October 31st to either purchase a pre-made reflective button for your and your spooky crew or join us for an in-store event to make your own!
During the in-store button making event, you can choose what your reflective button will look like from a series of pre-made designs and we will show you how to make them into a button.
We also have non-reflective Halloween button designs ready to be coloured in along with treats to appease everyone’s sweet tooth! Hope you can make it.
Registration is not necessary for this event, but if you would like to reserve a specific time to come in, just contact us and we will save you a spot!

Read more »
Make Your Own Button Necklaces with Magnetic Pendants! February 28 2015
Available in two shapes and three different styles to suit your taste, these fun and classy magnetic necklace pendants are a great way to show off your favourite button creations in new and original ways.
Designed to hold a 1" round or square flat back button, the pendants are made with super strong rare earth magnets that won't let go of your button until you want them to.
Pendants for 1" ROUND necklaces:

Pendants for 1" SQUARE necklaces:

Infinitely customizable, you now have the greatest excuse to make all of the buttons you could ever want to wear and change up your look weekly, daily, hourly, or as often as you'd like! Without poking holes in your shirt! :)
Like a locket, button pendant necklaces make a meaningful personalized gift, arts and crafts project, or raffle giveaway.
Create and sell a series of interchangeable designs that people can buy together as a set or collect over time.
They can also be used as a unique and creative marketing tool. Above all else, they're a one of a kind accessory that will never get old.
Available individually or by the thousands (volume discounts apply).
To DIY it up and make them yourself, you’ll need a standard size 1” button maker.

You will also need flat back button parts to make your masterpiece.
Order everything for 1” ROUND Flat Back Buttons here.
Supplies for 1” SQUARE Unpinned Back Buttons are here.

Watch this great how-to video to see how effortless it is to make these new necklaces:
Don’t have a 1” machine?
If you love these pretty little things and want some of your own, but don’t own a 1” machine, you can buy the necklace pendants and then rent a button maker from us or have us make your buttons for you.
The pendants for the necklaces are sold without chains so you can wear your design with a chain you already own or choose exactly the style you want. We have a few necklace chain styles in stock and are adding more. If you are looking for a chain style we don’t have, just let us know and we can likely get what you need!
Be sure to check in often to see what new style options we have. Stay tuned for customizable bracelets and other new items to be introduced in the coming weeks and months!
Read more »
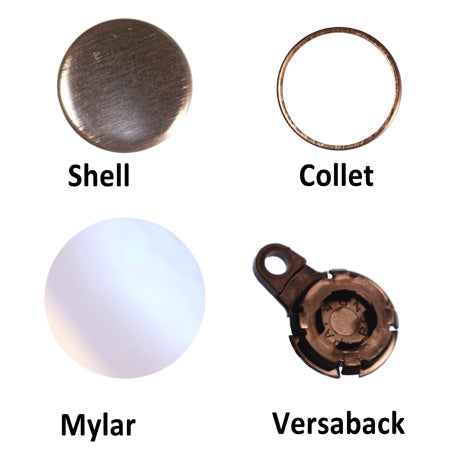
How to make a button with the new Multi Size Button Maker July 15 2014
Making buttons is easy with this simple, solid metal, multi size button maker. A new multi die or multiple size button maker that works!

The new multiple size die button maker kits
Whilst this machine is not as fast as a pro button maker if you need buttons in smaller quantities but in different sizes this is an option. The difference in cost is substantial. The multi machine at $400 is equivalent to 3 pro button makers at $1200 – $1600. Pro machines are faster but if you are not running a button business or producing bulk buttons this could be a low cost solution.

Interchangeable dies for button making. Picture shows 1″, 2-1/4″ and 3″ dies.
Currently this machine is available with dies in 1″, 2-1/4″ and 3″. 1-1/4″, 1-1/2″ and 1-3/4″ dies will be available by the end of the year. Additional die sets with a matching circle cutter are around $100 to $150 depending on size. To swap dies simply pull the pin out and remove the die carrier. Once you have replaced the die carrier with the size you need you slot it in place, slip in the pin and you’re away. With this style of button maker there are no upper dies which are harder to replace and often consequently do not line up correctly causing poor quality buttons. With this multi machine you should have no trouble.

interchangeable die button maker
As I have said before the method of using the dies is slower but it does seem to be reliable. The method is a little bit like Badge-A-Minit except these are inexpensive standard button parts and the dies are solid metal and not plastic. To make a button you flip the dies and press the button in sequence. Here’s a detailed instruction on making a 2-1/4″ pin-back button using a multi size button maker:
Before you begin check that you have everything you need!
Your machine parts:

The basic press. This machine will press dies from 1″ to 3″.

Die table with 2 dies for button making. Pickup die on the left and crimp die on the right. The first press uses the left hand pickup die. The second press uses the right hand crimp die.
The positioning ring
")
The positioning ring (bottom view) Do not use this way up.

The correct side of the positioning ring – Always use this way up in both the left and right hand dies.
The pressing die
")
The pressing die. Use this way up for the first press.

The pressing die (View of the flip side) Use this way up for the 2nd press.
White plastic spacer rings for 2-1/4″ only

Spacer rings – Only necessary for making 2-1/4″ buttons. Not supplied for other sizes.

Adding the plastic ring when using the 2-1/4″ die is just a question of laying the ring down before inserting the pin-back
Button parts – Remember each die set will make a specific size button.
Match your buttons to the die set you are using.

And you will also need your button parts
And you will need your button image or artwork cut and ready to go.

Artwork ready to cut first before pressing
Remember that you can also make magnets, key-chains, mirrors as well as all kinds of items. They usually involve changing the back button part, the front remains the same. Just follow these instructions but for example for a fridge magnet use a magnet back instead of the pin-back.
Once you’ve checked you’ve got everything you need you can begin making buttons.

Place the button maker in front of you with the dies easily accessible on a solid table so you can begin button making.

Place a shell in the left hand or pickup die. The edge of the shell slots into the circular slit in the pickup die. The shell fits exactly into the slot.

Add your pre prepared artwork or image over the shell. It should fit snugly in the available space. Now cover your art or image with a circular sheet of clear mylar.
Note! Adding the white plastic spacer ring is only necessary for the 2-1/4″ die set.
Adding the plastic ring when using the 2-1/4″ die is just a question of laying the ring down before inserting the pin-back.

Place your pin-back, pin facing down and make sure your pin-back and the direction of your art match as per the photo. You want the pin to end up at the top of your art. So you now have your button maker loaded with shell, image and mylar in the left die and pin-back in the right die.

Place the positioning ring over your image so that the centre of your image shows through. Make sure the positioning ring has slotted into the lower die and is firm or it may be upside down.

Place the pressing die on top of the positioning ring. Note how most of the pressing die is sticking out of the positioning ring making it higher.

So remember, in this order: shell, image then mylar. Positioning ring and then pressing die. To see which way up they go see above.

Now swivel the die table so that the left hand die moves to a position under the press and press your button. You will note with the first press that you feel the handle give as it presses your button. No force is necessary just pull the handle down.

Make sure you go all the way down but force is not necessary.
You should have now successfully completed the first press. Now we will transfer the button over to the crimp die to make the second and final press. You know you did it correctly if you got that give in the handle as it shaped your button.

Once the first press is complete remove the pressing die and flip it as you put it down ready for the second press. Remove the positioning ring from the left die and you will see your image pressed into the ring ready to move to the right hand die and to match up with the pin-back.

This illustrates your positioning ring from the underneath. Your shell is pressed into the ring with your image and mylar. Note the edge of your art and the mylar around the edge ready for the pin-back. Move carefully to retain the correct position.

So carefully remove the positioning ring with your art from the left hand die and place it over the pin-back in the right hand die. Match the top of the back to the top of your image.

Remember: The position of the art to the pin-back makes a difference to your final button.

You already flipped your pressing die so place it on top of your art. It should slide into the positioning ring. Make sure the curved or button shape surface is face down.

Now you’re ready for the second press. Swing your die table under the press to complete the second press.

This is not far enough. Swing the die table all the way to the stop. Watch it doesn’t bounce back a little.

Make sure you’re in the center of the die.

Pull the black handle down all the way in the centre of the die. There is no give on the second press. No force necessary. Just a steady pull all the way down.

Once you have completed the second press you can remove the pressing die and the positioning ring and your button will be revealed. Check the pin lines up at the top of the art so the button is straight. If not watch for this on the next button. Make sure you line up the art and the pin. Happy button making!
Read more »
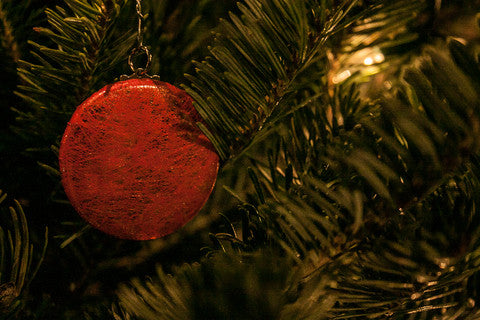
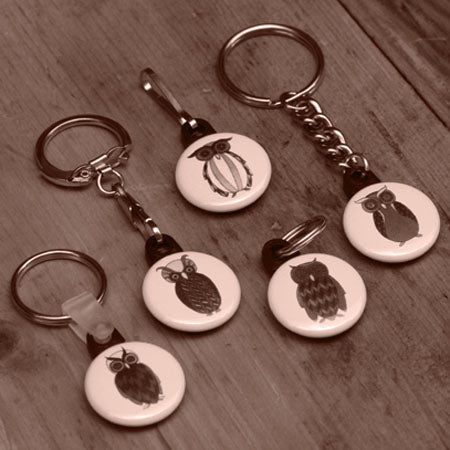
Pretty button ornaments! December 17 2013
Have a button maker? Why not start a new tradition and make some fancy button ornaments over the holidays? A great way to recycle some pretty wrapping paper and easy to make.
These ornaments pictured are made using a 1.75" button maker with a keychain back, chain tabs (without the chain), some metallic wrapping paper and a light mesh wrapping paper. The image is printed on Dura-lar (available through our store) instead of paper.
What you need:
Shell and keychain backs
Chain tabs
Your design, or paper
Ornament hook
The other way to make Christmas ornaments is covered here.
Read more »
Help with a sticky Graphic Punch for Button Making December 03 2013
Graphic punches are used for circle cutting. A question we get over and over is why does my graphic punch get stuck, or not work as cleanly as it should, and what can I do about it?
Usually this is caused by cutting stickers. This can can cause the punch to get sticky or gummy. There is an easy and low maintenance fix for this. You do NOT need to take it apart to clean it.
Take a piece of of tin/metal which you can buy at any hardware store, or use the shell part for a rectangle or square button if you have one. (also known as a shim.)
Just slide it in the punch where you would normally put the paper.
![]()
...and quickly insert it a few times to get rid of the gum.
![]()

This should clear off any of the stickiness and start cutting properly again. You should do this periodically to ensure the sharp cutting of your graphic punch.
Happy Punching!!
Read more »
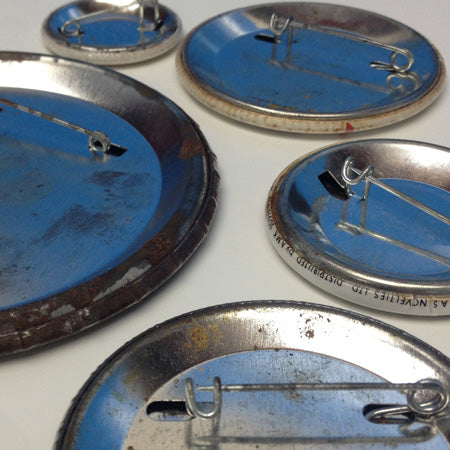
Rusty Buttons? Why do my buttons rust? Button Rust? September 20 2013
Quick question....I've been making buttons for a while now using a Tecre model 100 and their parts. I've noticed that after like 6+ months, my buttons are rusting around the inside edges when you look at them from the back....what causes this and how can I prevent it? Thanks!
Buttons are tin and will rust very quickly.
I of course don’t know your specific situation but do you do outdoor events? Do you keep your buttons in plastic buckets? If on the end of a humid day you put a lid on and seal your buttons in plastic they will rust. Of course from rain but even just from humidity.
This is a good reason to save and collect those silica gel sachets that come with all kinds of products. Chuck some of these in with your buttons when you store them after a humid day and don’t seal the boxes up. If you leave stuff in your car overnight or store buttons in an unheated garage get a heater and/or dehumidifier – or bring them into the house.
Read more »
Customized buttons online or renting a button maker and doing it yourself? September 05 2013
You're thinking of getting some customized buttons made. These maybe photo buttons with a text or buttons with your own design. If you are looking to get 100 custom buttons and pins or even 250 custom made buttons it's not really worthwhile to rent. You might as well let someone else make the buttons for you. You can easily order custom buttons online with us at People Power Press or with Button-Designer from The Button Guy.
But if you are thinking of making customized buttons, custom photo buttons or any custom buttons and pins in a quantity of maybe 500 or 1000 then renting a button maker could be a serious, easy custom button alternative. This could save you a lot of $$$$. Basically you supply the labor and the customized button design and we supply the machine and the button parts. If you have lots of time, volunteers or workers with not enough to do renting a button maker could just be the way to get your custom pins buttons at a much better price. Here are some links:
Renting a Button Maker Checkout pricing and details about renting!
Customized Buttons Checkout customized buttons from People Power Press - We can customize for you!
Custom Photo Buttons Checkout larger customized photo buttons and add text to your photo
Customized buttons online Try the free online button designer and customize your own buttons and pins!
The great thing about buttons is the low cost of the button parts if you make them yourself. If you are doing an event regularly every year then buy a button maker and you will find all kinds of occasions to get the button maker out. With standard button parts at somewhere between 6 cents and 12 cents each you can have a lot of fun with a button maker for a very small amount of money!
Read more »
Add Versatiltiy to 1" buttons with a Versaback July 17 2013
1" Button Versabacks
Convert 1" buttons into key chains or zipper pulls using a snap in versaback. A versa back is a black plastic button part that snaps into the back of a 1" collet and replaces the lock pin. Once the versa back is inserted it is a permanent and secure back with a 1/8" hole extending out from the back of the button. Attach split rings, key chains or zipper pulls through the hole to add functionality to your 1" buttons.
Split Ring Keyring with Plastic Tab Versaback.
(Split Rings are too big for 1" button versabacks and require the use of a plastic tab).
Mini Split Ring and Zipper Pull Versabacks
Snap Hook and Chain Keychain Versabacks
** Versabacks are also available for 1-1/4" and 1-1/2" buttons - Happy Button Making!! Versabacks also known as versa-backs, versa backs and snap backs. Can be available in black or white.
Read more »
Cut button making time in half with a graphic punch. July 04 2013
Button Making: Tecre Graphic Punches
Is it time to invest in a graphic punch for button making - we think so (it will cut your time in half). Graphic punches are used to cut out graphics, paper or photos for button making and are a faster method than traditional "adjustable cutters", scissors or quick cutters. Tecre graphic punches are of all metal construction, have clear and easy visual centering, are compact and light-weight and require very little force to operate. And an added bonus is that these graphic punches come with a manufacturer's life-time warranty and are useful for all sorts of fine-art related projects.
Cutting Paper Circles and Blank Paper:
Cutting Custom Button Artwork:
Cutting Magazine Images to make Buttons:
Cutting Patterned Paper to make Buttons:
Remember to cut your paper, photos, magazine images or custom button artwork into strips so that they fit to the graphic punch. We carry graphic punches for all sizes of button making. For a complete list and pricing click here. Happy Button Making!
Read more »
Fluorescent Up Your Day June 27 2013
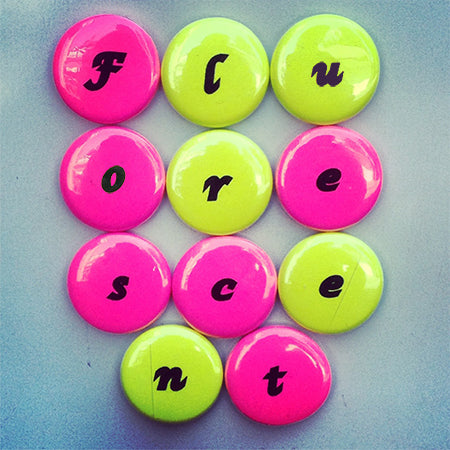
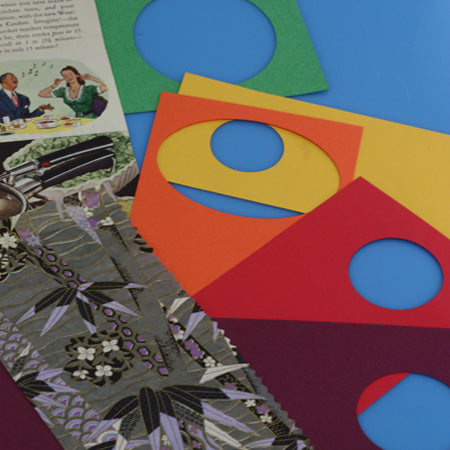
Fluorescent 7/8" Buttons
Fluorescent buttons stand out but as we all know, printing fluorescent color can be next to impossible. I decided to experiment using fluorescent paper and print my artwork on clearacetate, which is available in both Matte or Gloss and in various thicknesses. Acetate also eliminates the need for using mylar. It is fun to experiment with printing different colors on the acetate and see how they appear when pressed on top of the fluorescent paper or other colored paper (see example below).

Read more »
New Online Button Designer Software just went live! Free online button designer! May 10 2013

New online button designer from The Button Guy. Easy button design and button artwork creation.
We just went live! Checkout this simple button design software: it’s free. A great tool for designing buttons and creating button artwork. It even takes your button design and lays it out on the sheet for you. With a 2-1/4″ button you make your design and then you go to print and it puts 9 up on the page in a pdf, ready to print. In your profile you can collect and save all your designs and then print 9 different buttons on each sheet if you wish. Simple and effective.
If you’re a graphic designer then no problem, stick to Photoshop, Illustrator, Gimp etc. But if you are not a graphics person then you can instantly make your button artwork and then the system lays your button artwork out on a page ready for printing. Sweet!
Remember your button design is key. Once you have a good button maker, making buttons is inexpensive and pressing them is easy. Coming up with great button artwork or a really good button design is not so easy. Invest time in your designs. It will pay off. Remember a few tips:
- More is less! Do not clutter your button.
- Bright but simple works well
- Button designs with white backgrounds work very well on buttons.
- One bright colour works well on buttons. eg. Black white then a splash of red.
- If you’re using multiple colours ensure they hang together well.
Read more »
Making Metallic Buttons May 03 2013

Add Some Shine to your Buttons!
We've also been experimenting with making silver buttons. The process is very simple: Print your artwork on acetate transparency or use Dura-Lar Film for printing and button making in reverse, cut it out and press - and let the silver shine through. Press the button with your artwork shiny side up as the printed image will scratch off.
You print your image in reverse and put it ink side down when making the button. This stops any chance of the ink scratching off the button once it's made. The ink is inside and protected.
Put the acetate print side down on a naked button to get the silver effect.Simple. Want to make gold buttons? Lay a metallic gold paper under the acetate. Fluorescent? Yes you can use fluorescent or glow in the dark papers!
You can buy acetate or clear dura-lar on our website. Also bright gold sheets!
Read more »
Gold and Silver Pin-Back Buttons – Button Making Ideas! April 20 2013
The problem is quite simple. How do I make buttons that are fluorescent? My printer cannot print fluorescent colours. How do I make gold or silver buttons? My printer cannot print gold or silver. Well the fact is very few printers can print fluorescent colours or gold. Even bright pink is difficult to reproduce so this article explains how to get around the limitations of printing and put really bright colors on a button. So if you want bright pink buttons just use this idea and substitute the gold paper for fluorescent pink or whatever color you choose.
I will use the example of gold because no printer can print shiny reflective gold.
What do you need to make really shiny gold buttons:
- Gold foil paper
- Printable acetate transparencies
- Circle cutter, printer and button maker (Just like you need for any button making job)
Make your artwork just like you would for any button and then reverse it. Then simply print the reverse image on a transparency. Lay the transparency over a sheet of the gold foil paper and cut out the gold sheet and acetate together. If you have trouble with the gold foil you can always cut it separately with scissors and put it under the acetate. It only need show through where there is no colour printed on the acetate. You don’t even need to cut very accurately. Now put acetate with gold backing into the button maker and press as normal. Voila!
Another tip is to print the image NOT reversed and lay the acetate over the gold foil print side down. This way the print side is protected. Depending on your printer and acetate combo the ink may scratch off. This way your print is protected.

A printed transparency with the image showing through the clear acetate. The printer printed on the reverse of this transparency to protect the print surface.

The printed sheet is placed over a gold foil sheet with printed side down but image showing correctly through the acetate. Note the photo here cannot reproduce the shiny gold as per the actual gold leaf. You need to see this button. It shines!

Here we cut the acetate and the gold leaf die simultaneously using a cutting die. If you are using a graphic punch to make your buttons then cut the acetate with your punch and cut the gold leaf with scissors.

Finished buttons with shiny gold showing through the acetate. A great way to make visually striking buttons. This photo here cannot reproduce the eye catching gold.
Make one yourself and see what I mean.
 Syndicated blog from TheButtonGuy.net This article is reprinted with permission. http://TheButtonGuy.net/
Read more »
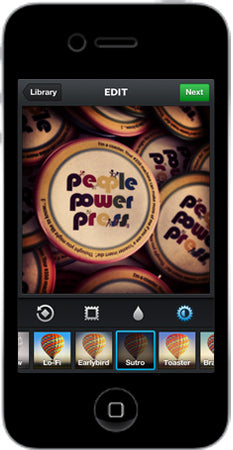
Turn your Favourite Instagram Pics into Button or Magnet Art March 13 2013

Make Buttons or Magnets from your Instagram Photos
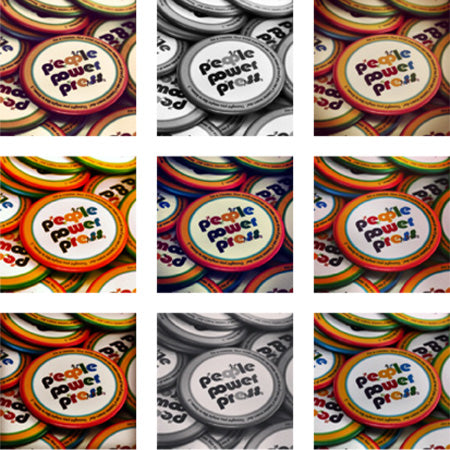
Instagram is a fantastic smart phone application which provides you with the ability to quickly and easily apply filters to your photos. There are about a dozen filters for you to choose from with brightness/contrast control and border features for each. The one problem is that with Instagram your photos only ever exist online -- so why not make them into long lasting, physical BUTTONS or MAGNETS! Read below to find out how...
Step 1: Take a picture using Instagram
You can either use Instagram to take a photo or bring in outside photos from your camera roll to Instagram.
When you have decided on a photo you may choose to apply a filter, a blur, add a border or adjust brightness and contrast.
Once published, the app will save a full size, high resolution image to your camera roll. That feature is turned off by default but can be changed in the iphone's settings app. If you get stuck, you can always save the photo by right clicking it on your Instragram feed while using your computer, but the quality might not be as high.
Step 2: Place Your Order
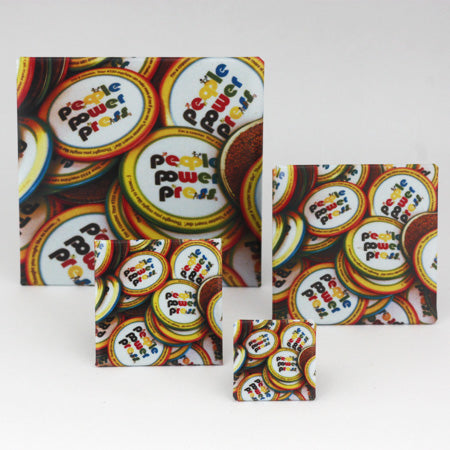
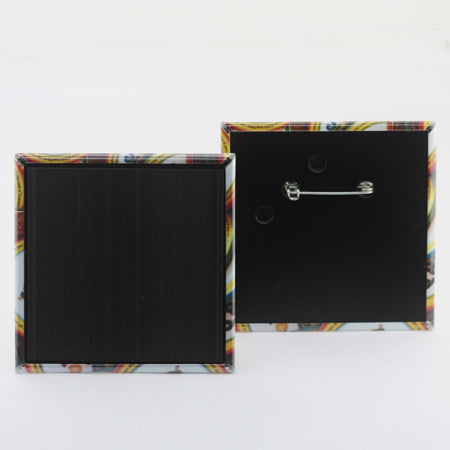
We have four square sizes for you to choose from: 1", 1.5", 2" and 3".
Click on the following link to be taken to our Instagram Button and Magnet order page:
http://peoplepowerpress.org/products/instagram-square-buttons-buttons-from-instagram-photosStep 3: Upload Your Artwork
Upload your Instagram picture using the link that is sent with your order confirmation
OR
Step 4: Get Excited About Receiving Your Buttons/Magnets! :)
We endeavour to make and ship your custom orders within 24-48 hours of payment and artwork being received and can often get your buttons in the mail same day!
Read more »
Button Sizes and Shapes March 08 2013

Check out this photo of all the shapes and sizes that we offer in button parts and custom buttons; round buttons, square and diamond buttons, rectangular buttons, oval buttons and oblong buttons. We carry button parts to make pin-back buttons, magnets, mirrors, key chains, bottle openers, coasters and much more.
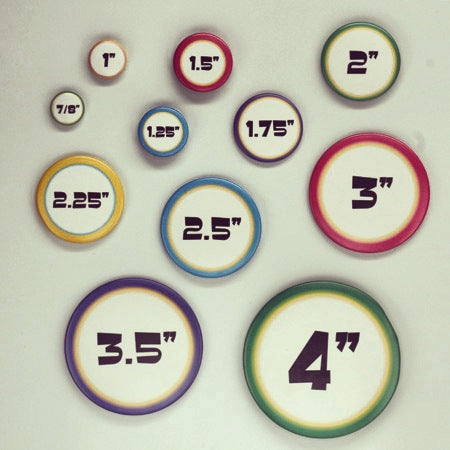
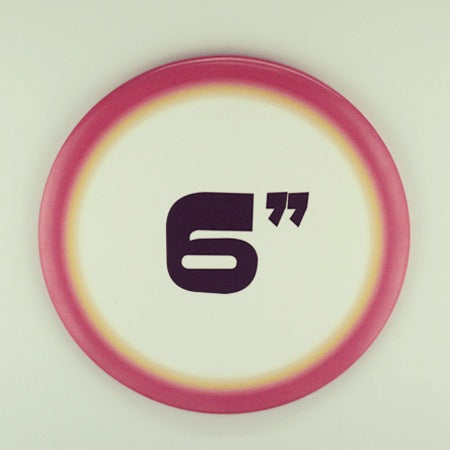
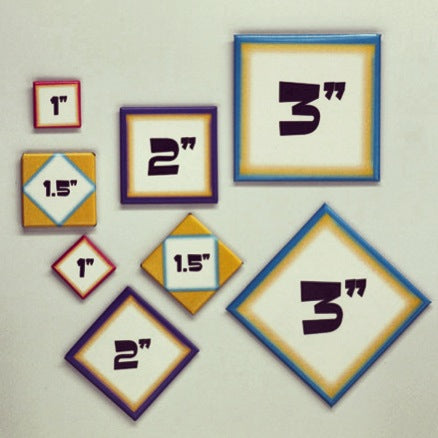
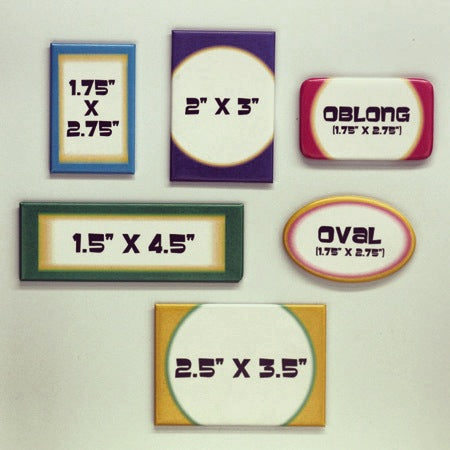
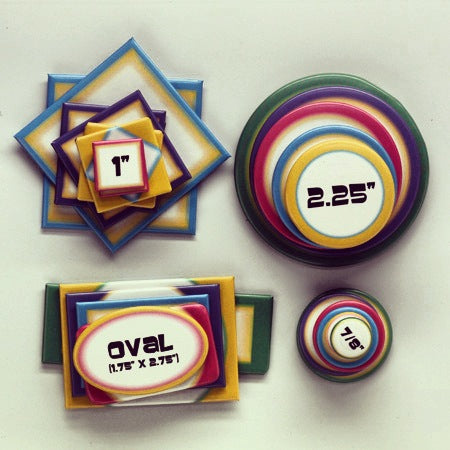
Read more »
Silicon Lubricant - A Button Maker's Best Friend... March 01 2013
Recommended by THE BUTTON GUY for button maker lubrication!

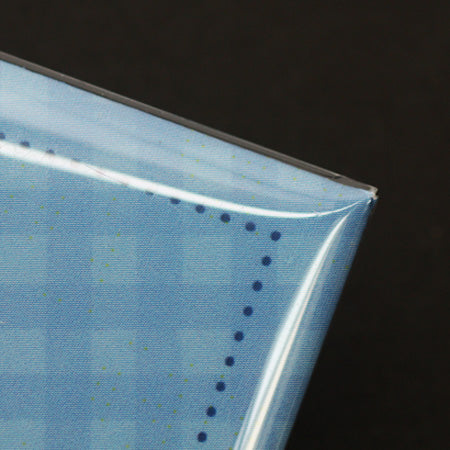
Over time a button maker will become unlubricated and produce mylar sealing problems (pictured above). This white stick lubricant will combat that problem - simply lubricate the upper die on your button maker. Be sure to wipe the grease off of your first few buttons after application and you should be good to go.
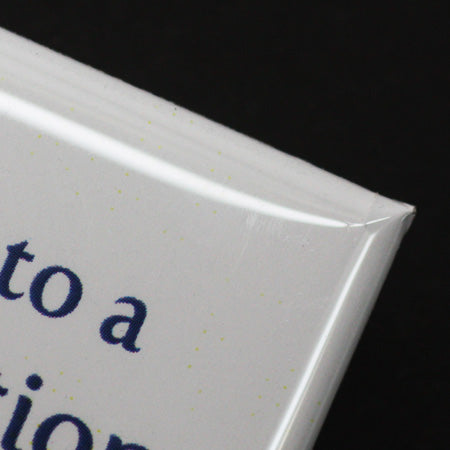
This is what your edges should look like! To order a stick, click here or include one in your next order! Happy Button Making.
Read more »
How to Make a Recipe Magnet February 28 2013
Recipe on a magnet - Fridge ready!

I often have the problem of forgetting where I found a great a great recipe. I always plan to write it out, or print it from the internet but even then, where should one store it. So the other day I had the idea to make one into a fridge magnet - what better spot for a recipe!!

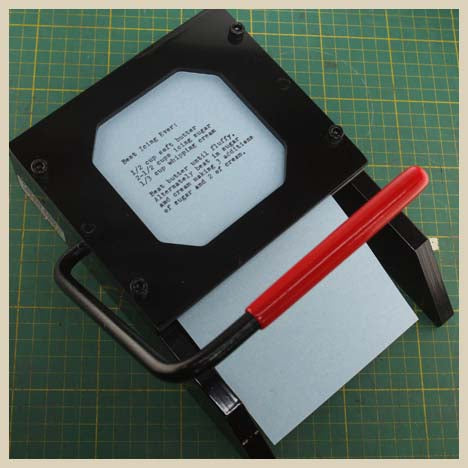
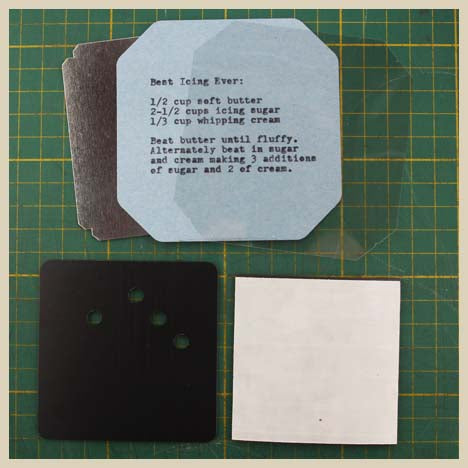
Then I cut it out using a 3" square graphic punch and got my button parts assembled for a 3" square magnet. You need a shell, mylar, unpinned back and a magnet.
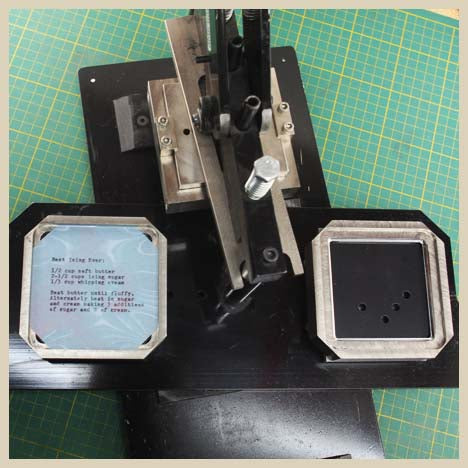
Then pressed my magnet with my 3" Square Button Maker and now I will never have to search all over the world again for this recipe. P.S. You should try it, it is delicious!
Read more »
- Page 1 of 2
- Next