Using thick Photo Paper in a button maker? Creating photo buttons with my button machines.
- Robert: I am wondering if there is an adjustment I can make to use photo paper (thick) in a button maker. I would use photo paper exclusively so it could be set up once and left that way. Right now I have some of the badge parts inc machines. Thanks for you help
- The Button Guy: Hi Robert First thing is size? What size photo buttons do you want to make? Depending on size you may just need to cut your image slightly smaller. That could mean buying a graphic punch sized for photos. Depending as well on what make of button maker you have. The manufacturer can reset some of the sizes, tolerances on your machine but this may be more expensive than just getting a photo button maker, ready sized for photos. So let me know the button size and I’ll let you know what you need to do.
- Robert: I have a 1 3/4x 2 3/4 oblong model 700 maker from badge parts inc. Is the work on the machine something I could do? I’m pretty handy and have access to lathes, mills etc. Thanks
- The Button Guy: I do not have a 1-3/4” x 2-3/4” oblong machine from Badge Parts here and I know Joe at Badge Parts does not make all his machines standard so I do not know the exact size. But you could ask Joe at Badge Parts if he can reset the machine. A simpler and cheaper solution is to change the cut size of the cutter. This you can test with scissors. Cut your photo paper so it is not the normal size you would use for a button but cut it smaller so the paper fills the front of the button but does not fold around the back. Experiment with this and you should find the size you need. You want to fill as much of the front of the button as you can but not go around the back. The mylar which is normally the same size as the button image will be larger in this case. The mylar will hold your paper in place. Then make or get a die maker to make you a die that cuts the special size and you’re done. With my 1-3/4” x 2-3/4” oblong machine I can put quite thick paper, even fabric in it anyway but as I say it’s a different manufacturer and possibly a different size.
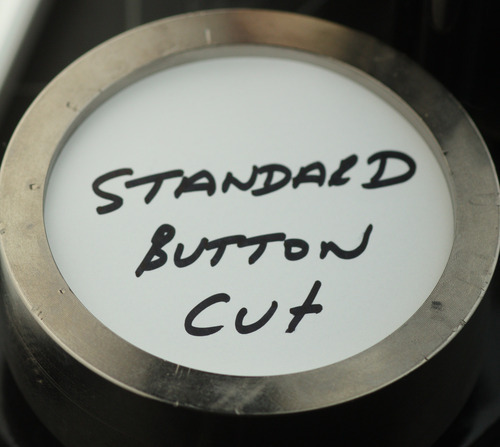
The two photos show the same button maker. The first shows a circle cut for a photo button. The second shows a circle cut for a standard button.

- The Button Guy: Generally speaking button makers can mostly make buttons with relatively thick paper but seeing as most photography is digital today and can be printed on standard 24 lb paper it is quite rare these days to find specially sized photo button makers and photo circle cutters. In most cases as I mention above the solution is just to cut the paper smaller than the mylar so that the paper does not need to fold around. Thicker paper tends to tear on the edge as some fabric does when it is pressed around the button. Sizing the image to the front of the button will normally solve the problem. There are some “specially” sized photo cutters or graphic punches that do just that. They are available for 2”, 2-1/4” and 2” x 3” buttons.
Note how this circle fills the full die whereas the photo button cut above only fills the inner circle of the button maker. This is the same button machine.
- What the smaller cut size of a PHOTO CUTTER does is match the inner circumference of the button maker allowing you to still centre your image.
- There are also some photo button makers in 3”, 3-1/2” and 4” but my advice would be to print your photos on thinner paper and get standard button maker/ cutters. The special photo papers are covered up by a layer of plastic anyway. So there is no great advantage and they are certainly more expensive than standard papers. The best paper for button making is ultra white 20 lb paper.