Buttons, Badges & Pins - People Power Blog
Events Are Back This Summer So Are You Ready With Custom Swag? April 20 2022
It feels like a while, but after a couple of years with a lot of ups and downs (maybe more downs), things are open again and this summer events are back.
Festivals, markets, concerts and more are making a comeback and we couldn't be more excited. It seems like it is not just us too. Many people are ready to get out and have a good time this summer by attending events again.

If you are planning an event this summer - or any time - are you ready for it? If you are thinking of having custom items on hand for sale or to just hand out, make sure you've got your custom buttons ordered in time.
Over here the orders are coming in strong for events and so this is how we know things will be different this year compared to the last two years. We are operating at full production and are ready for your custom button orders.
We don't need a lot of lead time to get your order done, but we do recommend that earlier is always better when having custom pins made with a time-sensitive event, especially if you need your order shipped.

What Size of Button Should I Choose For Events?

If you aren't sure what size of button you should pick, we can help you with that. There are a few sizes that are most common, but this depends on the purpose of the button.
1-inch Buttons - The Classic Band Button
This is one of our smallest button sizes and is usually the size of band buttons - the pins bands sell at shows or in their online merch shop for fans to collect and pin on a jacket or bag.
Great for: concerts, music festivals, simple logo buttons
1.25" Buttons - Most Popular Pin Size
This pin size is just a bit bigger than the band button. Still wearable, that extra 1/4-inch gives a bit more real estate for your design. This allows images and text to be more visible while still being able to wear on your coat or backpack.
Great for: events, festivals, markets, button collecting, pin packs (sets of 3-5 buttons)
2-1/4" Buttons - The Campaign Button
This button is bigger so one you will wear when you really want it to be seen. Not silly big, but this is the size usually worn during political campaigns and elections. It lets you include a longer message or photo without needing to squint to read it. Also the best option for staff and volunteers so that they can be easily identified.
Great for: elections, kids events, event staff, summer camp
If you still need help to decide, please just contact us so we can help you out. Questions about production timelines? We can walk you through that too.
We look forward to helping make your event a real success this summer!
Read more »
The Amazon Trap - Why buying a button maker on Amazon does not work. February 25 2021
If you have purchased a button maker on Amazon and are contacting us for a return or a repair in most cases we cannot help you. We do not sell on Amazon. If your purchase was recent and you can still return it: RETURN IT! Get your money back and buy a button maker that works.
Maybe Jeff Besos's interest in Space and his company, Blue Origin Aerospace is connected to how many returns Amazon gets. Think landfill on the moon.

I have written a relatively long explanation here about why Amazon maybe fine for ordering a book or a DVD. I understand of course Amazon destroys bookshops and record shops but this goes a little further. This article shows why it may be fine to buy a low quality cheap item on Amazon, a throwaway product. But if you want a serious, in this case, button maker, Amazon is the last place to find it. Anything that is a quality item, well made and at a fair price, won't even find it's way to Amazon. Read on and find out why. Comments are welcome.
Read more »
Vaccination Buttons - Vaccinated and Proud of it! February 11 2021
The Covid-19 pandemic is entering year 2 and we all look forward to life as we once new it. In a survey by the CBC today 66% of Canadians believe advice from doctors is reliable and they trust the vaccine and will get the innoculation as soon as it is available. That's a good thing if we are to achieve herd immunity and want to return to normal as soon as possible. I doubt the post Covid world will be the same as life before covid but whatever it has in store for us I want to get there ASAP.
Design your own Covid-19 vaccination buttons here Go to the green "customize" button and start designing.
Order your vaccinated and proud of it buttons here. Take a look at our vaccinated and proud of it designs.

Normally speaking I would not be a member of the 66% with total faith in Government, the health care system and big pharma. There are unfortunately too many good reasons to mention. Remember Thalidomide? What about US vaccination programs in Pakistan; really designed to gather DNA information to find Osama Bin Laden (and this was under Obama, imagine what Trump would be capable of doing). And most recently the opioid crisis with the first big pharma company, Purdue Pharma, admitting criminal responsibility and going into liquidation to avoid paying 8.3 billion in damages. A number of other larger pharma companies will be paying out over the coming years. They will pay and of course avoid admitting responsibility. I am not sure that paying a small fraction of their multi billion dollar profits is really justice for the devasted lives caused by the way they marketed OxyContin. I think some prison sentences would be more applicable.
But back to the point: Despite my reservations I see no alternative. We need big pharma to make a vaccine that works and we need to innoculate the world against Covid-19 before it mutates into something more virulent. Or before the economic damage ends up causing more death and suffering than the pandemic itself. So I will get the vaccine when my turn comes and I will wear my vaccinated button with pride despite my reservations about Governments, Health Care Systems and Big Pharma. I don't see any other choice.
I think this blog post sums it up: Vaccinated and Proud Buttons! Vaccination Badges.

Design your own Covid-19 vaccination buttons here Go to the green "customize" button and start designing.
or: order your vaccinated and proud of it buttons here. Take a look at our vaccinated and proud of it designs.
Read more »
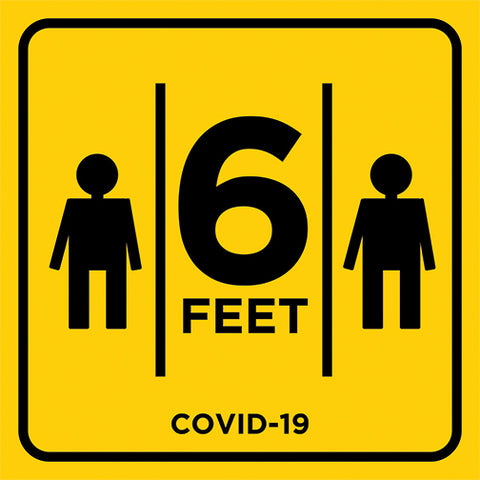
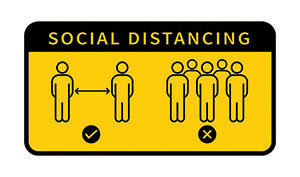
Looking for Covid-19 Social Distancing Media - Prepare for re-opening! May 30 2020
Google has many a useful website to help you identify symptoms of stress so I’m going to skip that stage and assume every one of us is facing a unique stress landscape right now whether from the number, length and intensity of the stressors, from their unique quality (lock down, no child care), from the pervasiveness of existential challenges (pandemic, plagues, social unrest, recession/depression) or from a wild and woolly combination of all of the above and then some. Some people began their stress odyssey in Week 1 with uniquely difficult, dangerous or exhausting personal journeys and spaces; some people have experienced stress as a distant drumbeat growing louder and closer with each passing week. However we got to Week 12 of lock down, we arrived with stress and tension and anxiety and concern, for ourselves, for our families and friends, for society, for the world. And additional stress for re-opening our businesses. I have no crystal ball but if I may be so bold, I predict it will get worse before it gets better so we’d all better figure out how we’re going to manage re-opening. I don't think there are any silver bullets, quick fixes or fast vaccines. I think we are going to be suspended in uncertainty for quite a bit longer. We are going to get through this though and re-opening our businesses will require some planning and some Social Distancing Awareness Media:
Covid-19 Awareness media is available to assist with re-opening your business. As business owners we need to instill confidence in our staff and customers. Good covid-19 social distancing signage will speed the return to the new normal - whatever that means! Order Covid-19 Awareness products.
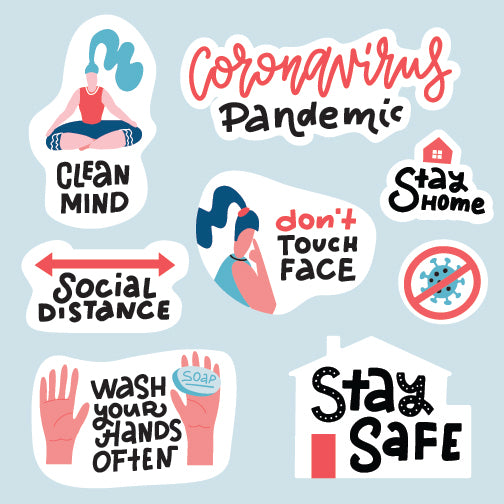
Our design team can provide templates for your Labels N Stickers or we can custom design decals, stickers and floor markers for your return to business.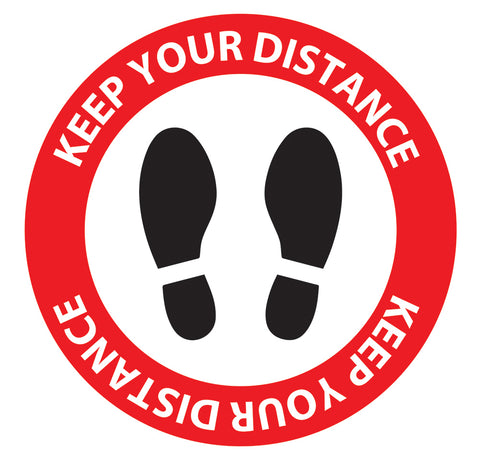
Both Buttons and Magnets are also proving useful in the public awareness campaigns surrounding the Covid-19 pandemic. We can assist with a complete set of Covid-19 media products tailored to your business.
Order Covid-19 Awareness products.
Read more »
CHANGE OF HOURS - 3095 Dundas Street West May 22 2020
Hey all! We are officially back at the button store for all of your button making and gift shopping needs!
People Power Press Toronto hours are now:
Mondays: Closed
Tuesdays: Closed
Wednesdays 1pm - 5pm
Thursdays: 11am - 5pm
Fridays: 11am - 5pm
Saturdays: 11am - 4pm
Sundays: Closed
Wednesday through Saturday you are welcome to come into the store (3 customers at a time maximum), or you can schedule a CURBSIDE PICKUP for any online orders.
For CURBSIDE PICKUPS just select "Curbside Pickup - Toronto" as the shipping method.
Please do contact us before you head over to 3095 Dundas Street West for pickup, so we can ensure everything for your order is packed up and ready to go ![]()
Thank you so much to all of our amazing customers, and keep on keepin' on!
Read more »
Spring Sale on Selected Retail Items - 50% Off Select Brands March 05 2020
Spring is here (almost) so we are having a SALE!!
We have a number of our retail shop brands currently on sale for 50% off. I know, super deal time.
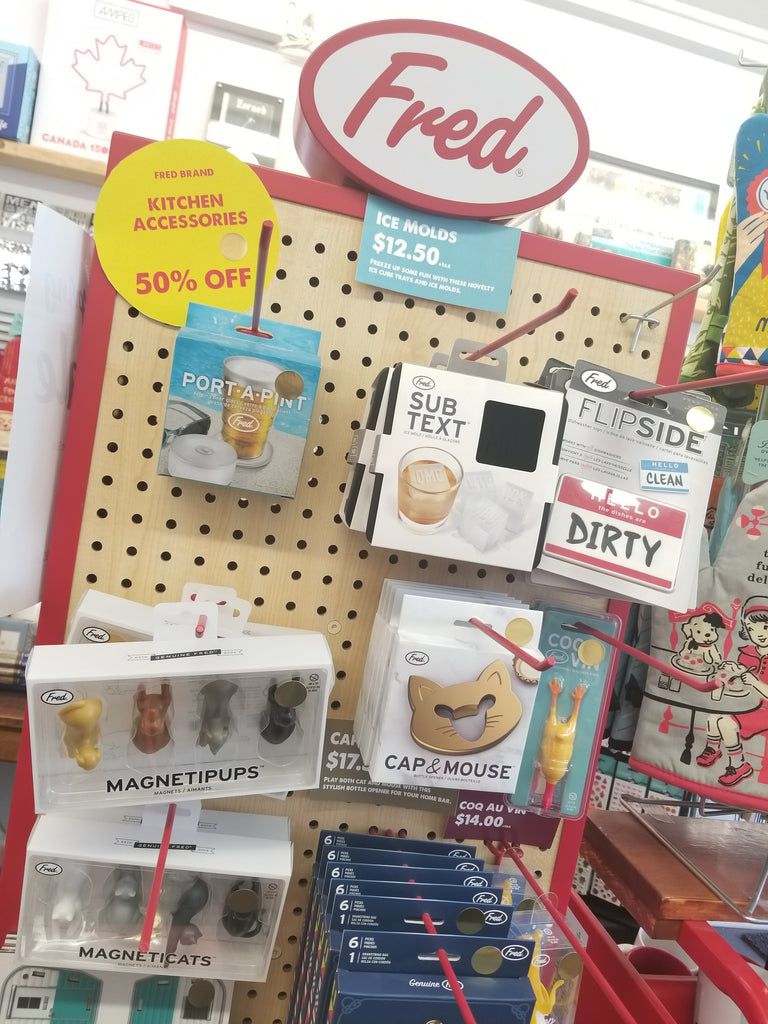
Brands included are Fred, Amped Neon Lights, Legami (Vintage Memories), Loqi reusable shopping bags, Perth Soap Co. soaps and lotions, as well as various CD and LP display frames and other picture frames.
Sale is on online and at all 3 of our People Power Boutique locations in Toronto, Ottawa and Napanee.
If you come into the store, just look for signs and stickers to see what is on sale.
If you are shopping online, you can see some of the deals here (more in store!).
Or just ask us, we are happy to help!
If ordering online, the discount will be applied once you add items to your shopping cart and head to check out. Don't see the discount, just contact us and we can help you get your deals.
Get in before these deals are gone ... this sale is short and sweet, kind of like Spring!
Happy Spring and Happy Shopping!
Read more »
All Bodies Are Good Bodies at George Brown College | Student Group Buttons February 28 2020
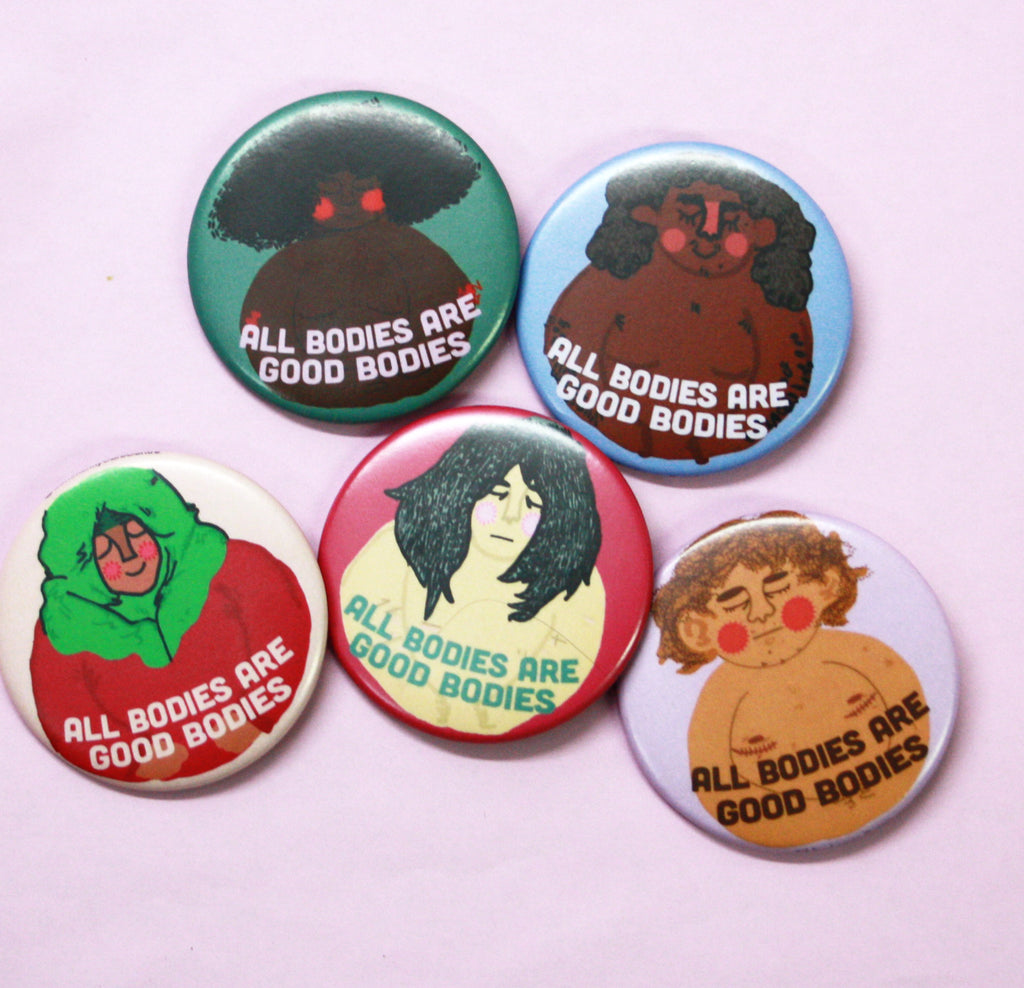

More About Sonya Renee Taylor
More About the Community Care Centre at George Brown College
Read more »
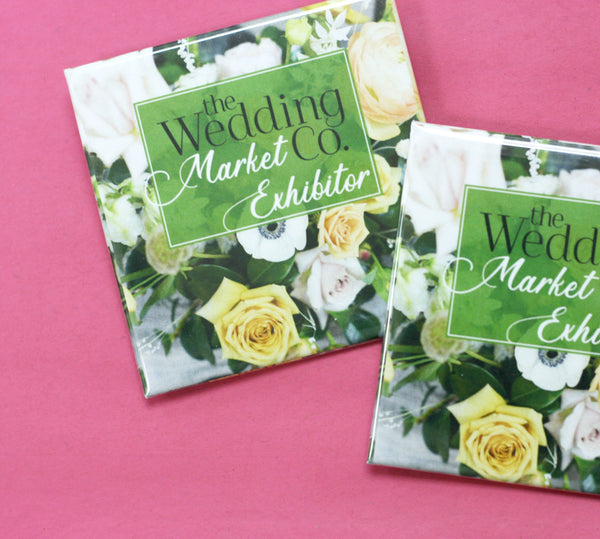
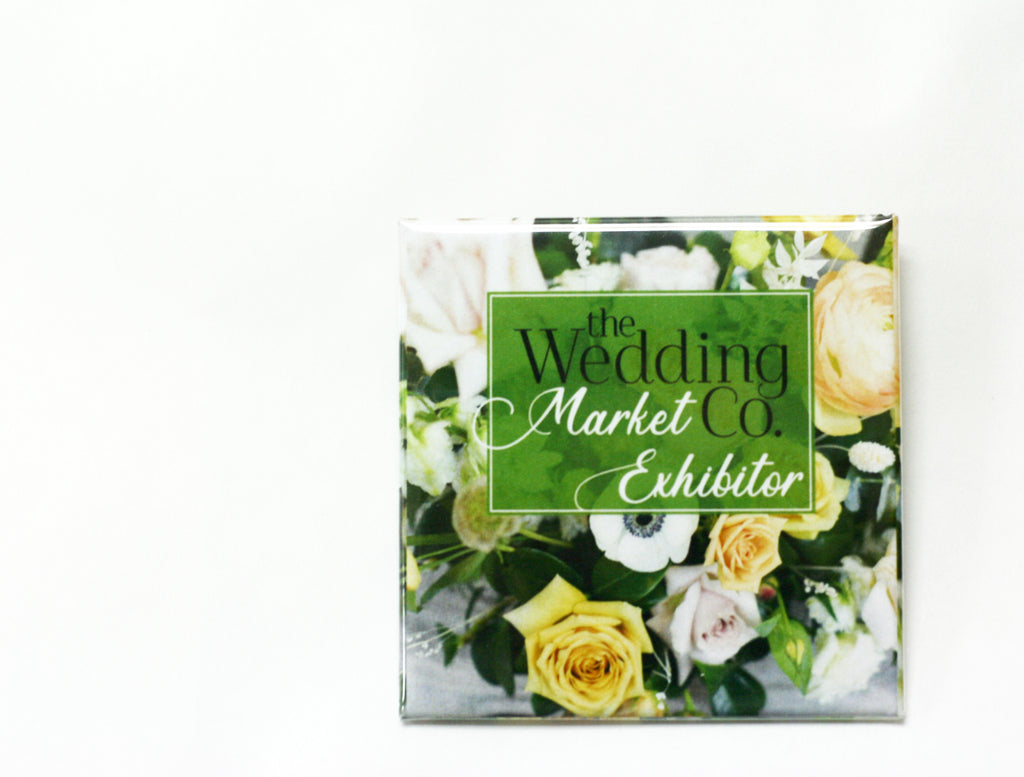
Lovely Exhibitor Identification Badges for The Wedding Co. Show | Toronto Wedding Show February 19 2020
If you are getting married and are living in the Toronto area, then The Wedding Co. Market 2020 is where you want to be.
It is a lovely intimate marketplace that focuses on a bespoke wedding experience. It happens at the lovely Artscape Wychwood Barns on Sunday, February 23.
This is not our first time teaming up with the great team that runs this show that gathers top wedding professionals from Toronto and surrounding areas.
We make exhibitor badges for their vendors to help identify them, but in a way that matches The Wedding Co. brand. Each year the buttons are slightly different and this year we are floral and square.
If you are heading out to the show, you will see these beautiful 2-1/2" Square Buttons by the 70+ unique vendors. Tickets are on sale now and a significant discount for getting ahead of time instead of buying at the event.
You can get a better picture of the event and a taste of all the fabulous vendors by checking out The Wedding Co. online:
Website: www.theweddingco.com
Instagram: @theweddingco
If you are running an event, custom exhibitor badges are simple and affordable ways to identify vendors and brand your event. There are different button shapes and sizes to meet your needs. You can customize your buttons with vendor's names, businesses as well.
Custom buttons and custom magnets also make great wedding favours, so get in touch and we can make your special day extra special with this personalized product.
Read more »
Buttons for Tyendinaga Protest | #WetsuwetenStrong February 18 2020
One button can stand for so much, but like a news headline or soundbite, sometimes you need the story behind the button to fully understand what a button stands for. This is the case for these #WetsuwetenStrong buttons.

Here at People Power Press, we are pleased to have been asked to do a run of custom buttons for the protests at the Tyendinaga Mohawk Territory. For those of you who have felt inconvenienced by the blockade of the Lakeshore West Rail Corridor, or just aren't sure what is going on, we’d like to take a moment to appreciate why this protest matters.
It matters much more than a $6.2 billion dollar pipeline being built on land traditionally used, conserved and maintained by the Wet’suwet’en people in British Columbia.
Of course that matters, but also at stake here is the ability of the Supreme Court of Canada to render fair and impartial judgements about the laws of our nation.
In December 1997, the Supreme Court issued a ruling in the case of Delgamuukw v. British Columbia, which clearly established Aboriginal title over unceded ancestral lands. The Wet’suwet’en Nation have signed no treaties, so the case is very clear in the eyes of the highest court of Canada.
What followed the Delgamuukw decision in B.C. has been 25 years of resource industry lobbyists encouraging the government to overcome, subvert and ignore the ruling. A detailed history of those efforts can be found here.
As Wet’suwet’en protesters are arrested, the RCMP has become complicit in ignoring the law and ruling of our Supreme Court. If Canada has a judiciary that can be so easily ignored by our government and justice system, then we don’t have very much in this country.
We make a lot of buttons at PPP for all sorts of reasons and for a variety of causes. There are some buttons that we are very proud to make and this is an example of one of those buttons. We at PPP are very proud to stand behind the Wet’suwet’en and Tyendinaga Mohawk protesters, and their valiant effort to make Canada respect its own laws.
Read more »
Scrapbooking Flair Buttons | Scrapbook Ideas January 30 2020
If you do scrapbooking or are a general crafty person looking for different ways to use your 1" button maker, here are some ideas for how to make your own scrapbook flair buttons.
Scrapbook flair buttons are the small, but sweet buttons used in scrapbooking to add some flair, texture to page layouts. Just look up "scrapbook flair buttons" to see exactly what I am talking about. Pinterest is full of examples.
Flair buttons can be created in many ways, but using buttons made with a button maker - with the tips offered below - offer the best looking flair buttons for your scrapbook.
1. Make Buttons Without the Pin - Flat Back or Medallion Buttons
When trying to place a button in your scrapbook with the pin included, you will find that it won't lay flat. By making the button with a flat back (no pin) you can more easily position your button and it won't lay on an angle. This also allows you to better stick it into the book as you have a flat surface to work with.
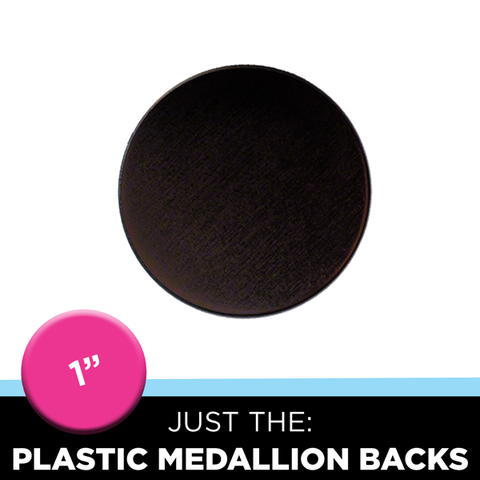
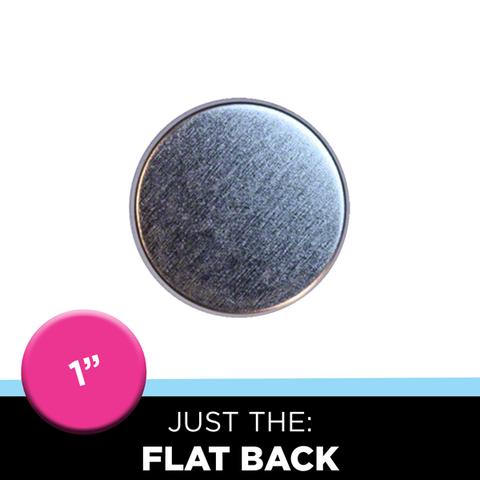
You can use a regular flat back buttons or, with the 1" button maker, you have the option of the medallion back button for even more versatility.
2. What Are Medallion Buttons?
Um, what is a medallion button you ask? Well it is a kind of button that is only available for the 1" button size - which is also the perfect size for scrapbooking flair buttons.
But instead of making buttons with a pinned back or the tin back, a flat plastic back is used. Using the patented third press technique (will explain in the next point) you can make a flatter 1" button that can be easily inserted into a scrapbook and glued onto various surfaces. You still get that desired texture variety, but it is a lot easier to place the button into your layout.
(Here is cross section of two buttons: regular pressed button (left) and third press button (right). Photo courtesy: Tecre.com)
The flatter button will lay nicely in a scrapbook and is a huge improvement to the bubble cap stickers that are sometimes referenced when discussing scrapbooking flair buttons. These rounded (bubble) stickers are supposed to mimic a button, but don't look nearly as good as a real button! You cannot tell us otherwise. ;)
2. What is the Third Button Press Technique?
This is a special - patented - button press technique that is used with our button makers to make a 1" button flatter than the standard button.
3. All the Ways to Make Your Flair Buttons
If you see yourself making loads of scrapbooking flair buttons, then investing in a button maker makes the most sense. And if you scrapbook, you are a crafty person who will appreciate all the other things that a button maker can do. This machine makes buttons, magnets, jewelry, keychains, hair ties, shoelace buttons, zipper pulls and more!
If you just want to make a few buttons for your scrapbook, it may make more sense to rent a button maker to either take out of store for a day or two or week or to come into one of our 3 locations to make them here in our maker spaces.
Another affordable way to get great looking scrapbook flair buttons made is to design to your heart's content and then have us make them! We make custom buttons to order in any quantity. Then you can do the rest to bring your scrapbook vision to life.
4. Make Scrapbook Flair Buttons to Sell to Other Scrapbookers
If you do end up getting a button maker, you can even start making a variety of scrapbooking flair buttons to sell to other people who scrapbook.
Just think of some ideas that people would use in their scrapbooks and start selling them in your own Etsy store. You can even take custom orders if someone has a really specific request.
These flat back buttons can be used to vary and expand your scrapbook layouts and hopefully inspire some new scrapbook ideas! Please remember to share what you create with us on Facebook, Twitter, Pinterest or Instagram!
Read more »
New SQUARE Button Size! - The 2.5" Square Button and Magnet is Here January 23 2020
New Year, new custom button size?! Yes!
The new 2-1/2" square button - and magnet - is now available for your custom button designs!

We love the look of the square button. It is distinctly different from the typical round button sizes and is just a modern feeling design that looks really good.
It is also a great and unique custom magnet option where rectangle shapes are more commonplace.
Whether button or magnet, the square just really stands out.
The challenge to date is that the sizes for square buttons are few (1"/1.5"/2"/3"), which can be limiting if you really are a fan of the shape, but need it to be a certain size to get the job done.
The introduction of the 2.5" square button (and 2-1/2" magnet) now fills the gap between the 2-inch and 3-inch square buttons that are already available.
Some Uses for Square Buttons
Square buttons and magnets are great for:
- Artist Buttons - you don't need to cut any corners when transferring your image onto a button/magnet;
- Band Merch - perfect for displaying your album cover designs and selling at shows or online to your fans;
- Quotes - this shape pairs so nicely with text;
- Corporate Branding and Logos - some logos just look good in the square shape, instead of being adapted to a circle so stay consistent with your brand by getting custom square buttons and magnets;
- Souvenir Fridge Magnets - these offer just enough difference from the usual rectangle fridge magnets to stand out wherever fridge magnets are sold;
- And More...
Squares Can Be Made As Custom Diamond Buttons and Magnets Too!

The other sweet thing about square buttons is that you can order them to be made as diamond buttons or magnets. We have templates for diamond artwork too so that the artwork is set up to be printed in the diamond layout and, with the pinback button, the pin can be oriented to corner-to-corner so pinning on a diamond button is not complicated.
Read more »
Supporting Occasional Teachers in York Region | Custom Union Buttons and Stickers January 08 2020
Teachers and other school support staff have been bust negotiating with the government of Ontario this Fall and now into the New Year.
And now high school teachers, including those from York Region's Ontario Secondary School Teachers Federation (OSSTF) District 16, have had a number of rotating strikes with more to come if negotiations with the provincial government continue.
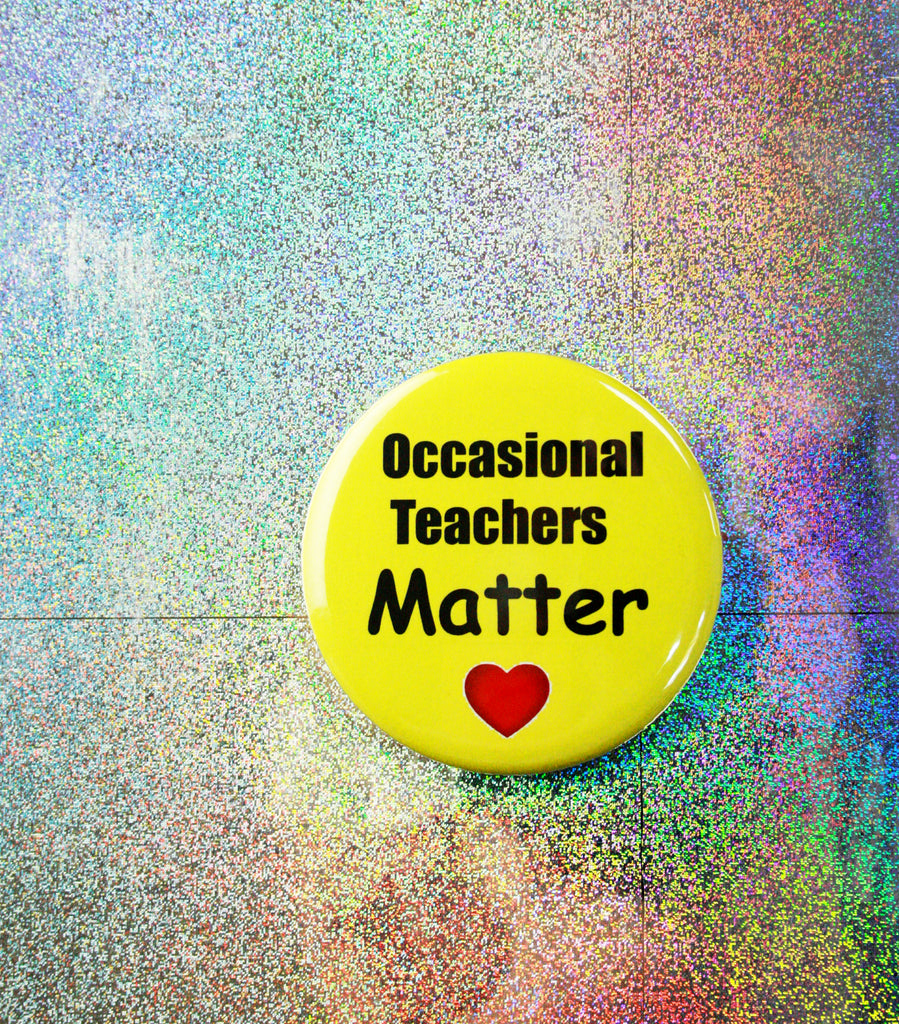
As OSSTF teachers hit the picket lines, York Region's OSSTF District 16 wants to make sure the support for teachers includes occasional teachers too with these bright and big 2.25" buttons and matching stickers.
Occasional teachers are also represented by the union - there are approximately 600 occasional members in District 16 - and they too are affected by labour negotiations and rotating strikes happening now in the province. Occasional teachers include teachers short and long term occasional teachers.
Major sticking points in negotiations include OSSTF demands that the government:
- Revert to 2018-19 average class size of 22 students to 1 teacher - new average is 25 down from original 28 students per class;
- Eliminate mandatory e-learning - students must now take 2 online course in order to graduate, down from originally proposed 4 courses;
- Commit to salary increases that are in line with rate of inflation and not Bill 124, which sees public sector increases capped at 1%.
If you are getting buttons, you can get matching stickers (great for members not wanting to pin their coats or to stick to other things like signs, etc.) for a great rate when ordering at the same time as your buttons.
To follow District 16 York Region OSSTF:
Website: www.d16.osstf.ca
Instagram: @district16osstf
Read more »
Hey, It's Lara Not Laura! | Custom Name Buttons Online Store January 06 2020
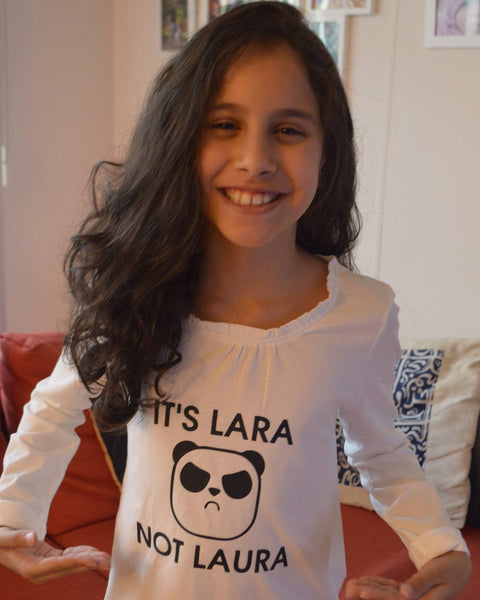

I thought my name was very simple until so many people including my teachers called me Laura instead of Lara. Even after me and my parents corrected my teachers, they would still call me Laura. Two years ago when I was in Grade 4, I decided to design a t-shirt that had the message, “It’s Lara Not Laura” with a picture of an angry panda. I wore it to school and so many other students related to my problem. But my problem wasn’t just at school – it happened everywhere.
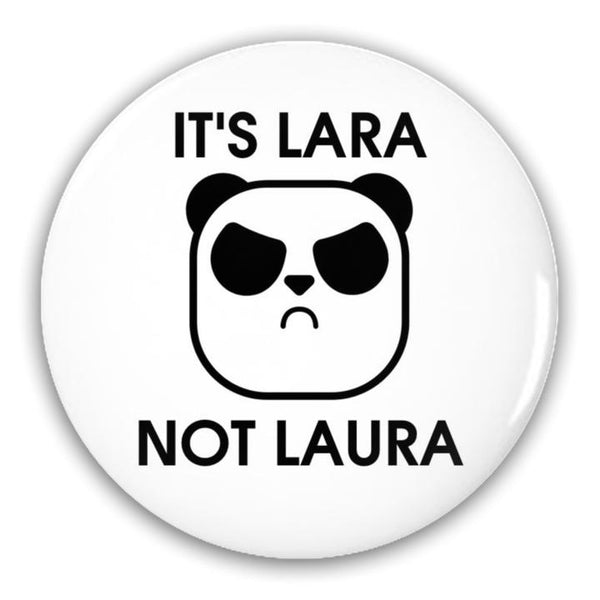
Since I couldn’t wear the same t-shirt everyday, I thought wearing a button would be more practical. The button got a lot of people talking and sharing their stories.
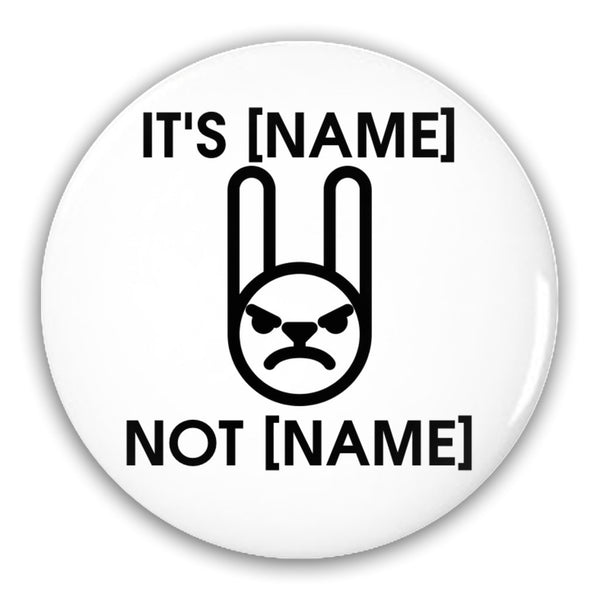
I then decided that I could help others who were as frustrated as I was by making personalized pin-back buttons for them. My dad helped me create a website (https://laranotlaura.ca/) and through my parent's social media and word of mouth, I started to get orders from Canada and the United States.
Read more »
Perfect Gift for Person Who Likes to Cook | Funny Foodie Gift December 19 2019
Are you still looking for a great quality gift for the home cook or chef on your list?
We have the best aprons out there - high quality with fantastically fun designs - and they are on sale right now, just in time for the holidays.
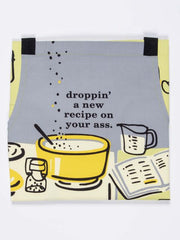

Normally selling for $46 (CAD), these are now a steal at $29 (CAD). Choose from 12 fun and funny designs. Something for everyone from mom to your foodie bestie, pet-loving partner or real deal chef, these mugs are the perfect gift for anyone who likes to cook. Chef quality apron.
Being in the kitchen or behind the BBQ just got a lot better - and funnier - with these sturdy, well-made aprons from the hilarious folks at Blue Q.
Features:
- Made from soft, extra-sturdy, 100% heavy cotton twill
- Extra-long waist ties
- Handy pockets
- Adjustable neck strap
Check out all the fun designs for yourself online here. These styles are also available to see in our Toronto store, but you can pick them up in our Ottawa or Napanee stores.
Read more »
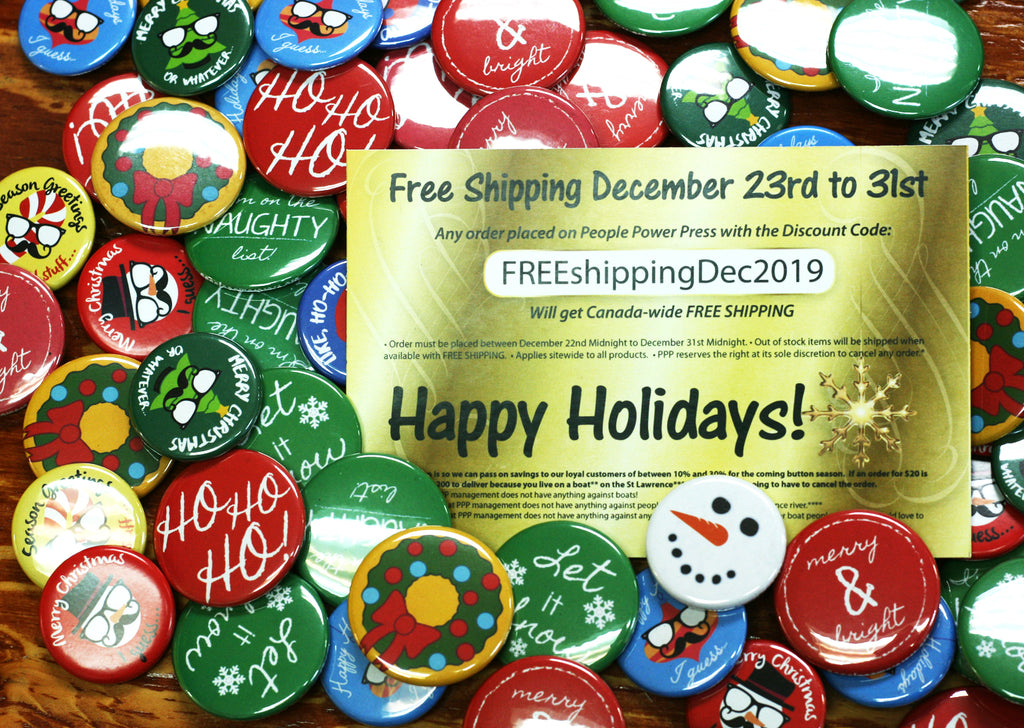
Holiday Shipping Bonus - Limited Time Offer! December 17 2019
It is the holidays so we thought we'd pass along something of a gift to our customers.
Shipping costs can be a lot for us here in Canada so we thought we'd give you a break with FREE SHIPPING for any orders placed between Dec. 23 and Dec. 31st.
Free shipping - Wooo Hooooo!
So what are the details you need to know? Here's the lowdown on the shipping savings we've got for you:
- Use this code: FREEshippingDEC2019
- To be used for Canada-wide shipping
- Applies to all products sitewide
- Orders must be placed between December 22 to December 31 at midnight
- Any out of stock items will be shipping with Free Shipping as soon as the item is back in stock
So what's the thinking behind this super sweet shipping freebie? We just are super grateful for our loyal customers that we wanted to pass on savings to you for the coming year! This could be a savings of 10-30% to get you off on the right foot for 2020.
(If you order something for $20 and it is going to take $200 because you live on a boat* on the St. Lawrence River** to get it to you ... won't lie, we are probably going to cancel that order! ***)
* We have nothing against living on a boat.
** We have nothing against living on a boat on the St. Lawrence River.
*** We have nothing against any boats, any rivers or anyone living on boats on the river.
So if you are thinking of getting busy in 2020 with some buttons, get online and order between Dec. 22 and Dec. 31. The savings code FREEshippingDEC2019 won't work as of Jan. 1st, 12:01 am.
Happy Holidays from all of us here at People Power Press and thanks so much for a wonderful 2019. :)
Read more »
Modernizing the School Library with Unleash The Library Project | Custom Buttons Toronto December 05 2019
Parent Councils at two Toronto public schools are looking to bring the school library experience into the 21st century with the ambitious and fantastic Unleash the Library project.
The Annette Street Public School and High Park Alternative Junior School parent councils have launched a project to create a Library Learning Commons that is a positive, inclusive environment that pushes past the traditional library model. This new space would still include books, but also include a makerspace, support STEM learning and embrace the digital world of the 21st Century.
This is a model that has been created successfully at other Toronto-area schools so the parent councils are looking to raise funds among the community to create the Library Learning Commons for their students.
And to help fundraising efforts among the schools, along with getting students excited about the project and sharing the project with their families, they had these awesomely adorable 1" buttons made. If these buttons are any indication of what is in store for the new library space, then the students are in for something very special.
The 1-inch button is a great size for a project like this as these small buttons are super wearable and sharable, which is the purpose for making these buttons - to raise awareness, funds and excitement for the project.
The whole plan, along with images and the roll out in phases, is all laid out in full on the project's website. There is also a very detailed description of what each donation will be used for.
Read more »
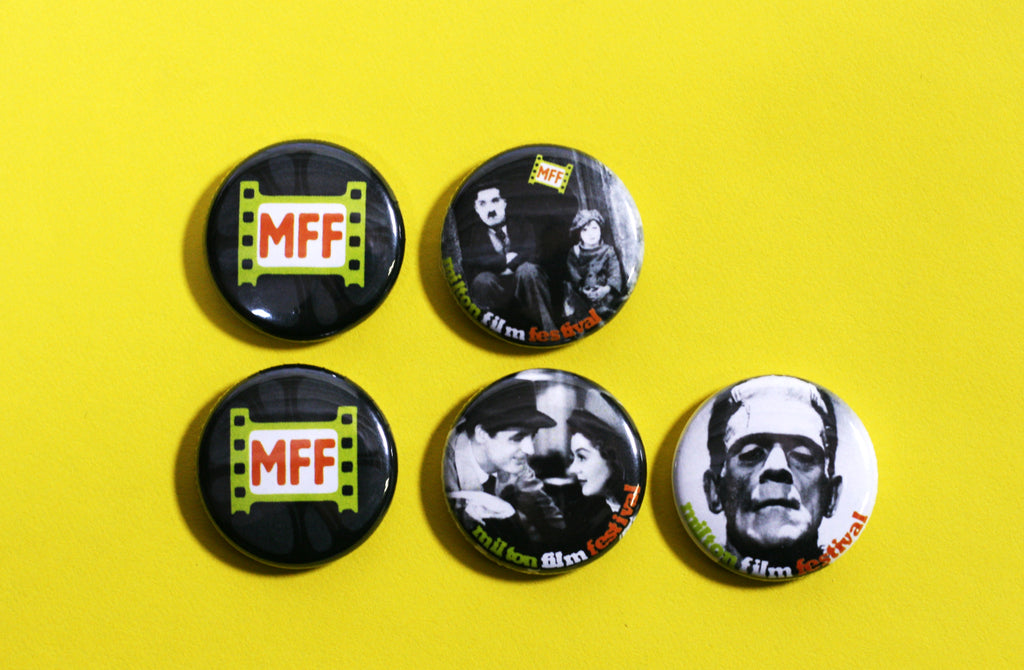
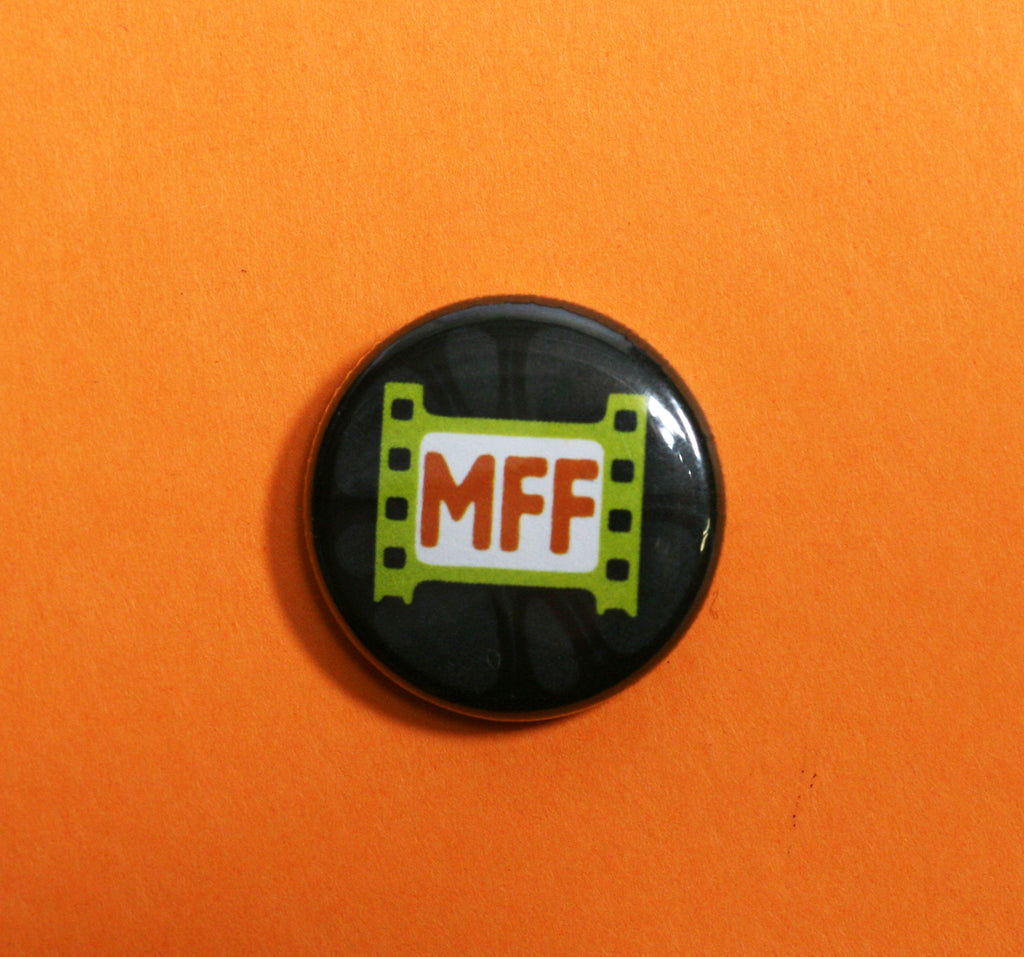
Milton Film Festival Coming in January! | Custom Festival Buttons Toronto December 04 2019
January is the perfect time to stay indoors, grab some popcorn and catch some world class movies. Well, it sounds like how wanna spend a few days in Winter!
The Milton Film Festival will be running for its seventh year from January 24-26 at the FirstOntario Arts Centre Milton. And tickets are now on sale!
This event runs in partnership with the Toronto International Film Festival's Film Circuit Progam that allows local filmgoers see local, Canadian and International films close to home.
If you are looking to get your tickets now, then you will want to head over to the Downtown Milton HolidayFest happening this Saturday, December 7th. MFF staff will be on hand to sell discounted tickets and you can get yourself some of their sweet custom 1" movie buttons featuring some great film classics.
To find out more about the 7th Annual Milton Film Festival, check them out in these places:
Website: www.miltonfilmfest.com
Facebook: @MiltonFilmFestival
YouTube: Milton Film Festival YouTube Channel
Twitter: @MiltonFilmFest
Instagram: @MiltonFilmFest
We all know January will be cold. Pass those wintry days away with some great movies, including films that made their debut at this year's TIFF.
Buttons make great giveaways for film festivals and other similar events. Custom festival buttons are best when made as 1-inch buttons or 1.25 inch buttons. They are small souvenirs that are wearable and shareable! Get creative like the folks at the Milton Film Festival and create a number of designs featuring the various films, making them super collectible souvenirs.
Read more »
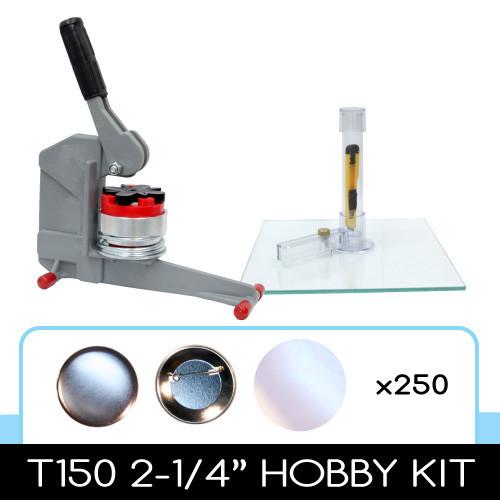
T150 Hobby Button Maker Appears in Brooklyn 99 Season 2 November 12 2019
Of all the button makers to make it to the small screen, we might not have expected it to be the T150 button maker, but if you go back and watch Season 2 of Brooklyn 99, there it is in the spotlight at the 9:00 mark!
For the record, the T150 does make mirrors.
The T150 is a hobby button maker that is like the little engine that could. It has been around for years and is a perfect little button maker for a crafter or hobbyist looking to make a few buttons at a time. It is also a more affordable option to get for kids looking to get crafty without breaking the bank getting them a pro-level machine.
And to repeat, you CAN make mirrors with the T150! This is the only machine we will sell that has plastic parts because it works.
Thinking of a little crafter this coming holiday season? The T150 button maker might be one to try! Each kit comes with the supplies to make 250 buttons.
Or just use this post as an excuse to binge on B99 one more time. We might just do that so no judgement here! ;)
Related Reading
HOW TO CREATE BUTTONS FOR PRINT OR SCREEN
Read more »
Making Your Brand Look Its Best with The Marchant Co. | Small Business Branding Buttons Canada November 11 2019
While most small business owners understand the importance of building a strong brand, not all know how to actually create it.
We know our biz, but need help to share that with the world with some polish and shine.
This is where Oakville's The Marchant Company comes in, to offer a full suite of services including logo and website design, trade show printing and branding consultancy.
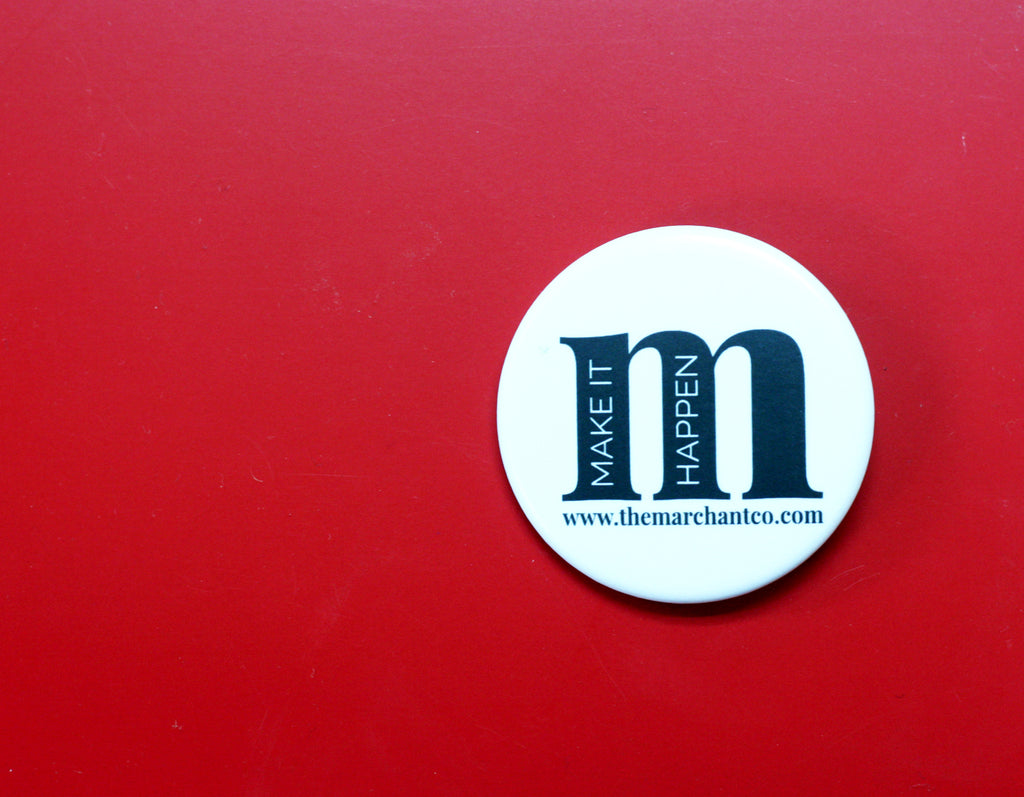
Just like these fantastic-looking 1.75" matte finish buttons (this is a branding company after all!), The Marchant Co. is working with you so that you can Make It Happen with your business.
They are really passionate about working with a variety of small businesses across Ontario to build strong brands, allowing each business put their best foot forward.
So what is Matte Finish anyway?
Matte Finish is an option we offer on most custom button shapes and sizes. It is a laminated finish that is a cool and modern alternative to the traditional glossy finish you see with most buttons. You don't get shine with a matte button. It looks great and costs just a bit more than the standard gloss finish.
We made a number of black and white designs for The Marchant Co. buttons and they all look super sophisticated to match the rest of the company's branding. Yup, they really do know what they are doing with this branding and design thing.
To learn more about The Marchant Company and the many small businesses they work with, you can find them in these places:
Website: www.themarchantco.com
Facebook: @bethmarchant
Instagram: @bethmmarchant
Read more »
Charming Artist Buttons by Moon Eyes Art | Custom Buttons Toronto November 08 2019
Moon Eyes Art creates special art pieces that are cute and whimsical. Hayley Lizz is the Toronto-based illustrator behind Moon Eyes Art.
She creates a range of art including adorable cat designs and awesome pet portraits using acrylic, oil and watercolour paints. She also makes magical tarot-inspired designs.
Her work is available online in a variety of places including Etsy, Redbubble and Society6, and you can her designs on a variety of mediums from canvas to stickers and now buttons!
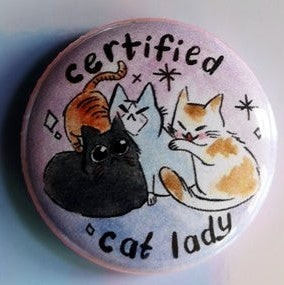
These fantastic feline buttons are the lovely small and super wearable 1" button. Perfect for collecting and for pinning onto bags, jackets and sweaters, these are great gifts for your favourite cat lady and any cat lover.
Check out Moon Eyes Art in all these places:
Instagram: @mooneyesart
Facebook: @mooneyesart
Website: www.mooneyesart.com
If you are an artist, especially one looking to sell you art in a variety of places online like Etsy and Society6, then having custom artist buttons or custom stickers may be something you want to add to your shop.
Buttons and stickers (and mugs from our friends at WTM) with your artwork and illustrations are great ways to diversify your online shop offerings and appeal to a range of budgets. We'd love to see everyone buying original paintings, but some fans may want something smaller or less expensive.
Plus, as an added bonus to your bottom line, these items are all light and super inexpensive to ship around the world.
Buttons allow you to give fans of your work your designs in an affordable medium that they can wear and share. You can also consider some of out other custom products like pocket mirrors, magnets and stickers.
Related Reading
FANTASTIC TORONTO COMICON BUTTONS BY ARTIST LEANNE DAVIES
CUSTOM ILLUSTRATED VEGETABLE BUTTONS BY ROBIN CLUGSTON
HORROR ARTIST KAMERON DOYLE | CUSTOM BAZAAR OF THE BIZARRE SHOW BUTTONS
Read more »
Oasis Dufferin Community Centre Creating Community for Over 20 Years | Custom Buttons Toronto November 04 2019
Since 1994, Oasis Dufferin Community Centre has been that place. It began out of a need to provide support to people and families that were new to Canada. It now offers a range of services to so many people in the community.
It offers an emergency food bank, counselling, services for seniors, mentoring, advocacy, youth leadership, volunteer opportunities and more.
Read more »
How To Recreate Buttons for Print or Screen November 01 2019
The buttons we make are usually meant to be used at real events, but we do often get requests to recreate buttons for print and screen.
One recent example came in recreating buttons for an election guide for the federal election put out by Macleans and that also appeared in their Nov. 1st issue.

Seeing that Toronto also has a thriving film and television industry, we often make buttons that will appear on screens big and small.
It is really easy to recreate buttons, but there are some special considerations when making buttons that will appear on screen or in print.
1. Avoid Glare with Matte Finish
Standard buttons are made using a plastic covering to give them a glossy look. When used on screen, you may get unwanted reflections off of glossy buttons so you may want to consider using a matte laminate finish.
It depends on how the buttons will be used in the production. If standing in a crowd in a rally scene or election scene then you may prefer the authenticity of the glossy finish, but if you need to see what the button says clearly and not run the risk of getting some glare off the button, then a matte finish is the way to go!
2. Unpinned for Flat Lay Photography
If the buttons will be used for any kind of flat lay photography or filming, you should consider having the buttons made with an unpinned back. The pin in the back of the button sticks out a bit so when standing over a button to take a photo, it will not lay completely flat. This may cause unwanted glare if you are using lighting or a tilt to the button. Having an unpinned button ensures easier photography.
Looking to add buttons to your next film or media project? Get in touch with us as we have worked with a variety of productions and publications to get pins on screen or in print. And we also totally understand the unpredictability of production schedules so we will get you screen-ready buttons really quickly!
Read more »
Ontario Education Unions Set to Strike | Protest Buttons October 04 2019
When Doug Ford's Progressive Conservative Party came to power in Ontario his government started making some changes and putting their stamp on things. The government set their sights on the education system, making changes that have upset many who work in Ontario schools, along with the families that attend those schools.
Some high school students staged a walk out in the Spring to voice their concerns about changes in their schools and now support staff at many Ontario schools are set to walk off the job on October 7. This staff includes custodians, educational assistants, office staff and early childhood educators. And a number of school boards have already announced that if the strikes happen, they will keep schools closed.
A number of unions in Ontario representing teachers are also set to start negotiating with the province in the coming months.
Buttons and strikes go hand-in-hand, whatever side of things you fall on. Buttons allow you to express your ideas clearly without saying a word.
We know that the final word on whether strike is going to happen or not can be made at the last minute so it can be hard to know when to order buttons and how many. We have you covered.
As one of Canada's top button making facilities, we are fully equipped for high volume button production with fast turnaround times. We have made 100,000s of buttons for striking unions over the years. We've also made many other statement buttons by people who want to express their own thoughts on issues that affect them.
If you would like to get buttons made or make your own buttons to get your message out en masse or just as a one-off button, we are here to help! There are a few ways to get your union buttons and statement buttons made.
Custom Buttons Made By Us
You can send us your artwork and we can get started. Election campaign style buttons are traditionally a 2.25" custom round button, but you can get buttons in bigger or smaller sizes as well.
Make Your Statement Button In Store - 3 Locations!
Come into any one of our stores - Ottawa, Napanee or Toronto - and make your button here with us. It is a good idea to bring your design on your phone or a USB that we can then print for you here. Or you can use our supplies to hand draw your message.
Rent A Button Maker to Host a Button Making Party With Like-Minded Folks
Looking to make a number of buttons? Consider rolling up your sleeves to make your own buttons. You can rent machines here in store or you can rent to take home with you. Collect friends and colleagues with the same interests and make a fun event of it.
Go Full DIY With Your Own Button Maker Start-Up Kit
If you will be making a lot of buttons and feel like this is something you will be doing a lot of, you may want to purchase your own button making kit. We can help you get the right size and supplies for your needs.
Related Reading
WE LOVE TEACHING ASSISTANTS
ONTARIO #STUDENTSSAYNO STUDENT WALK OUT ON APRIL 4TH | HOW TO MAKE PROTEST BUTTONS
Read more »
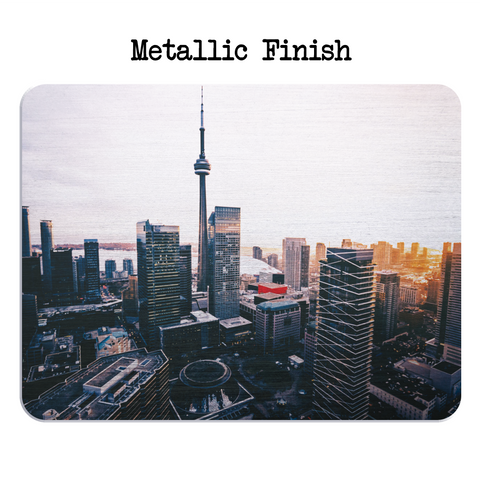
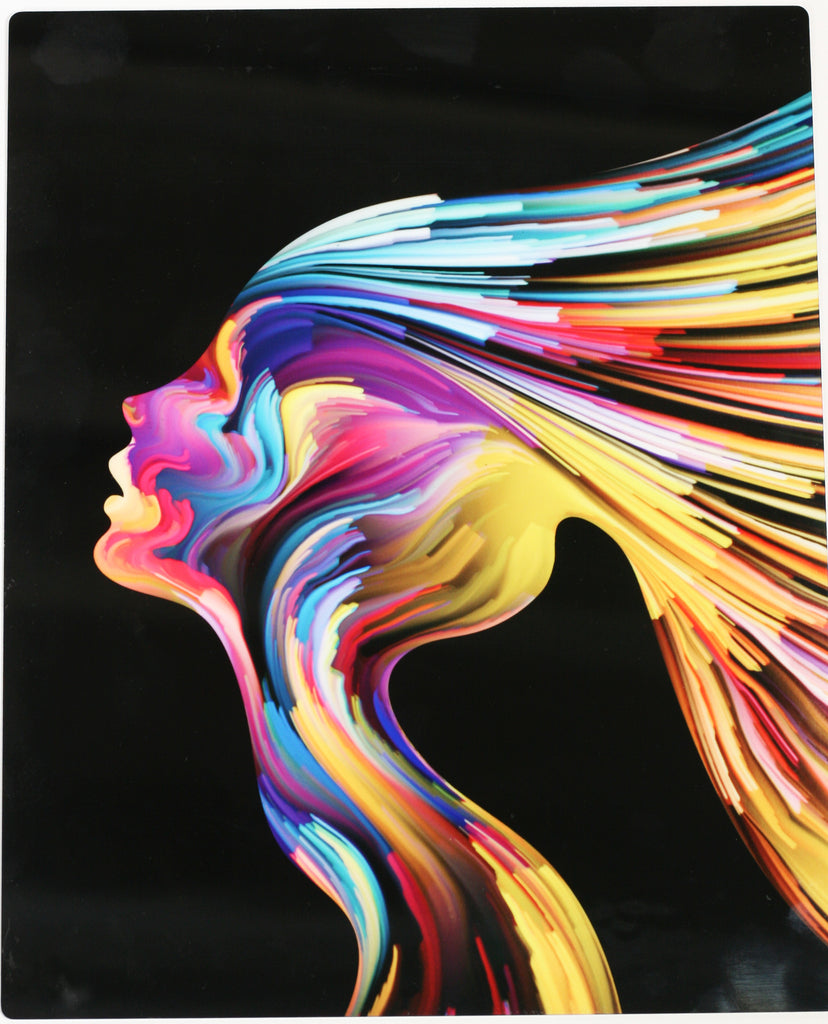
Custom ChromaLuxe Metal Signs | Custom Signs Canada October 03 2019
Custom ChromaLuxe panels offer exceptional colour resolution and detail offering really stunning images and signage that stands out. These panels make excellent signs as they are not going to fade or stain and are moisture resistant. These features also make them great alternatives to photo paper and canvas for printing photographs.
Great Uses for ChromaLuxe Aluminum Signs:
- Garage Signs
- Outdoor Signs
- Indoor Signs
- High Contrast Images
- HD Photography
- Signs with Antique Effect (corners that look rusted through design)
The Process:
ChromaLuxe aluminum panels are printed using the dye sublimation process. These sees that images are printed onto transfer. Heat is then applied to transfer the image to the product.
Finished metal panels can be displayed in a variety of ways. They can be drilled into concrete, fences, wood and other outdoor fences. You can also hang by attaching mounting hardware or sitting on a table, desk or shelf by sliding an edge into a block.

Finishes Available:
- Clear Gloss
- Semi-Gloss
- Gloss
- Matte
Sizes Available:
5x7" | 8x10" | 11x14" | 16x20" | Ask about other sizes
Pricing starts at only $20.99!!
Design Tips for ChromaLuxe Prints
- Use/Submit High Contrast Vector Files
- Low Resolution Files (cell phone images, etc.) may not print well, especially with large sizes
Aluminum panels are lightweight, durable and made with 100% recycled material. Metal prints are the perfect medium for displaying artwork and photography.

You can order this great product through our partner custom printing shop What The Mug.
Also available as Wood Photo Plaques!
Related Reading
EASY -TO-DO PERSONALIZED GARAGE SIGN | CUSTOM METAL SIGNS CANADA
YOUR PICTURE ON WOOD | DO SOMETHING DIFFERENT WITH YOUR PHOTOS
Read more »
Boy Trouble | Custom Buttons Edmonton August 12 2019
Summer is fringe festival season and we are always all here for it. The Edmonton Fringe Festival 2019 is running in the later part of August and if there is any chance of you being in the city then, you should head out and see some of the great shows happening this year.
Boy Trouble is Playing This Month at the Edmonton Fringe Festival
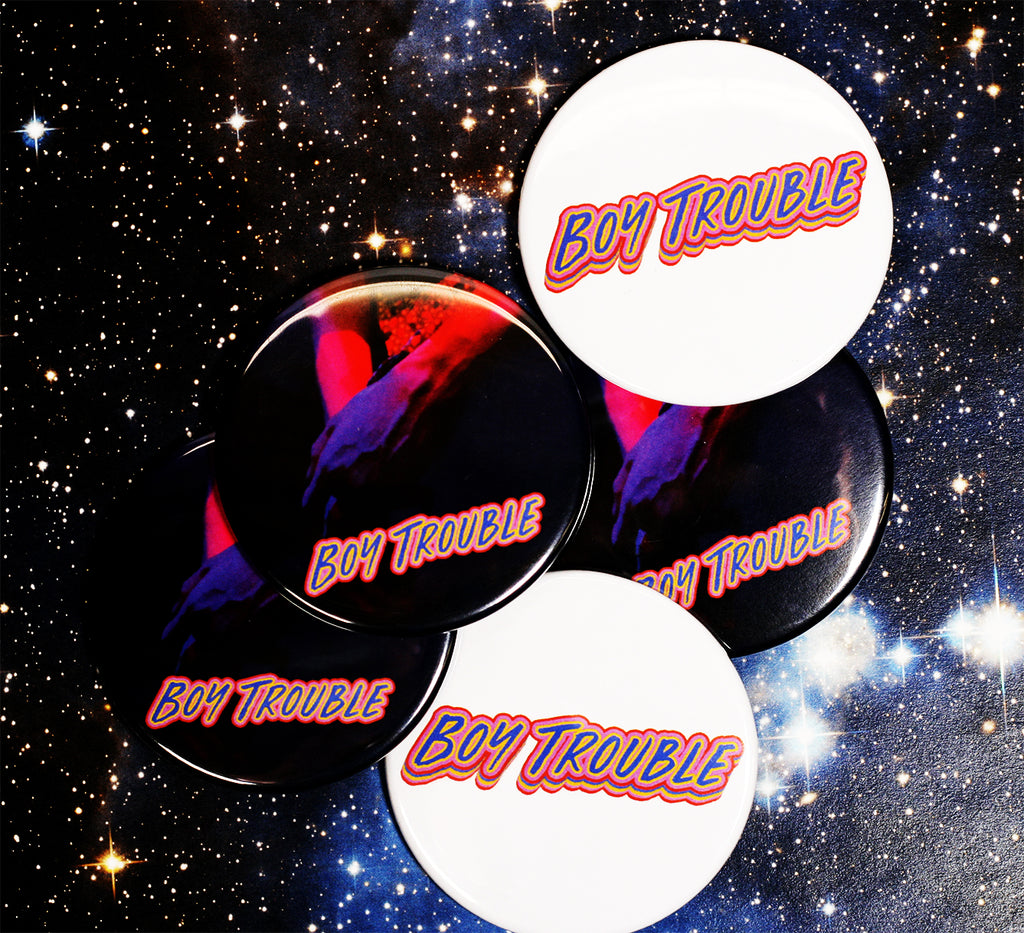
One show you will want to put onto your schedule is Boy Trouble. It is a show developed by an exciting team of emerging Edmonton artists from Vena Amoris Projects and focuses on a queer teen's coming-of-age story. The star of the show is emerging Edmonton actor Max Hanic.
The show explores questions of toxic masculinity and anonymous online encounters. Sure it is some heavy modern day subject matter, but the writing by Mac Brook is both comedic and dramatic.
There will be 6 showings of Boy Trouble starting August 15 and running until August 25. You can check out the times and buy your tickets online.
Annnd if you do get to see Boy Trouble, look out for some awesome custom fringe buttons we got to make for the show.
Buttons Over Playbills: Something for Playgoers to Hold Onto
According to the show's writer Mac Brock:
"We chose to print buttons through People Power Press to reduce the waste that comes from Fringe handbills, and give festival attendees a more personal way to remember our show that is less likely to wind up in a garbage bin the next day."

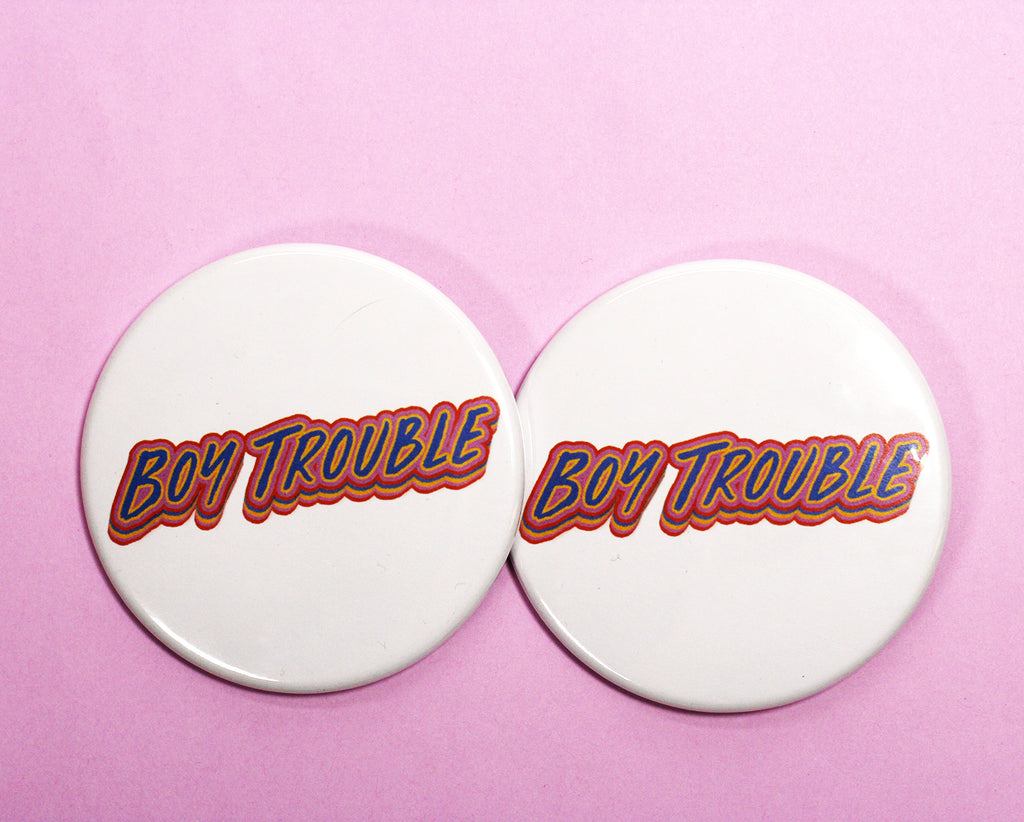
The buttons are the standard 2.25" round button size, which boldly showcases the show's great graphics for a great show souvenir. Paper handbills are easily tossed, but a button is a great thing to gift those who have come out to support your show and your work. If you are fundraising, you can even offer all designs on sale at the show for people to collect.
Contact us to find out more about getting custom buttons for your fringe show.
Boy Trouble is produced by the independent Edmonton performing arts company Vena Amoris Projects.
Check out all the cool folks behind Boy Trouble here:
Vena Amoris on Facebook: @amorisprojects
Vena Amoris on Instagram: @amorisprojects
Edmonton Fringe Festival Website: www.fringetheatre.ca
Related Reading
SUBWAY STATIONS, EXISTENTIAL CRISES & HOW WE CREATE: MEET EDMONTON PLAYWRIGHT MAC BROCK (External Article)
HOW TO FRINGE (External Article)
SHADOWLANDS: GLOW IN THE DARK BUTTONS FOR TORONTO FRINGE FESTIVAL (PPP Blog)
LAUGH WITH COMEDIAN ANJALI SANDHU AT THE WINNIPEG FRINGE FESTIVAL (PPP Blog)
Read more »
See the Joy of Getting a New Button Maker Kit from People Power Press | Button Maker Unboxing Videos August 09 2019
We totally understand the joys of getting a new button maker and it is something we see often here in our stores when someone picks out a kit and gets ready to take it home.
But it is kind of hard to explain to someone on the fence about button making. So we were thrilled when one of our customers Alex decided to create an unboxing video for her brand new button maker kit.
What is an unboxing video you ask. It is pretty much what it says and YouTube is full of them. People recording their reaction to opening up their new purchase so that you can see along with them what they got and how they feel about it all.
Unboxing videos are a big deal and this article of The Joys of Unboxing Videos breaks down what is so satisfying about them.
As for Alex, we are so grateful that she decided to record this reveal of her opening up her new 1-inch Standard Button Maker Kit. And we are even more excited to see what she creates with her new button press. Judging by her other videos on her channel, she is crafty and artistic. She will make great use of her new button maker.
To follow Alex, you can find her here:
YouTube Channel: Alex's Art and Journal Journey
Inspired to Get Your Own Button Maker?
We have the largest selection of button maker sizes and kits available so it can be overwhelming, but we are here to help!
You can visit one of our locations in Ottawa, Toronto or Napanee or you can contact us by phone or email. We are friendly folks who want to guide you to getting the right button maker for you.
Read more »
Bike Tours of Ottawa for Intimate, Local Experience | Custom Buttons Ottawa July 26 2019
Oh, we love Ottawa in the summertime!
And we love having the warm weather to get out and see the city by bike.
If you are traveling to Ottawa or just a local who wants to experience the city in a new way, you should check our Steel Pigeon Bike Experiences. They are a local Ottawa tour operator that runs daytime and evening bicycle tours for tourists and locals alike.

This Ottawa small business is run by Wes Scheer-Hennings, who is out to offer a different picture of Ottawa. It is a unique and personal experience that he describes this way:
"When people come for our rides, we inevitably find ourselves bonding, exchanging stories and laughing. The most important thing for me is that guests get a glimpse of Ottawa beyond the pomp and bureaucracy. I want them to feel Ottawa's artistic pulse, friendly neighbourhoods, eco-consciousness and, of course, historic sites."
Highlights of the Steel Pigeon Ottawa Bike Tour include:
- Tours that are brisk, but will not overly exerting;
- Small groups (4-7 people, on average);
- Different routes and experiences with each ride;
- 3 hour tour that includes a stop to eat (picnic);
- Cost is $55 per rider; and
- See Ottawa landmarks, historical sites along with local favourites for a real insider view of the city.
Here at People Power Press, we get to be a small part of this great experience in that we made some sleek souvenir buttons that riders can snag on each ride.
More Information About Ottawa Bike Tour Company Steel Pigeon
Reservations and Other Info: www.steelpigeon.ca
Instagram: @steel_pigeon_ott
Facebook: @steelpigeon
Are You a Small Local Business and Want to Show Love to Customers with Buttons?
Buttons are not expensive, but make great souvenir buttons. Customers love a simple, yet personal gift. You don't have to plaster it with your logo either - unless you want to! - but can create a fun and simple design that links your company to your customer in a meaningful way.
This doesn't have to be your father's promotional swag; make it mean something more that a different shaped business card that will get discarded. Make it interesting and folks will keep it along with some fond memories.
And if you are looking for some Ottawa souvenirs, we are located in Little Italy, which is part of the Steel Pigeon bike route, and have some great Ottawa souvenirs in store including the great Julia Gash Ottawa designs that we carry exclusively.
Related Reading
OTTAWA BUTTON STORE NOW OPEN IN LITTLE ITALY
CELEBRATE RECORD STORE DAY AND OTTAWA'S THE RECORD CENTRE
JOIN ROBOT FIELD TESTS THIS SUMMER WITH BOWIE AND ROBOT MISSIONS
Read more »
New Sizes Available for the Flex1000 Multi-Die Button Maker | Multi Size Button Maker May 30 2019
You've asked if there will be any other sizes for our popular Flex1000 hobby button maker and finally we can say YES!
The only all-metal button maker that makes more that one size now just got even better. There are TWO new sizes - 1-1/2" and 1-3/4"!!

This robust entry-level button maker is the perfect machine for anyone looking to make a little bit of everything. Being made without any plastic parts, this machine is the sturdiest hobby maker out there and by being a multi-size button maker - you change the dies to make different sizes of buttons - it is also among the most versatile button maker.
The new sizes - 1.5" and 1.75" - now join the 1", 2.25" and 3" sizes that the FLEX1000 button maker makes.
If you already have a Flex1000 machine you can just purchase one (or both) of the sizes as an add-on package that includes button parts and the cutter.
Adding to the versatility of this hobby maker, you can choose to start with just the standard 2.25" start-up kit or you can choose to get every size available all at once.
The Flex 1000 button maker is a hobby maker as it is perfect for making small amounts of buttons at a time. If you are a business or a school or anyone looking to make lots of buttons at a time or over a long period, then you still should consider buying one of our standard button makers.
Check out this video to see the Flex1000 in action:
Come in to one of our 3 locations to make a button with this machine and see how it works. We now have locations in Toronto, Ottawa and Napanee.
Read more »
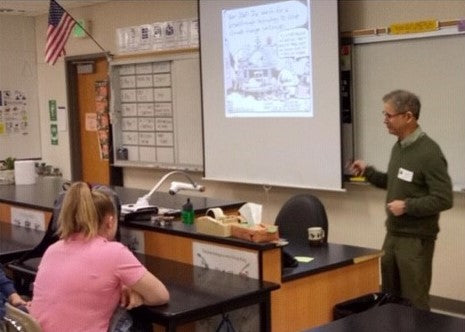
Educating Youth About Environment with MLK & Buttons | Custom Buttons Seattle May 17 2019
Climate change is happening and there are constant reminders around us every day, but as a collective human population, we are having trouble changing behaviours and working to fight against the environmental changes we see.
Barak Gale is a Seattle environmentalist who is both looking to the past and to the future - bridging the two - in order to spur conversations about climate change and to inspire change.
Gale visits high schools in the city with his Climate Reality presentation to get students thinking and talking about climate change. It is not an all doom-and-gloom presentation, as he offers humour and personality into the the talks. He also seeks to engage the students and have them contribute to the conversation, which they do.
It is an important task that Gale is taking on as one poll has indicated most teachers in the United States are not teaching their students about climate change, but 4 in 5 parents wish they did.
He has also found the right audience by targeting the voters, consumers and policy makers of the future, as another study indicates the best way to get to adults who don't seem to care about climate change is through educating their children.
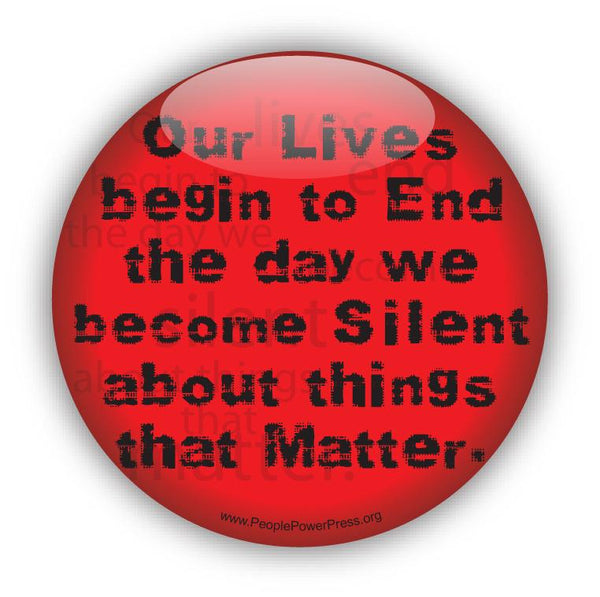
It is at the end of Gale's presentation that he looks to the past for wisdom through Dr. Martin Luther King Jr. He has this quote printed on custom red buttons:
"Our lives begin to end the day we become silent about the things that matter."
He has a challenge for the students in order for them to get a button. Anyone who pledges to talk to their family and friends about climate change gets a button.
The buttons are always scooped up.
It is an inspiring response to Gale's work as he continues to talk to hundreds of Seattle-area students.
(This button features this People Power Press civil rights movement design. It is also available as a white button and as a black button.)
Gale is a member of the Thurston Climate Action Team so you can find out more about their activities and resources in the following ways:
Website: www.thurstonclimateaction.org
Facebook: @ThurstonClimateAction
Instagram: @thurstonclimateactionteam
Twitter: @ThurstonClimate
YouTube: Thurston Climate Action Team Channel
Related Reading
JOIN ROBOT FIELD TESTS THIS SUMMER WITH BOWIE AND ROBOT MISSIONS | CUSTOM BUTTONS OTTAWA
FARM FISHING PROTEST BUTTONS | CUSTOM BUTTONS NOVA SCOTIA
EARTH LOVE PIN PACKS: CAN YOU DIG IT?
Read more »
Buttons Get Engagement at Trade Shows | MacEwan University Design at Skills Canada Alberta May 15 2019
Over 700 high school and post-secondary students from 50 communities across Alberta showed up in Edmonton to learn about skilled trades and technology careers while also taking part in the Provincial Skills Canada Alberta competition. The province's new premier Jason Kenney was also there to try his hand at a few trades.
Edmonton's MacEwan University's School of Design was also on hand to greet the students - with button makers.
MacEwan Design wanted to be at the event to show visiting students what a career in multi-disciplinary field of design could look like. And they used button making to get the students engaged in thinking about design and what it means to them.
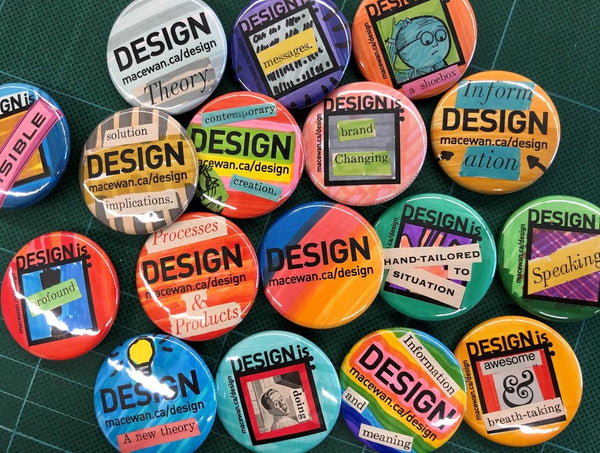
Students were given pre-cut paper with different black and white designs that they could bring to life with their own colours and drawings and words. They also had other materials to cut out words and designs to make a varying array of buttons showing love for design.
Looking at MacEwan Design's Instagram and Facebook pages, you can see that the buttons were a hit and students were very engaged in making loads of great-looking buttons.
MacEwan University is located in Edmonton and offers a variety of programs, which you can find out more about here.
Skills Canada Alberta is the provincial arm of Skills Canada, which was created to promote skilled trades and technologies among youth across Canada.
How to Get Engagement at Trade Shows with Button Making
If you are tasked with running a booth at a trade show or conference or any kind of event, you want to attract attention and invite people into your space.
Popular ideas include giveaways, draws for big prizes, promotional freebies like pens and some good candy.
But if you really want to give people a reason to stay at your booth so that you can talk to them, button making is a great idea just as MacEwan Design discovered at the recent Skills Canada Alberta event.
Button making booths drive engagement for a number of great reasons.
1. Button Making Gives People Something To Do
Inviting students and others to engage through a fun and easy activity is less awkward than saying hi and hoping attendees will engage that way.
2. Making Buttons is Accessible for Most Ages and Abilities
Button making is a simple activity that most can take part in, in some way. The process is simple and fun and can be done hand-over-hand so no one is left out and there is no large learning curve.
3. Button Making is Fun and Different From the Usual
Stand out with a button maker! Making buttons is different from free pens and other giveaways typical of trade shows and events. Many people have never made a button and there is a lot of satisfaction in pressing that button, as simple as it is to do.
4. Lets Customer Create Their Own Freebie
Use branded black and white templates with your own logo or message so that even if attendees get to decorate by adding text, colours and their own images just as MacEwan University did, they are still walking away with a promotional item.
Contact us today if you are ready to add button making to your next event. You can purchase your own machine or rent one of our machines. We can work with you to find a solution that fits your budget!
Read more »
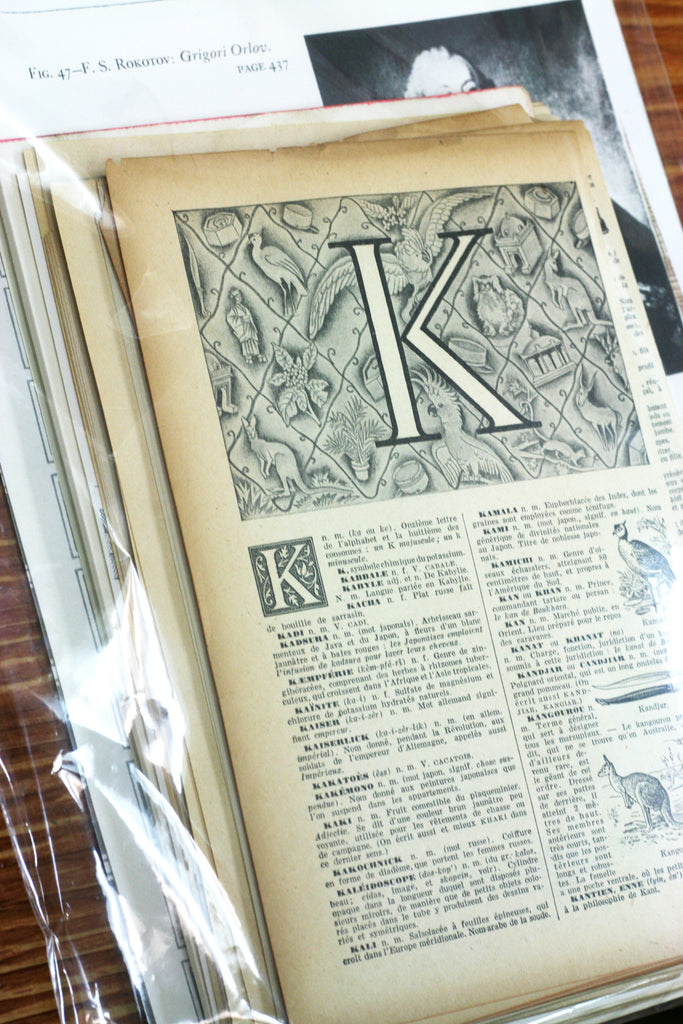
How to Make Buttons (and Other Stuff) With Old Books | Vintage Book Buttons April 15 2019
Somewhere along the way we came into possession of a large (really large) collection of vintage books. Many are decades old and cover a range of topics.
Instead of letting them sit around collecting dust we have been using them to upcycle into new products like fridge magnets, mirrors and notebooks. And now we thought we'd share the wealth of these books with you!
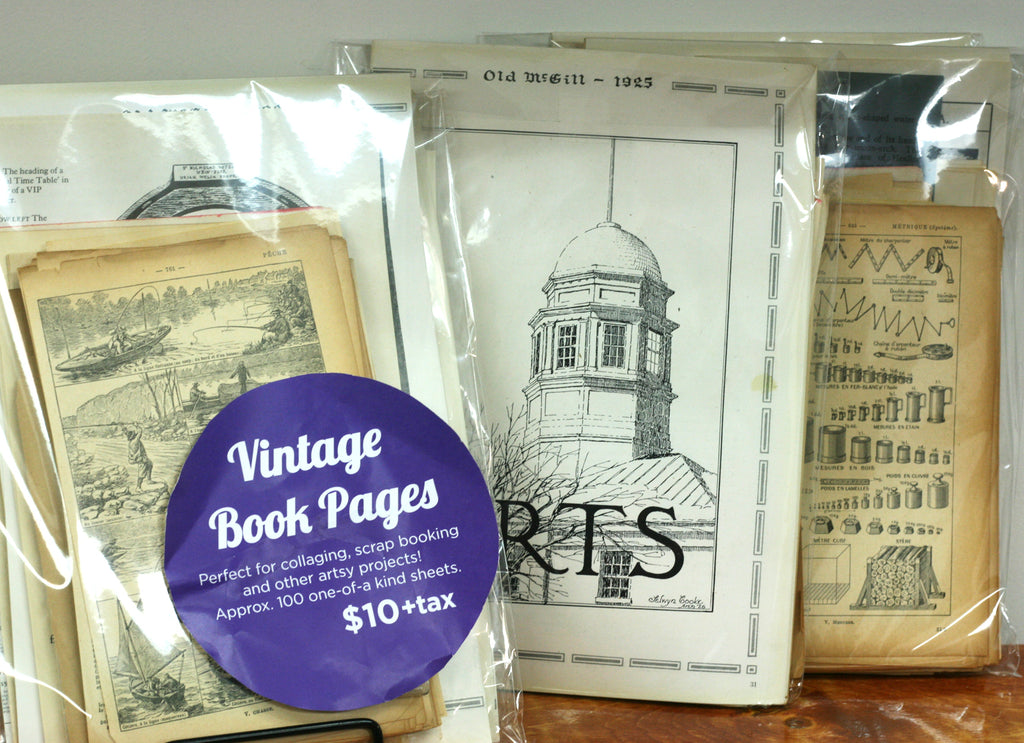
When we make the upcycled notebooks, the books original pages get removed so we can add the blank note paper. And we get too many pages to be able to make products with.
So we've packaged them up into vintage book pages bundles available online and in our Toronto store for anyone who likes making new things from old like we do!
The thing with making buttons is that you do not have to print our your artwork all the time. You can use scrap paper or wrapping paper and even some wallpaper as long as the pages are not too thick. The key here is the thickness of the paper. Button makers are designed to only press a certain thickness.
If you press something think like cardstock and some photo papers, you will find that you machine will have trouble pressing the button pieces together tightly.
And even if you do manage to press a thicker paper with your machine you may over time actually stretch the machine's die so that making a regular old button now is difficult. The press won't be nice and tight, which means your button may come apart after pressing.
But vintage book pages are just fine to use with your button maker. And some old books include beautiful images and drawings you just don't see anymore so the result can be nostalgic and romantic.
Do you have any old books laying around the house that you just know you aren't going to read again (if you ever did), but you can't fathom the thought of tossing the book out? Try some fun new products using your button maker. Think coasters (for the 3.5" machine only), magnets and mirrors.
And don't forget to tag us on Instagram or Facebook so we can see what you are making. We really love to see what you are creating.
Related Reading
UPCYCLE INSPIRATION: POCKET MIRRORS MADE WITH PORTRAITS FROM VINTAGE BOOKS
DIY INSPIRATION: FINE GENTLEMAN UPCYCLED VINTAGE COLLAGE FRIDGE MAGNETS
DIY PROJECT: MYSTERY SERIES POCKET MIRRORS
![]()
![]()
![]()
![]()
Read more »
Celebrate Oh Susanna, Indie Record Stores on Record Store Day | Band Buttons Ottawa April 11 2019
Welp, whether the temperature says so or not, there is another sign that Spring is here - Record Store Day is this Saturday, April 13th.
And there is stuff happening all over the world as music lovers are invited to get out and visit their local independent record shop.
This is the annual event that sees indie stores offer special deals and live performances.

Ottawa's The Record Centre is one shop that will be taking part in Record Store Day in a big way.
If you are a fan of Canadian music, there is going to be a special live performance to celebrate the 20th (whoa time flies) anniversary of Oh Susanna's Johnstown release. To mark the milestone, in addition to the live show, the album will be available for the first time on vinyl. Alan Neal from CBC Radio Ottawa's All in a Day will be on hand as well to do an interview.
We made some special buttons for the day, in 3 different sizes: custom 1-inch logo pins, 1-1/2" square buttons and 1-3/4" x 2-3/4" rectangle buttons.
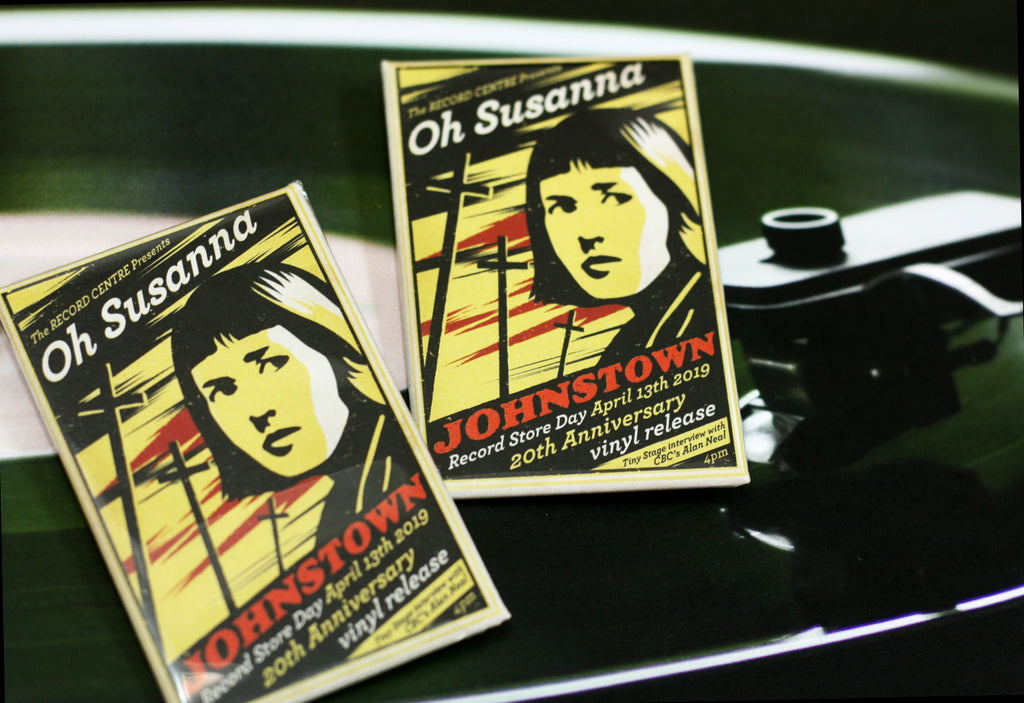
The Record Centre is the kind of place this day was meant to celebrate. It is a gem of a store located in Ottawa's arty Hintonburg neighbourhood.
The shop is run by John Thompson who, prior to opening the store, had been buying and selling vintage vinyl and vintage audio equipment online. In addition to all the great vintage stuff, The Record Centre carries new vinyl too. The selection is not sparse with 1000s of titles in stock and new titles are being added all the time.
Find Out More About The Record Centre
Facebook: @TheRecordCentre
Instagram: @threcordcentre
Website: www.therecordcentre.com
Listing of Record Store Day 2019 Events
If you are not in Ottawa, but curious to know what Record Store Day events are happening, you can see a list of events in Canada and in the U.S.
Related Reading
TORONTO METAL BAND SMOULDER TO RELEASE NEW ALBUM | CUSTOM BAND MERCH IDEAS
FANTASTIC TORONTO COMICON BUTTONS BY ARTIST LEANNE DAVIES
![]()
![]()
![]()
![]()
Read more »
Toronto Metal Band Smoulder to Release New Album | Custom Band Merch Ideas April 10 2019
If you are into metal and/or the Toronto music scene, we have a recommendation for you. One of the perks of making band buttons is getting to hear music we might not otherwise know about. That is how we came to learn about Smoulder, a Toronto-based metal band that has some new music coming out. And yes, you should check them out.

The album is called Times of Obscene Evil and Wild Daring and is available for pre-order now. We don't wanna be too pushy here, but they have a bunch of cool band merch that is available if you pre-order the album, and some of the exclusive pre-order bundles are already sold out.
The custom 1.25" buttons we made featuring their album cover are one of the items available as part of the bundles. But there are t-shirts, vinyl records and patches among the other band merch.
Smoulder describes themselves as "epic power doom in the tradition of Tales of Medusa, Gates of Slumber, and Solitude Aeternus" and they feature a great female lead singer.
You can learn more about them here:
Website: www.smoulder.bandcamp.com
Facebook: @smoulderdoom
Instagram: @smoulderdoom
The band's album sales strategy is a great one.
You want to be able to offer you fans - especially fans that are prepared to pre-order your stuff - something special.
Band buttons - 1-inch and 1.25" are wthe sizes we recommend - are super affordable band merchandise that fans are into. You can give them away with album sales and you can also sell them at shows.
Reach out if this is something you are thinking about and we can best guide you. The album design for Smoulder is awesome and detailed so the 1.25" gave them a bit more room to display the artwork, but often the 1" works better for other designs.
Related Reading
A PERFECT SPRING SOUNDTRACK AND CUSTOM 1" BUTTONS FROM FALLEN LOVE RECORDS
SPOTLIGHT ON THE BAND SALES: 1" BUTTONS WITH COLOURFUL CUSTOM COLLAGES
![]()
![]()
![]()
![]()
Read more »
Ontario #StudentsSayNo Student Walk Out on April 4th | How to Make Protest Buttons March 29 2019
If you are regular readers of this blog, you know we mention the button's strong history of being a tool of politics and protest.
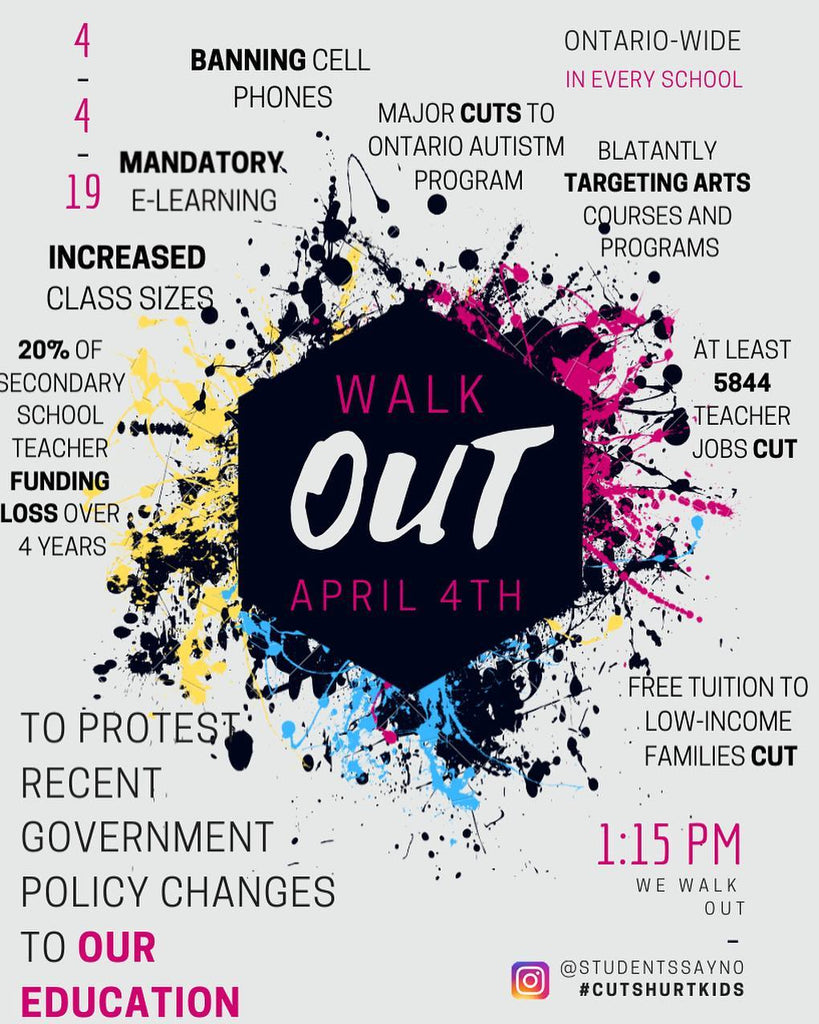
Well, there does seem to be a strong wave of button activism happening right now. And next week will be another opportunity for buttons to be part of a protest as students across Ontario walk out of their classrooms on April 4th to protest changes in education happening in the province's schools.
Some of the changes being made by Premier Doug Ford's government that are under protest include the banning of cell phones from schools, mandatory e-learning, larger class sizes, reduced staffing levels and the reduced funding or cutting of various programs and initiatives, including the Ontario Autism Program and Ontario Student Assistance Program (OSAP).
If you are looking for more information about the planned walk out and what is being protested, you can find out more from the official #StudentsSayNo organizing team. They have resources and information for anyone wishing to take part or organize a local protest. They also have active Instagram and Facebook pages where the conversation around education changes is happening in real time.
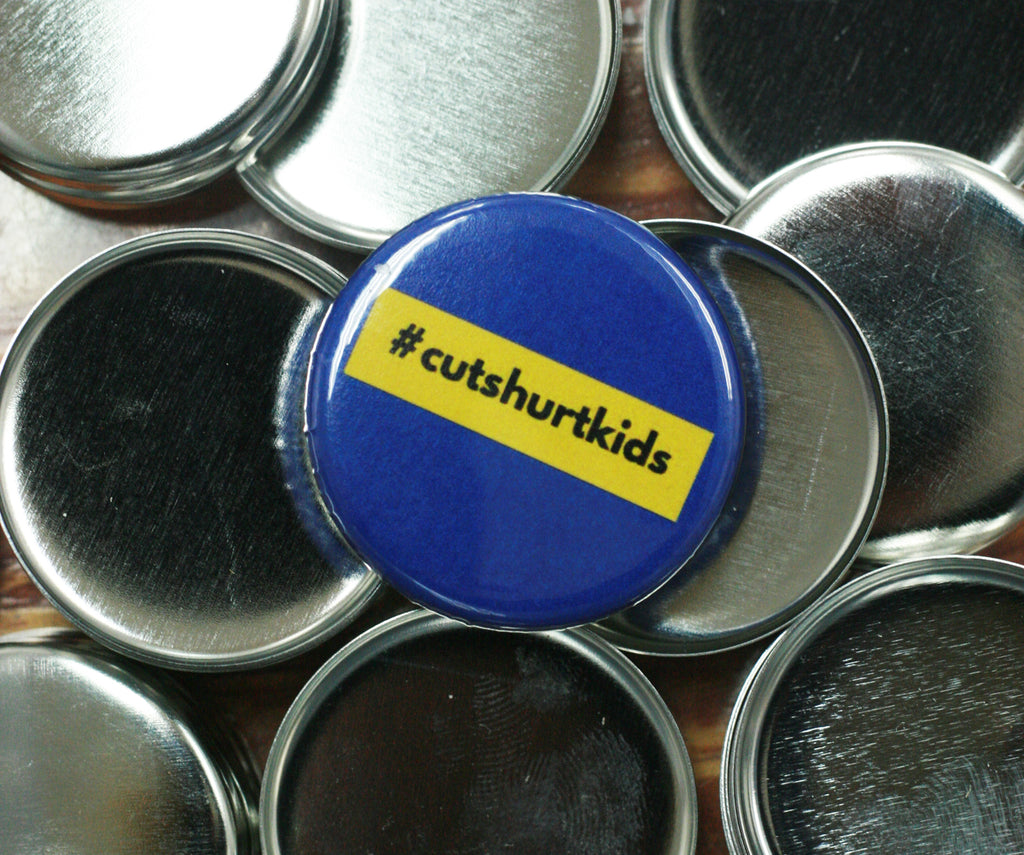
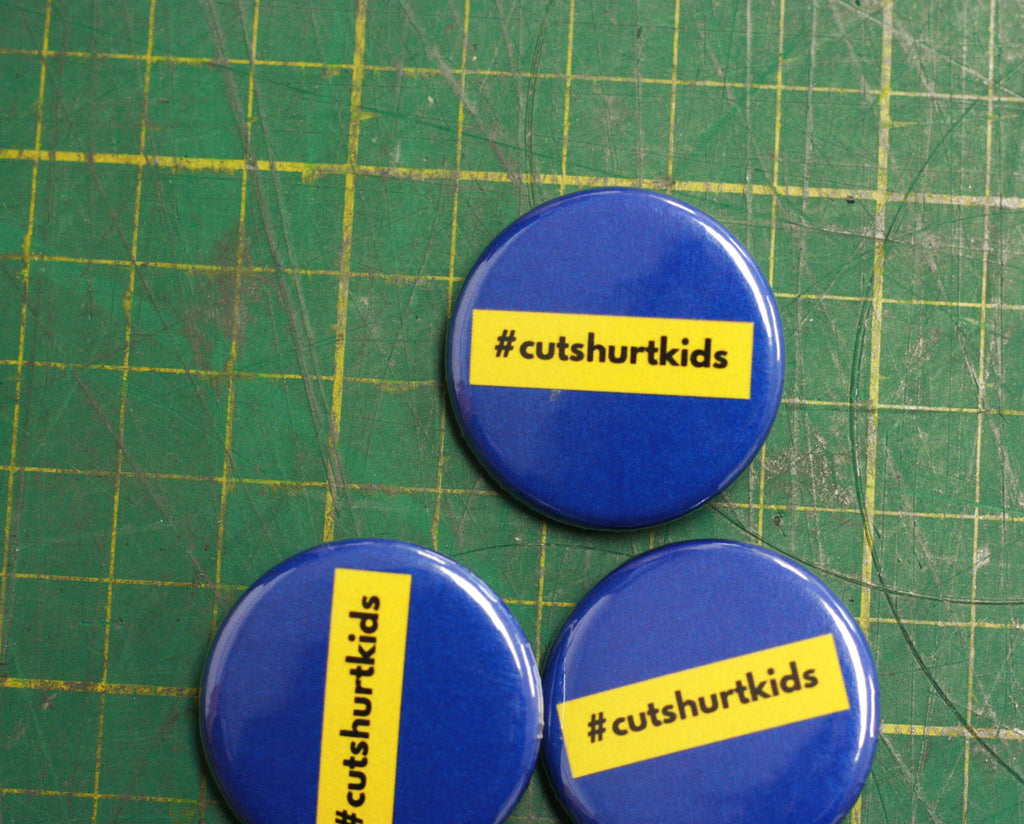
You can also follow and use the hashtag #cutshurtkids to join the conversation.
Now if you are planning on being part of this student protest, or another, and are thinking of including buttons, we can help.
Here's how to make buttons for your protest:
1. We make them for you. You can submit your designs, which can be as simple as the one shown here, to us and we can make your buttons for you super fast in time for April 4th.
2. Use your school's button maker. See if your school or another local school already has a button maker and use it to get making buttons for the walk out. If you need to purchase supplies, find out what kind of button maker the school has before you contact us and then we can hook you up with all the parts you need to make them!
3. Rent our button makers. If you are students from Ottawa or Toronto, you can come into one of our stores to rent our button makers and make your own buttons. You can use the machines in our store space or you can rent the machine for a day or two out of store.
Start designing your protest buttons using our templates, with free online design programs like Canva and Button Designer.
If you have any questions or need any help with your protest buttons, reach out to us please. We are here to help!
Related Reading
Campaign Buttons the Original Twitter? A Look Back at Election Buttons
How to Create Buttons for Your Political Cause
We Love Our Teaching Assistants | Buttons for Striking Teaching Assistants
![]()
![]()
![]()
![]()
Read more »
A Look at Former Prime Minister John G. Diefenbaker | Custom Buttons Saskatchewan March 27 2019
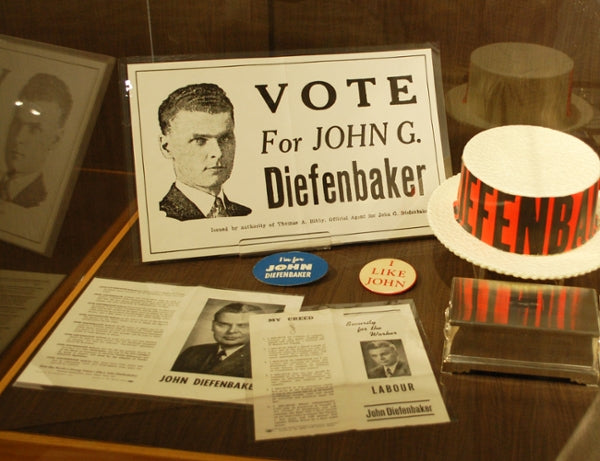
While so much focus in the news is on the upcoming federal election and the drama surrounding current Prime Minister of Canada Justin Trudeau, the face of a former PM came through the shop, via some buttons we got to make for the Diefenbaker Canada Centre in Saskatoon, Saskatchewan.

The Right Honourable John G. Diefenbaker was prime minister of Canada from 1957 to 1963. Canada's 13th prime minister was a graduate of the University of Saskatchewan, is buried near his alma mater and bequeathed many of his personal items to the school so it only seems fitting that the University of Saskatechewan is home to the Diefenbaker Canada Centre.
The DCC houses those personal items, but is also a larger celebration of a united Canada that is strengthened by its diversity, which was Diefenbaker's dream. Its mandate is to build on this legacy by celebrating citizenship, leadership, human rights and Canada’s role in the international community.
The centre hosts various exhibits throughout the year and offers free admission so that everyone can access them. Buttons are part of the artifacts house at the DCC (there are some visible in the image of an exhibit below) as buttons and politics have long gone hand-in-hand.
"I have but one love, Canada. One purpose, its greatness…one aim, unity from the Atlantic to the Pacific." - R. Hon. John G. Diefenbaker
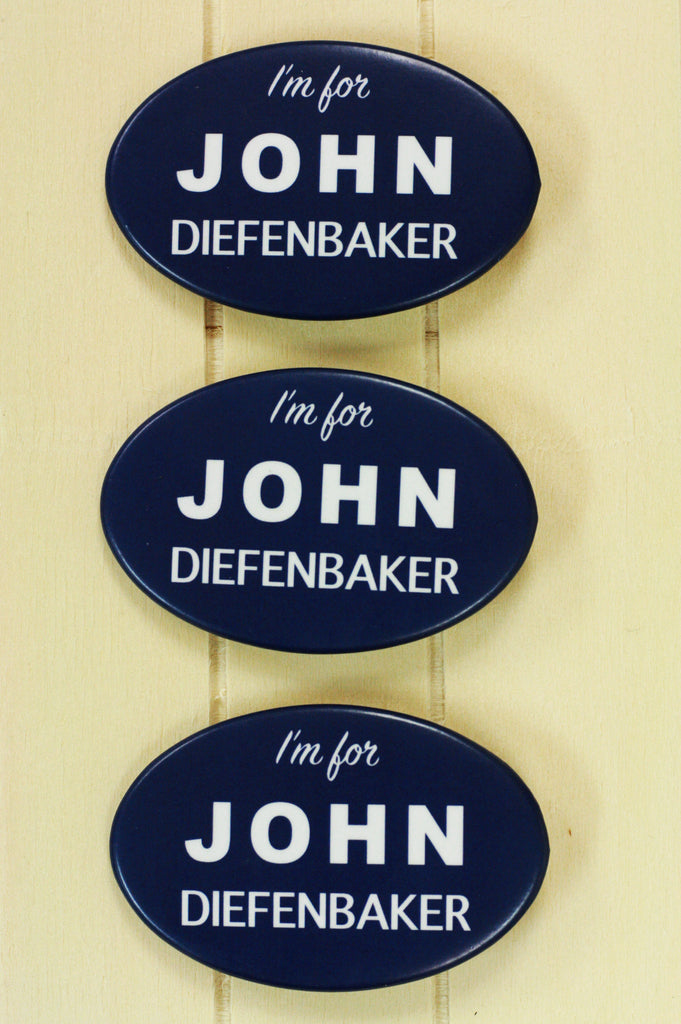
These new buttons we've made for the DCC are both a throwback to old campaign buttons and a tribute to the man they helped to elect.
Fun Fact: The DCC is also home to the Little Stone Schoolhouse, a historic building that was actually Saskatechwan's first school and public building. It was built in 1887 and visitors take a look inside and travel back in time.
If you have a trip to or through Saskatechewan planned, be sure to hit up the DCC to learn more about Diefenbaker, Saskatchewan and Canada.
Find Out More About the Diefenbaker Canada Centre
Website: www.usask.ca/diefenbaker/
Instagram: @diefcentre
Facebook: @diefenbakercentre
Twitter: @DiefCentre
Related Articles
If you are looking for more election buttons and election button history, check out these related articles here:
Campaign Buttons the Original Twitter? A Look Back at Election Buttons
How to Make Your Election Buttons Stand Out With Special Finish
THE Guide to Election Buttons and Campaign Buttons
How to Create Buttons for Your Political Cause
![]()
![]()
![]()
![]()
Read more »
Industry Training Authority Youth Buttons for Skilled Trades | Custom Buttons British Columbia March 22 2019
"So whaddya wanna do with your life?"
This is the lovely question we get asked and ask ourselves throughout our youth ... and beyond. Maybe we never figure it out or keep coming up with different answers over the years, but it's always nice to get a bit of guidance, direction and support.
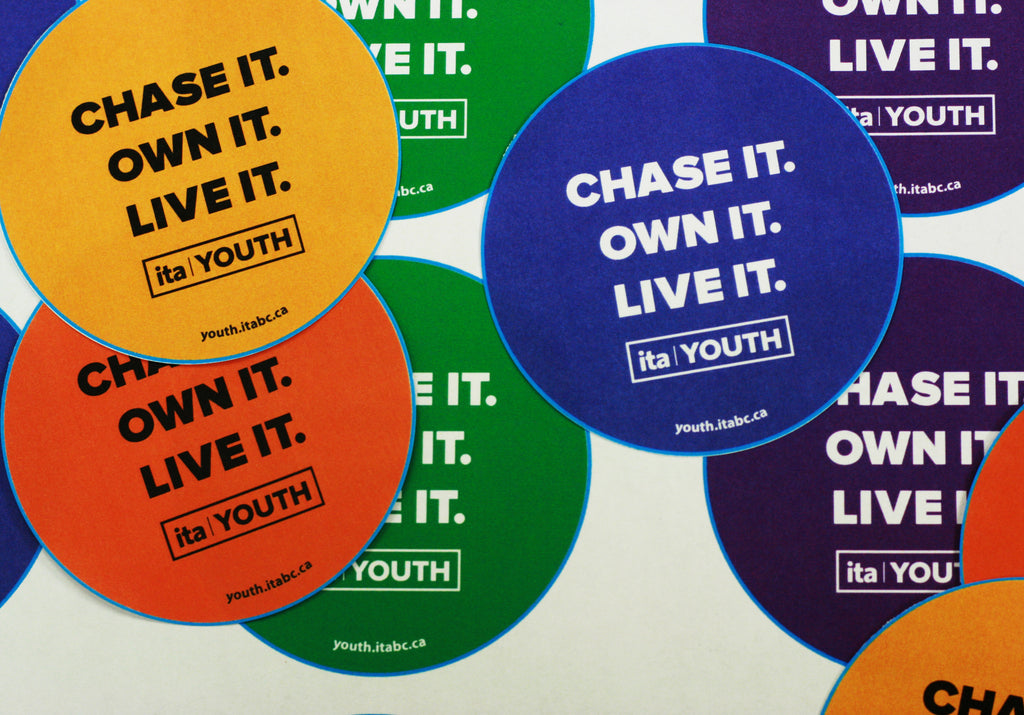
The good folks at British Columbia's Industry Training Authority, through their ITA Youth Trades Programs, are helping youth in the province learn about training for a career in the skilled trades well before they leave high school.
Skilled tradespeople make our lives better in many ways and are very necessary in our society. And it is the mission of ITA Youth to help show youth what is possible through a career in a trade.
In BC alone it is projected that there will be over 1 million job openings by 2025 and over half of those available jobs will be in the skilled trades.
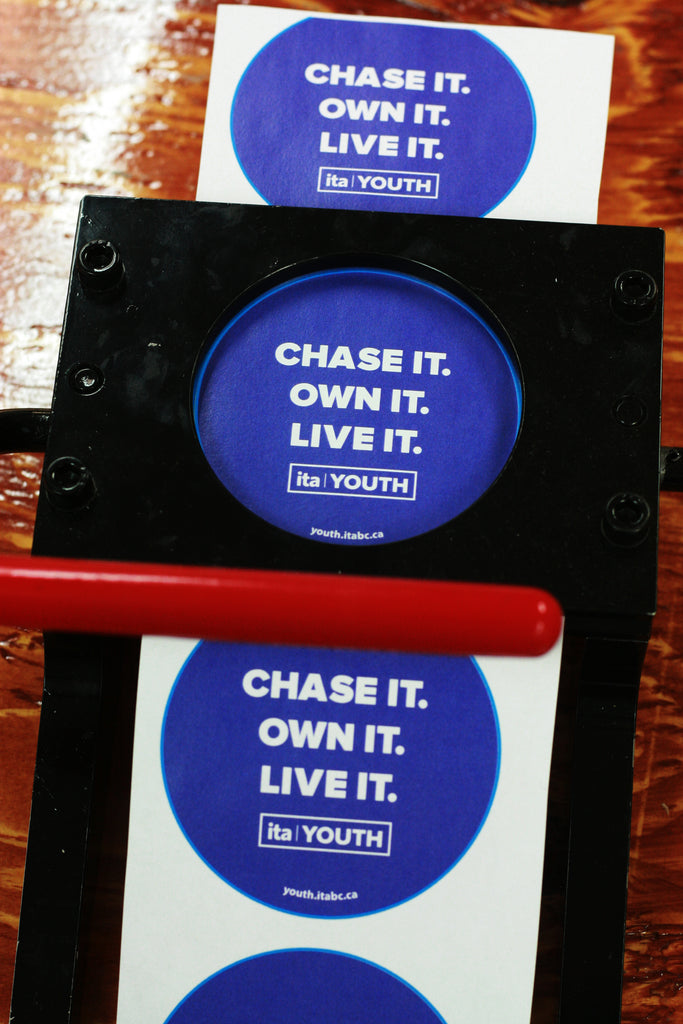
We work with the ITA Youth team to print and cut custom artwork for their button making. They have a button maker, but cutting artwork can be time consuming and potentially costly if you don't have a cutter or even if you do and you have a lot of cuttIng to do! We offer pre-cut artwork services to just save you time and energy. Then you get perfectly cut paper circles ready to press, which is especially handy for making buttons at events.
Button making is a a great hand's on activity for an event and is enjoyed by all ages. Get people engaged and then they get to take home some handmade swag.
If you'd like to learn more about what ITA Youth does you can check out their website and various social media profiles. Educators and employers will also be able to find information and resources on the website.
Website: www.youth.itabc.ca
Twitter: @ita_youth
Facebook: @IndustryTrainingAuthority
Instagram: @ita_youth
YouTube: itabctradestraining
![]()
![]()
![]()
![]()
Read more »
How to Make Your Election Buttons Stand Out | Special Finish Campaign Buttons Canada March 21 2019
We recently spotted an early 2000's Paul Martin campaign button in the archives of York University, and thought that this would be a good time to talk about special finishes for pins and buttons.
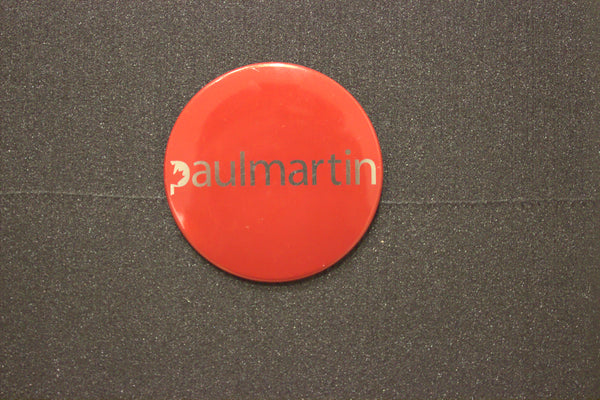
(Image Source: York University)
Although we don't know this for sure, we're pretty-pretty sure that this button was made with dura-lar and gold foil paper. To create buttons with a special finish like this one, we simply print the design on plastic acetate-like sheets that we can layer on top of all different kinds of special papers and foils.
For the golden Paul Martin button, the orange must have been printed on dura-lar, while the text was left blank/white. Once the dura-lar was placed on top of the foil, that eye-catching golden touch was created.
With this method, you can create a bunch of different finishes and effects for your buttons - it'll sure help the voters remember you!
What Is Dura-lar?
Dura-lar is a printable plastic film that works with most printers. When making regular buttons, we print the button designs on regular paper. The paper is placed on top of a metal shell, and on top of the paper we place a little plastic mylar cover before pressing everything together with the pinback.
But when we make special finish buttons, we print the button design on dura-lar and place it on top of the paper. Before printing, we mirror reverse the designs - so that we can place the print "face down". This way the ink ends up on the "back side" of the dura-lar, keeping it safe and protected from wear and tear, wind and weather.
Fun Foils Give Your Button an Eye-Popping Finish

Examples of some foils or specialty papers to use with button making and dura-lar includes:
- Holographic Foils - can make your buttons sparkle, shine and glitter.
- Metallic Foils - can make your buttons shine like gold, silver or bronze.
- Fluorescent Paper - when you're looking for extremely vibrant, neon colours, but your printer can't produce it, fluorescent paper will sure give you a satisfactory result.
- Glow-in-the-Dark Foil - NOW THIS IS FUN! With glow-in-the-dark foil or tape, you can create a design that lights up in the dark.
- Reflective Foil - make your buttons reflect the light! This doesn't just look cool - it can also help car drivers spot pedestrians from far away!
Button Design Tips for Dura-Lar and Special Finish
Designing buttons for dura-lar printing is really fun, and the finished product looks amazing. That being said, they are a trickier to design than buttons printed on regular paper.
Button designs with dura-lar and special paper or foil tend to be most successful when paired with simple clean digital artwork. Black and solid bold colours look great!
Here are some quick tips for making your dura-lar button designs stand out and look their very best:
- Keep your designs simple, with just a few elements and no small details.
- The fewer colours you use, the better.
- Make sure the shapes in your design aren't too small.
- If you play around with negative space, you can create some really cool effects!
- Outline your image with a dark colour for optimal image definition. This picture shows the same mermaid design with two different treatments. The design on the left has a transparent outline which makes it tricky to see the mermaid. The design on the right has a black outline, which makes the mermaid stand out and look extra awesome!

This article was first published by our friends at Custom Buttons Ottawa. You should also check out also our comprehensive Guide to Election Buttons.
Read More:
Order Holographic Foil Paper from People Power Press
Order Dura-lar Sheets from People Power Press
Glow-in-the-Dark Buttons for Toronto Fringe Festival
Read more »
Election Buttons Are The Original Twitter | Campaign Button Makers February 14 2019
Twitter, as we all know very well now, is the place where lots of folks talk politics and make political statements. But before Twitter, how did people stake their political claims? Buttons of course.
We have noted many times on this blog the role that buttons have had in the history of elections, but let's look at some campaigns from the past that used buttons to really change the way conversations happen in election, much like how Twitter, and social media in general, have changed the modern political discourse.
In the 1940s, U.S. President Franklin Roosevelt was running for his third term against Republican candidate Wendell Willkie. Willkie was a long shot to win, but he was aggressive with his election campaign merchandise. His use of buttons, as seen in this Life article, for election were a highlight.
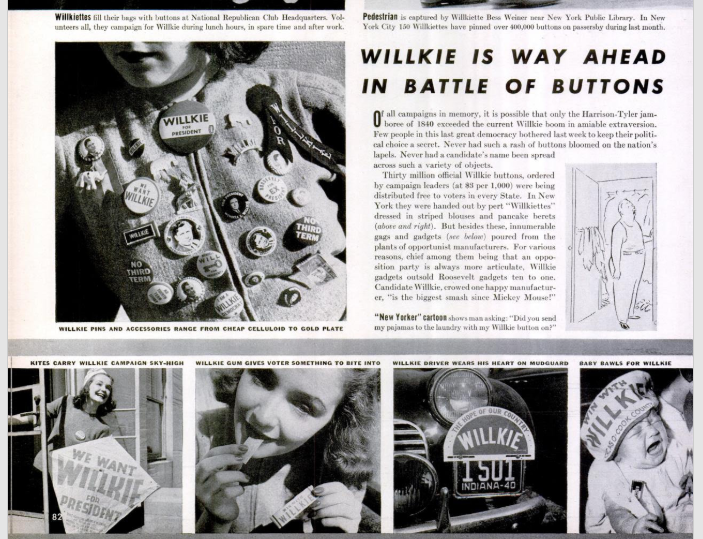
Here are a few of his button designs that ditched campaign slogans and were made to respond to election stories as they happened. Not as instant as Twitter, maybe, but the intention was the same.
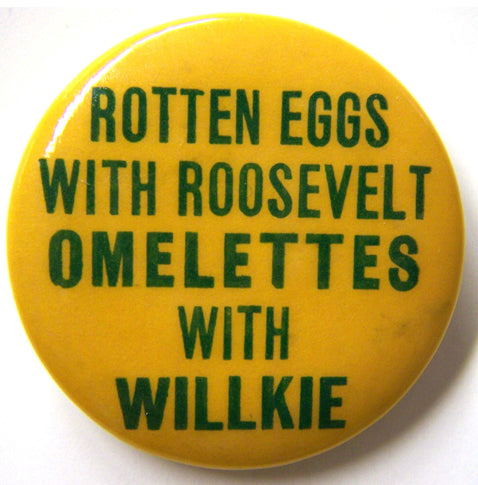

Campaign buttons have been around since 1790, but this is the election that changed the course of election campaigns with its new focus on catchy slogans and commentary. And now Twitter plays a heavy hand in political commentary, but buttons still remain as vehicles to push a political message and candidate's name and party in a tangible, very visible way.
And buttons continue to be one of the most affordable election products out there.
To read more about Willkie's buttons, you can check out some of the great coverage from 1940 here:
Willkie's Buttons (New Yorker)
Willkie is Way Ahead in the Battle of Buttons (LIFE)
If you are looking for more information about how to use buttons today in the upcoming election, check out our comprehensive Guide to Election Buttons here.
![]()
![]()
![]()
![]()
Read more »
Awesome and Affordable Gift Ideas for Valentine's Day | Valentine's Day Gifts Made in Canada February 08 2019
It can cost a lot to say "I love you" on Valentine's Day.
Consumers actually spend an average of over $600 to celebrate the day of love and this number has been climbing in recent years.
While we do think letting your significant other know that you love them is important, we are here to suggest that it shouldn't break the bank.
We have a whole roster of perfect gift ideas for Valentine's Day that will make your honey smile, but will not put stress on your finances.
Unique Valentine's Day Cards and Other Gifts
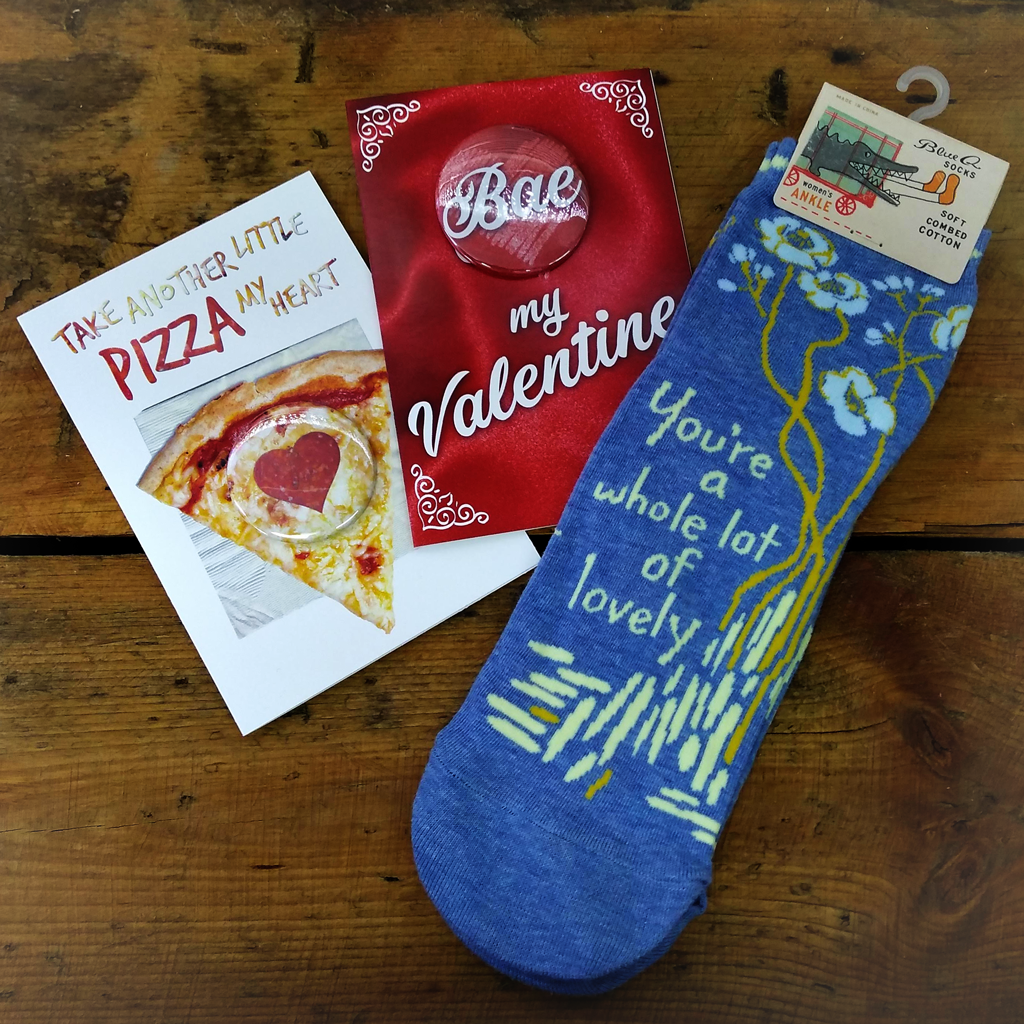
If you are going to buy a Valentine's Day card, at least buy one that stands out.
We carry a range of unique cards that are designed in house so you won't find them anywhere else. Being a button shop, many (not all) of our cards a button cards so you get a button as part of The cards range from funny to sweet so however you want to say "I Love You" on February 14, we have got you covered!
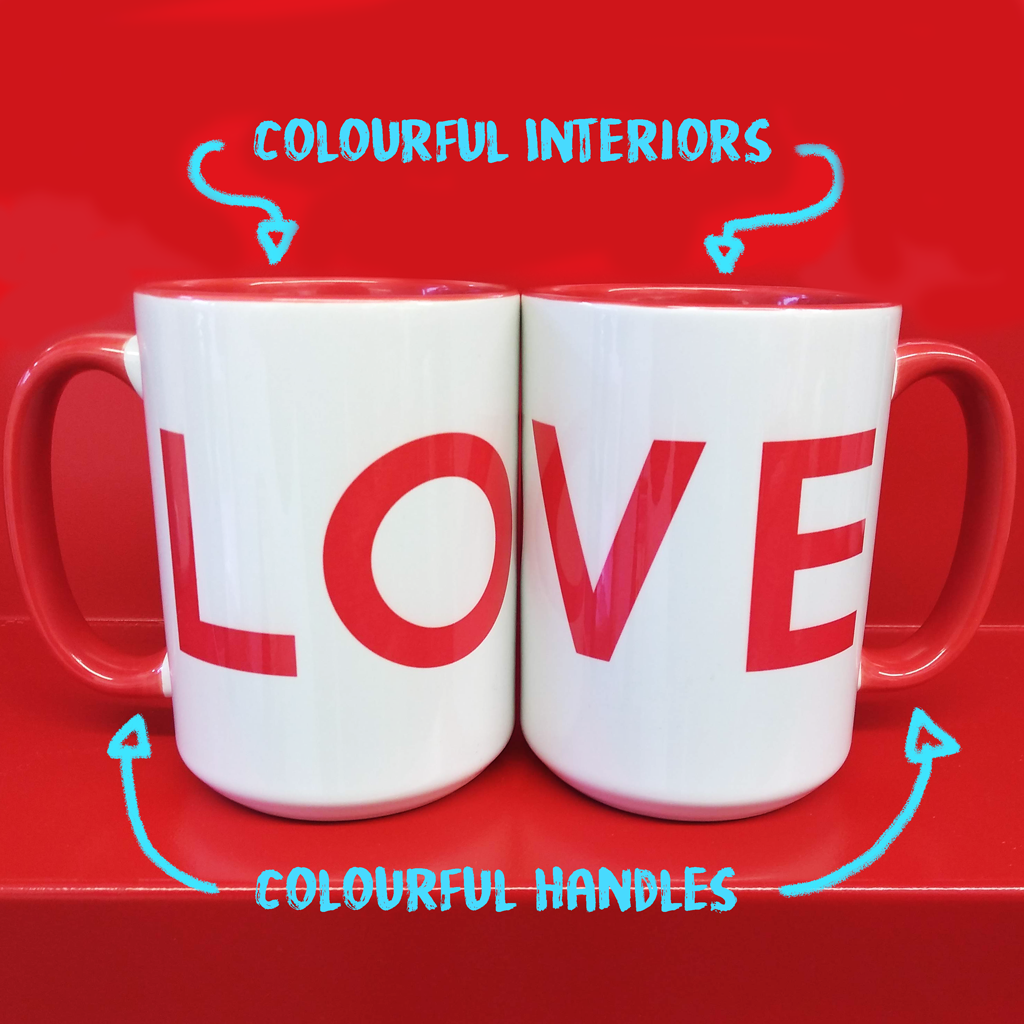
Love-ly Valentine's Day Mugs
Choose from a number of mug designs or customize your own (you will get extra points for personalizing your design) mug or mug set this Valentine's Day. Made on location in Toronto by What the Mug.
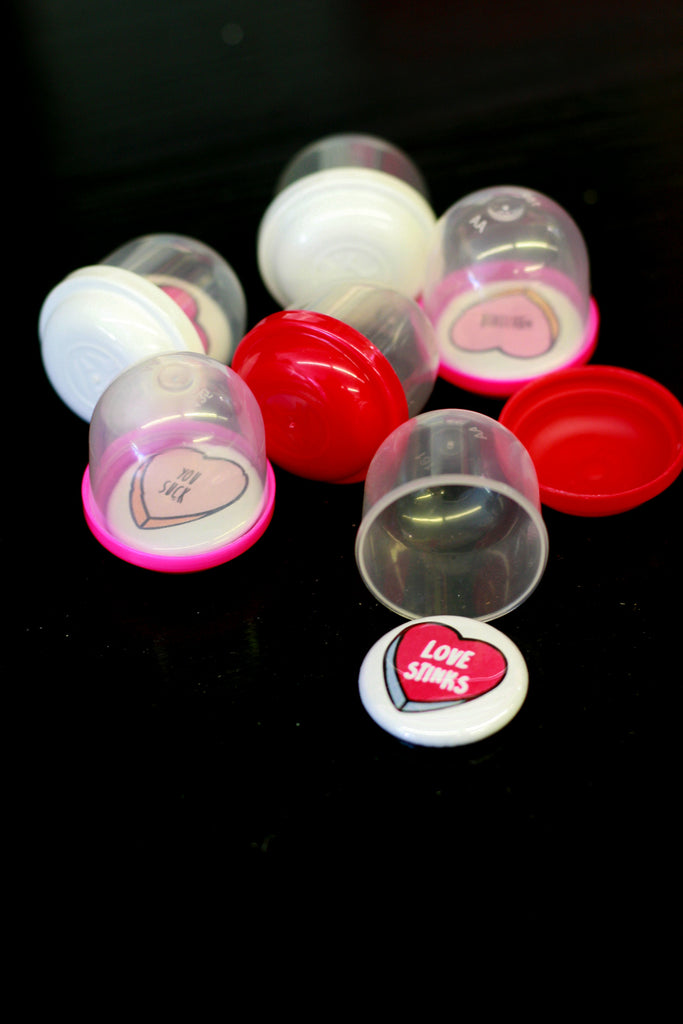
Anti-Valentine's Day Gifts
We even have gift ideas if you don't want to celebrate Valentine's Day.
Galentine's Day Gifts
We also have Galentine's Day covered if you will be celebrating your gal pals on Feb. 13.
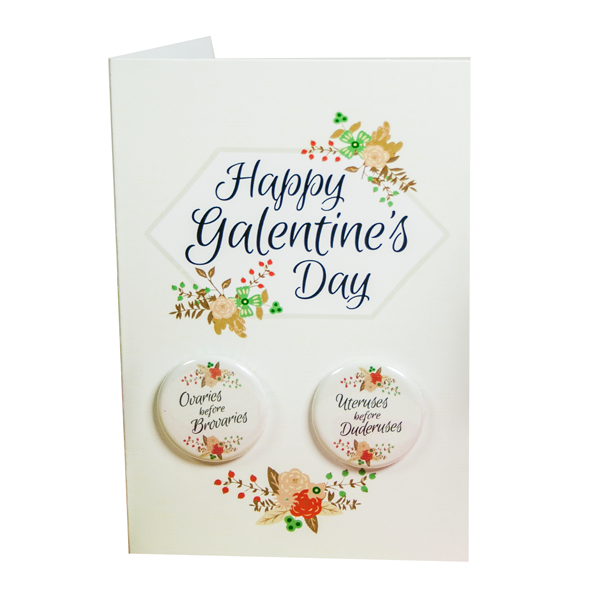
Come into our Toronto and Ottawa gift shop locations to see everything we have. We carry a wide range of novelty gifts so we are pretty sure you will find something just right for your Valentine.
![]()
![]()
![]()
![]()
Read more »
Find the Buttons with The Great Toronto Yarn Hop | Great Customer Engagement Ideas January 25 2019
The Great Toronto Yarn Hop is all about getting Toronto knitters out together in real life.
So it should be no surprise that they came up with this great idea to have their online followers find them - and their awesome 1-inch logo buttons - at various events at local yarn shops for another level of customer engagement.
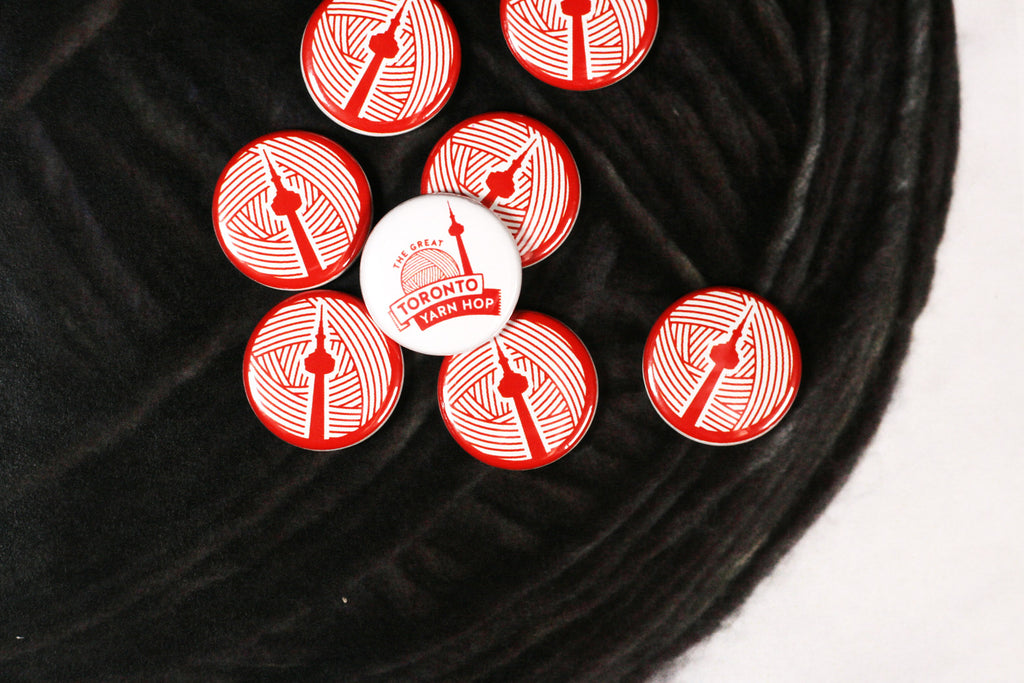
Fun Button Hunt for Customer Engagement In Person and On Social Media
Here's how it works:
1.Find Emily, their primary social media person, at local yarn shops and local yarn shop events.
2. Say "Hi!" to Emily and ask for one of the logo pins.
3. Take a photo there on the spot while wearing the 1" button and use the hashtag #TGTYH.
This is such a fun idea that is totally on brand for the group and easily gets an already engaged community another way to be involved and promote the brand. When followers asked how to snag a button, the rules stood. Come out to support independent local yarn shops and then share with the online world that you are there.
The buttons feature the Great Toronto Yarn Hop logo and are a fantastic looking promotional item, but in being only available in this game, they remain an exclusive giveaway.
This idea is great for other businesses too. Just adapt to your audience.
Engage Customers with A Local Scavenger Hunt
Other companies and organizations have used buttons for more of a scavenger hunt. Buttons are left in special spots. Followers will find the spots using online clues and then get out into the real world to collect the buttons. Then the successful button hunter will be rewarded in some way (gift certificate, products). And the entire adventure is documented online.
Custom buttons are great affordable promotional items, but things get really fun with you add some real world and online engagement element to get your followers actively promoting your brand with the buttons.
Here's more info about The Great Toronto Yarn Hop:
Website: www.thegreattorontoyarnhop.com
Facebook: @TTCKnitalong
Instagram: @the_great_toronto_yarn_hop
![]()
![]()
![]()
![]()
Read more »
How to Get Organized With Custom Labels, Clips and Magnets | Organization Tips for Office and Home January 16 2019
So it is a New Year and you said you want to clean up and get organized. Maybe you've been watching "Tidying Up With Marie Kondo" on Netflix. We feel you and we want to help.
Aside from buttons we make a number of custom products that will help you get organized at home, at the office and in the classroom. You can organize your stuff in an affordable way that still fits your style.

1. Custom Bull Dog Clips
Organize your mailboxes and organizational trays with these simple custom bull dog clips.
Have to keep stuff from multiple kids separated or maybe bills and other paperwork to file? These clips are super simple and sturdy to attach. The great thing is that they can also be moved around as needed.
2. Custom Magnets
Same as the custom bulldog clips, you can label and organize with fun custom magnet sets to easily label magnetic surfaces like filing cabinets and white boards.
Custom magnets are great for labeling at the office, in the classroom (have a magnet with every students name for duties board), as well as at home.
3. Custom Stickers and Labels
If you want to label items in the kitchen (spice jars, bins and containers), then custom stickers would be the best choice. These stickers really stick so they can be used to label toy room bins and items in your home office so you know what is what and everyone can find things easily.
4. Coming Soon - Flexible Magnet Sheets
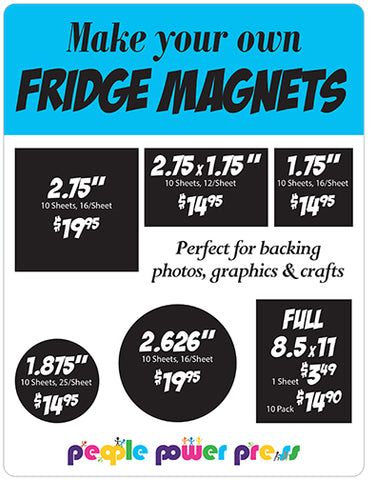
These are sheet magnets you can print on. These are not made with a button maker so there is no tin involved. Just the sticker sheet that is attached to the magnet sheet. In a variety of shapes and sizes.
Contact us for pricing if you would like to order these. Our pricing for this product will be on the website soon!
Great Item for Professional Organizers Too
If your business is organizing people's homes and/or offices, we do bulk orders or small orders. We also work quickly so you can provide an awesome custom product to your clients right away. Have questions or your own ideas? Get in touch with us today and we will be happy to chat with you!
If you haven't heard of Netflix's latest hit show, then here is the trailer for "Tidying Up with Marie Kondo." Yes, you really can watch a show about how to fold your clothes.
Happy organizing!
![]()
![]()
![]()
![]()
Read more »
University of Toronto's Faculty of Information | Buttons for Promoting Higher Education January 07 2019
Does the New Year involve a decision to head back to school? Learning something new and changing jobs/careers consistently show up on annual lists of top New Year Resolutions.
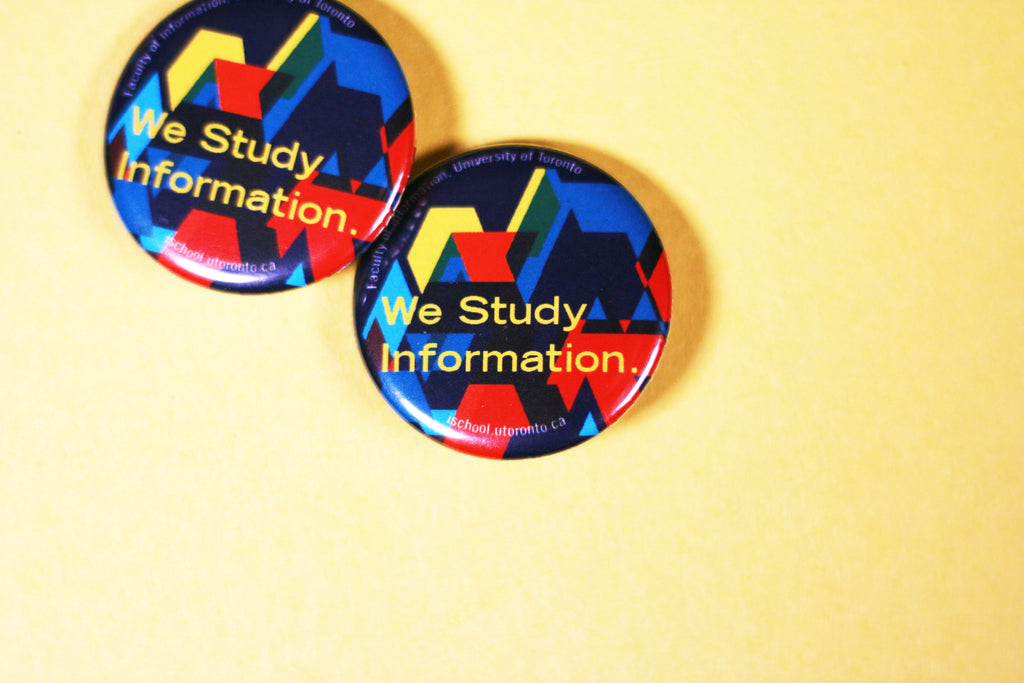
If you are thinking of hitting the books in 2019, but still looking to settle on what you want to study, The University of Toronto's Faculty of Information may have what you are looking for.
They are holding sessions about their various programs this Saturday January 12 and registration is still open so if you are curious, sign up to find out more!
The Faculty of Information is a Tier One Member of iSchool, an international association of universities that lead and promote programs for the information field worldwide.
Elements of Great Button Design
We made these awesome custom 1.25" buttons to promote their school and programs at upcoming fairs and information session.
These promotional pins are bright and bold, their message is simple and clear: We Study Information.
We love button designs like this: eye-catching and good looking design paired with little text to make the message clear. The school's name and website can be found in the edge text so the button is still informative, but the button's face isn't cluttered so that the message gets lost.
More Higher Education Custom Button Designs for Inspiration
This is What a Feminist Looks Like: Women's and Gender Studies at the University of Winnipeg
Fine Arts Buttons at the University of Lethbridge
How To Get More Information About The U of T's Faculty of Information
Website: www.ischool.utoronto.ca
Twitter: @UofTInfoFaculty
Facebook: @iSchoolToronto
Instagram: @iSchool_TO
YouTube: iSchoolUofT
![]()
![]()
![]()
![]()
Read more »
Introducing New Look Silicone Lubricant - Still a Button Maker Must-Have | Button Making Resources December 21 2018
We like to say a stick of lubricant is a button maker's best friend. And if you've made 100s and 1000s of buttons with your button maker you know what we mean.
For those of you familiar with silicone, there is just a change in that we are carrying a new brand. We will now be selling AGS Stick Lubricant. This replaces the Panef stick lubricant we have been carrying.
Why Do I Need Silicone Lubricant for My Button Maker?
Well-built button makers like the all-metal machines we sell are made to last, but with lots of use they will need some maintenance over time to keep them pumping out buttons.
Silicone lubricant is that handy tool that doesn't cost a lot and will last forever - you only need to use a bit at a time - but will assist when you find your buttons aren't pressing as cleanly as they did.
When and How Do I Use Silicone Lubricant?
When you notice buttons aren't crimping well (the mylar and paper aren't pressed together with the rest of the button smoothly) then it is time to add a bit of lubricant to your machine. You only need to put a small amount of the lubricant (like a glue stick) onto your finger and apply to just one spot on your machine. Like magic!
To see exactly where to apply the small bit of lube to your machine, check out this video:
Lubricant can - and should - be added to your hand press and your automatic machines. Here, with our automatic presses, we are adding a bit of lube every 100 buttons because they can pump out over 1000 pins in a single day.
As Recommended on The Button Guy Blog
This is the little button maker must-have tool that is recommended by The Button Guy.
![]()
![]()
![]()
![]()
Read more »
Horror Artist Kameron Doyle | Custom Bazaar of the Bizarre Show Buttons December 12 2018
If The Nightmare Before Christmas is more your holiday style then you may be looking for a different kind of craft sale this season.
Bazaar of the Bizarre: Frostbite is the holiday version of the delightfully unusual craft show that happens throughout the year in Toronto.

The latest edition is happening on December 15 and features handmade goods from a long list of vendors. One of the wicked vendors is Toronto fantasy and horror artist Kameron Doyle.
Doyle's paintings and sculptures feature a wide range of spooky characters - "anything you were afraid of as a kid."
She appears with her work at shows throughout the year and has her art put onto other items like these 1.25" round custom buttons we made for her, along with jewelry and other items. She also takes requests for commissioned work.
You can find out more about Doyle and see more work here:
Website: www.kamerondoyle.com
Facebook: @creaturesbykameron
Instagram: @creaturesbykameron
Custom Buttons - Affordable Products for Artists to Sell
Custom buttons are a great source of revenue for artists looking to offer affordable products for sale online and at art shows and conventions. Someone may not be able to purchase your original work, but as a fan they can pick up a handful of buttons to collect and pin on.
Buttons are also not complicated or expensive to ship so they are also another affordable product for artists to sell online on Etsy and other online stores.
To see some other great artists who have put their work onto a button check out these past posts:
Toronto Comicon Sqaure Buttons by Artist Leanne Davies
Cross Country Comicon Buttons - Calgary Comic Expo and Nothern Gamin Expo
![]()
![]()
![]()
![]()
Read more »
Farm Fishing Protest Buttons | Custom Buttons Nova Scotia November 22 2018
The Nova Scotia government has opened the door to a salmon farm expansion in Liverpool Bay, Nova Scotia, but scientists and local residents are not convinced this is a good idea.
Kelly Cove Salmon Ltd, a subsidiary of Cooke Aquaculture Inc., has been given an option to lease, which would increase their salmon farming operations dramatically.

While approval would still need to be given for the actual lease to be granted, residents and members of the scientific community are sounding the alarm that this would not be a good development for the coastline and environment.
While the company is currently doing research about the possible expansion, a group called Protect Liverpool Bay will be holding a protest at the Nova Scotia Legislature on Monday, November 26th. They will be wearing these bright yellow custom 1-1/4" protest buttons when they do.
Beyond the planned protest, they are active online and in the media with mission to educate people about what a larger fish farm could mean for the community and it's environment. The company already operates a smaller farming operation, but it is contended that the expansion would put too much pressure on the are and there has been criticism of how the company currently operates.
If you'd like to learn more about Protect Liverpool Bay and get information about the issue, you can check out their Facebook Page.
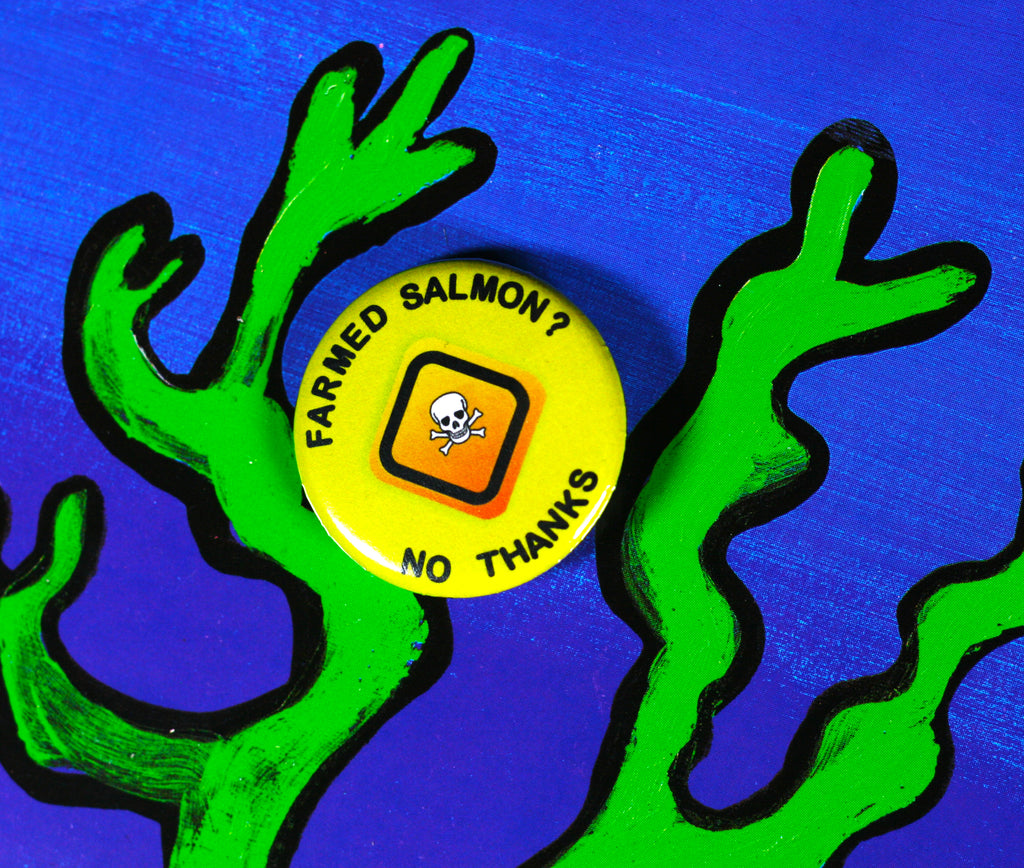
Here are links to some media stories to follow coverage of the issue:
Cooke Aquaculture Looks to Expand Sea Farming in Liverpool Ba (The Chronicle Herald)
Residents Concerned About Salmon Farm Expansion Near Liverpool (CBC News)
![]()
![]()
![]()
![]()
Read more »
Custom Fashion Pins for Pin-Up Brand Putré-Fashion | Custom Buttons Quebec City November 20 2018
When Isabelle Drolet was still in high school she started Putré-Fashion, a fashion company that has now grown to be available in stores across North America, Australia and more.
The clothes have a variety of influences including gothic, punk, pin-up and underground. The designs, while sometimes hard to categorize, are designed for comfort for all ages and body types.
Along with the clothes Putré-Fashion carries various other accessories including these sweet pin sets.
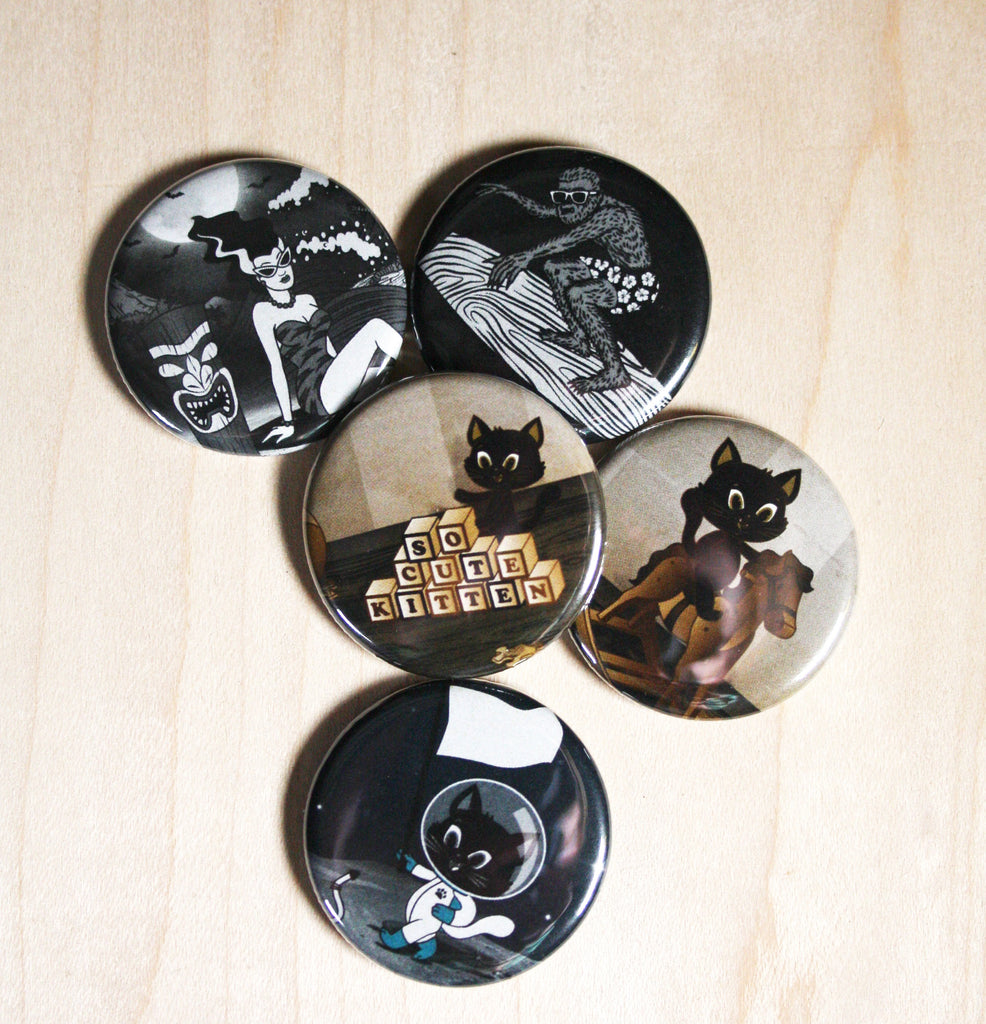
The Tiki Surfing Monsters, Vintage Cat Toys and Retro Space Cats sets all feature images taken from popular Putré-Fashion skirt designs and are available in the Putré-Fashion Esty shop or at various shows throughout Quebec and Ontario.
Fashion pins also allow you to have another item to sell to your customers, especially those that are serious fans. This popular pin size is super wearable, perfect for selling as collections and being so light to ship, makes a great item to sell on Etsy.
To learn more about Putré-Fashion, you can visit their online store or follow them on social media!
Online Store: putrefashion.net
Etsy Shop: altputrefashion
Instagram: @putrefashion.clothing
Facebook: @Putrefashion
Here are a few other ways fashion buttons have been used by our fashion-focused customers.
One Fire Movement Launches Clothing Line
Custom Fashion Pins for More Than A Label Slow Clothing Movement
Read more »
Loads of Fun Gifts Just in Time for the Holidays! | Novelty Gift Shop November 15 2018
While there are loads of button-related gifts we can recommend, we now stock a range of other fun novelty gifts too! Available in our stores and online.
Just in time for all your Christmas shopping, we are carrying a wide selection of new products.
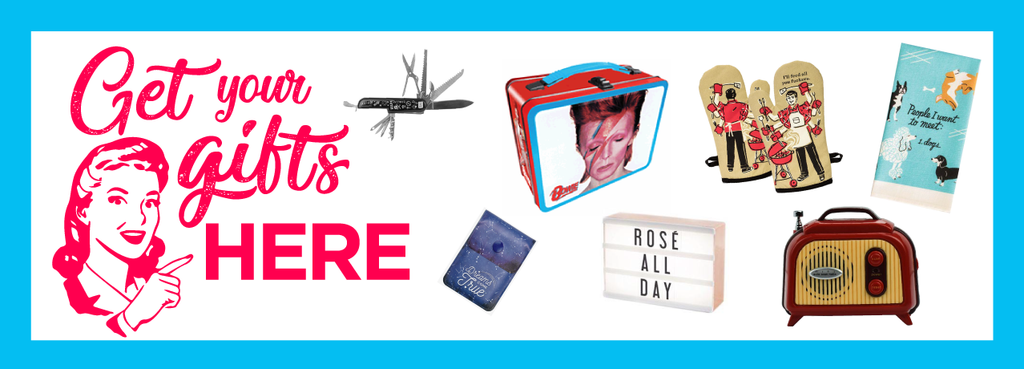
There really may be something here at People Power Press for everyone on your list this year!
Home Decor
We are also now carrying neon lights and light boxes in various styles so you can light up your home or office space.
Add some personality to your kitchen with our line of cheeky oven mitts and dishtowels.
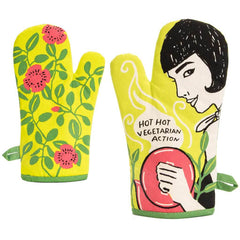

We are so thrilled to have a new in store partner, What the Mug. WTM makes a range of fun and original mug designs, many of which can be customized. You can also add your own image or design to a mug for a truly personalized gift.
![]()
Bath & Beauty
We are loving the smell of our new line of hand soaps made by the Perth Soap Co. We are also carrying lip balm and chewing gum with messages to make you smile.
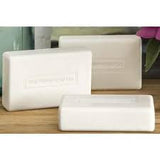
Cards & Stationery
Our greeting card collection has definitely expanded to include even more fun and unique card styles for all occasions.

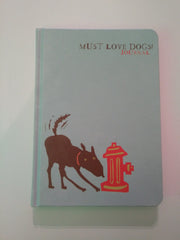
In addition to our beloved upcycled notebooks, we are now carrying a few other notebook styles and sizes to make sure you get all those thoughts down on paper.
Fun & Games
So much fun stuff including juggling balls, playing cards and puzzles.
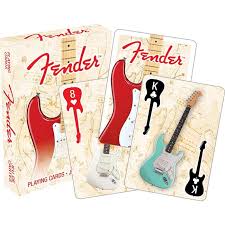

There are also various quirky gift ideas such as pen scissors (scissors that look like a pen), tiny alarm clocks, bike bells and bike lights, smoking cases and more.
Collectors Frames
If you have a collector on your list, we carry a range of collectors frames for keeping those precious comic books, baseball cards, sports memorabilia and album covers protected while on display.
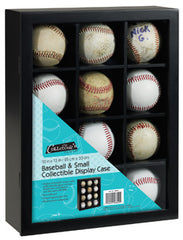
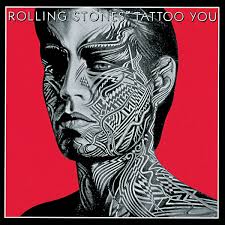
Other Creative DIY Stuff - Screen Printing and Block Printing Kits
If you are an artist and are looking for a creative outlet in addition to button making, we have screen printing kits and block printing kits ranging from beginner to advanced skill level. 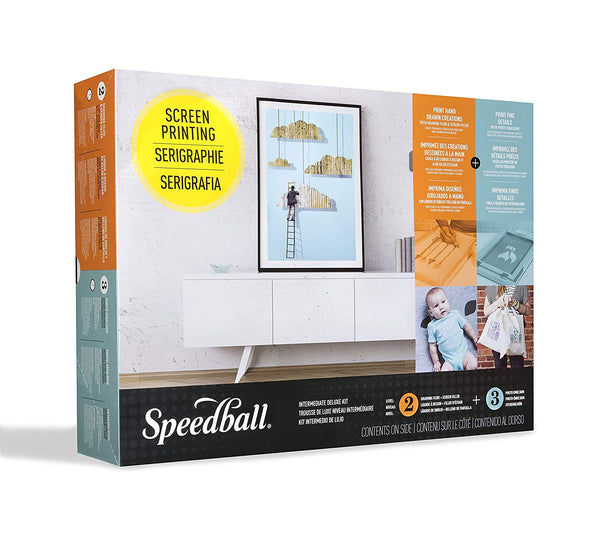
This list is only general overview of our fun new novelty gifts. There is too much to list here and new products are arriving in store all the time.
Stay tuned to this page to see what else we have in stock!
Read more »
Flightnook Platform to Facilitate Using Cleaner Fuels for Air Travel | Custom Buttons Montreal November 12 2018
Climate change is a tough reality. It is happening so now the question is what are we going to do about it?
Flightnook is a Montreal company that is coming up with ways to help us make more sustainable choices when we fly.

The popularity of air travel continues to grow, so people are not going to stop flying, but Flightnook is a non-profit venture that wants to change how we fly to reduce climate change and exploitation. They are creating a platform that will allow people to calculate the cost of their flight choices and to be able to pay to support a move to use cleaner fuel for flights.
Flightnook is not asking us to stop flying, but to do our part to reduce our environmental impact when we do choose to fly.
The Hummingbird Philosophy - Do Your Part Even if Small
The hummingbird in the Flightnook logo and on these custom logo pins we created for the Montreal company signifies their philosophy that while doing one's part may seem trivial, everyone's actions taken together can have a positive impact.
This is based on a story of a hummingbird carrying water in its beak to help put out a fire:
There is an Amerindian legend that says that one day a great forest fire took hold, all the animals were dismayed, helpless, except for the hummingbird that was going to take a few drops of water in its beak to throw it on the fire. The irritated armadillo said to the hummingbird: “You don’t really believe that you’re going to extinguish the fire with a drop of water?” And the hummingbird answers “I know, but I’m doing my part”.
You can find this story and more about their mission on the Flightnook website.
Learn More About Flightnook and Get Involved!
Website: www.flightnook.com
Twitter: @flightnook
Facebook: @Flightnook
Custom Buttons Montreal - High Quality Buttons with Fast Turnaround Times
With stores in Toronto and Ottawa, we can make high quality custom buttons for Montreal customers and ship them to arrive quickly. Contact us today to discuss your project and learn just how fast you will be able to get your buttons or button making supplies.
Read more »
- Page 1 of 9
- Next