Buttons, Badges & Pins - People Power Blog

Fun Giveaway Idea for Spring Trade Shows with 2.5” x 3.5” Rectangle Magnets and Pocket Mirrors May 09 2017

Hooray, it’s Spring!

Besides warmer weather, it is also time for Spring trade shows and the start of a busy wedding season. Want a great, fun giveaway idea? 2.5” x 3.5” Rectangle Magnets and Pocket Mirrors are the answer!

TWO new Button Guy videos!

Learn how simple it is to make 2.5” x 3.5” Rectangle Magnets and Pocket Mirrors with two new videos from The Button Guy! The first video walks you through making 2.5” x 3.5” Peel n' Stick Rectangle Magnets.

The second new Button Guy video shows the step-by-step process of making 2.5” x 3.5” Rectangle Purse/Pocket Mirrors. Making mirrors is fun, but there are a few tricks here that will help you be successful.

Why this size?

The 2.5" x 3.5" rectangle is great size for making magnets and mirrors because you get maximum surface space to display your artwork. With a bigger mirror you have a practical item to sell or give away to Spring trade show and wedding guests. People will actually want to stick these mirrors in their purse or bag to use all the time!

Getting started!

To get started you will need the 2.5” x 3.5” Rectangle Button Maker Kit. This machine also comes with pinback parts. To make magnets, you will need to order 2.5” x 3.5” Rectangle Peel n’ Stick Magnets and to make pocket mirrors, you will need to order 2.5” x 3.5” Rectangle Pocket Mirrors.

If you are loving this fun giveaway idea, but not ready to get your own button maker or don't have the time to make them - we did say busy wedding season - then we can do it for you! We have many design options available so you can send us your artwork or we can design from scratch or we can do something in between. 

See the options for custom 2.5" x 3.5" peel n' stick rectangle magnets.

Check out the choices for custom 2.5" x 3.5" rectangle pocket/purse mirrors here. 

Take a look to see all of our custom magnet sizes here and all of our custom mirror sizes here.


people power presspeople power press twitterpeople power press instagrampeople power press facebook

Read more »

Making Metallic Silver & Gold Buttons with Dura-Lar April 26 2017

We're really excited about making metallic gold and silver buttons with Dura-Lar!!

Using Dura-Lar Film is the easiest way to make Do-It-Yourself buttons that look lavish and luxurious.

In this video, Dura-Lar is used with Gold and Silver Reversible Metallic Dura-Lar to make gorgeous, shiny, pinback buttons that are great for holidays and special occasions. Check it out!


The SILVER & GOLD DURA-LAR used in this video is reversible, with gold on one side and silver on the other. The Metallic Dura-Lar Foil is 2mm thick, comes in standard 8.5 x 11" sheets, and has an EXTREMELY reflective mirror-like finish. Doesn't that sound awesome for a button??!

**When making Dura-Lar Buttons, it is the Glossy or Matte Dura-Lar that goes through the printer, and NOT the metallic Dura-Lar! The metallic Dura-Lar foil goes behind the transparent Dura-Lar film. **

How to Make Metallic Gold and Silver Pinback Buttons Instructional Video The Button Guy

 How to make shiny metallic gold button pins with foil


Curious to see some other examples of buttons made with Dura-Lar Film and reflective Metallic Dura-Lar Foil? Here are some older blog posts that feature buttons with special finishes! Which one do you like the best?

Instructional Video: Making Buttons with Dura-Lar

Get That New Year's Sparkle All Year Long With Holographic Foil
Buttons for Chinese New Year: Year of the Rooster
Feeling Lucky? It's St. Patrick's Day


Read more »

Say it With a 2” x 3” Rectangle Fridge Magnet: Great for Personal Statement Gifts, Promotional Giveaways and More! April 24 2017

The 2" x 3” Rectangle Fridge Magnet is a great versatile choice. A popular size for family photos and personal statement gifts, this magnet is a favourite souvenir shop idea and for real estate promotional giveaways too.

See the process of making a 2" x 3” Rectangle Fridge Magnet in this new video from The Button Guy. This video will show you important tips to successfully make magnets with the 2” x 3” rectangle button maker.

This essential advice includes how to cut your artwork, how to properly apply the peel n’ stick magnet and why it is important to let your magnets sit on a flat surface for 24 hours before hanging them on another surface.

Once you see how easy it is to make 2" x 3” Rectangle Fridge Magnets you will be able to get busy. Some projects include:

  • Decorating your locker or fridge with family photos and other art
  • Making personalized statement gifts for friends and family
  • Creating promotional giveaways for your business to hand out to clients and at trade shows and conferences
  • Designing your artwork like a postcard for your city's attractions for a great souvenir shop idea

rectangle magnets for promotional giveaways and more!


To get started you will need the 2 x 3” Rectangle Button Maker Kit. This machine will also make pinback buttons so you can really have some fun! You will also need all the supplies to make 2 x 3” Rectangle Peel n’ Stick Magnets.

Peel n' Stick Magnet Parts for Family Photos

Loving the idea of these fridge magnets, but not ready to invest in a button maker? We can make Custom 2 x 3” Rectangle Magnets for you with the design of your choice. Check out the other custom magnet sizes we have available.


Read more »

Learn How to Make 2 x 3" Rectangle Pinback Buttons March 23 2017

Rectangle pinback buttons are a neat shape and lend themselves well to making name tags, accommodating rectangular logos or photographs, and are awesome for fridge magnets too!

We love rectangular pinback buttons, and thought that you might be just as excited as we are! Check out this video courtesy of The Button Guy on How to Make 2 x 3" Rectangle Buttons!


Interested in making some of these yourself? Click on the link to find Parts & Supplies for 2" x 3" Rectangle Pinback Buttons on our website, or get more info on the 2" x 3" Rectangle Hand Press that was used in the video :)

We also carry parts and hand presses for other sizes of rectangle pinback buttons including 1-3/4 x 2-3/4", and  2-1/2 x 3-1/2".

 Pinback Button Shapes, How to Make Rectangle Buttons, The Buttona Guy, How To Video, Rectangle Pinback Buttons, DIY crafts,

Rather have us make some buttons or magnets for you? Cool! We also offer Custom Rectangle Buttons in a variety of sizes. Click on the link or send us an email to find out more :)


Read more »

Standard 2" Buttons: What's up with the Plastic Back? March 01 2017

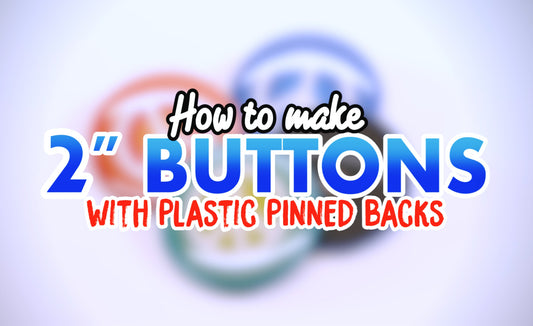
If you've ever looked into getting a Standard 2" Round Button Maker, you may have noticed that the 2" Pinned Back is a little different than every other size of button. It's made of black plastic instead of metal.

Standard 2" Plastic Back, How to Make 2" Round Buttons,

There is reasoning behind the 2" Plastic Back, and you're gonna find out all about it!

First, start off with this video on "How to Make 2 Inch Round Buttons with Plastic Pinned Backs" courtesy of The Button Guy!


 HOW TO MAKE 2" BUTTONS WITH PLASTIC PINNED BACKS


Now that you know how a Standard 2" Button is Made, we'll fill you in on the mysterious black plastic backing!

THIRD PRESS OPERATION

When a button is made with a plastic backing, the edge of the button gets crimped at a 45 degree angle. For a pinback button, this 45 degree crimp will hold the button together no problem. The problem with this crimp becomes obvious if you try and mount that button on a plaque, scrap book, or card. It just doesn't lay flat!

The Standard 1", 2", and 6" Round Buttons can be subject to a "Third Press Operation" patented by Tecre. This simply means that the the button gets pressed one extra time in the the pick up die, which flattens the edge completely. The button, now with a flattened back, can be adhered to whatever you like using double sided sticky foam disks or other adhesives.

So now you know what's up the the plastic back! Yay 2 inch buttons :)


Read more »

New Video: How to Make Magnetic Button Name Tags January 12 2017

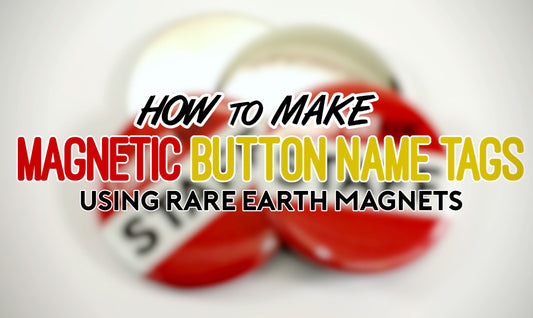
We get lots of inquiries about how to make Magnetic Button Name Tags that you can wear without putting a hole through your clothing. They're a great pinback button alternative for formal events, work functions, or any situation where fancy clothes are required (because they don't put a hold through the fabric).

Here's a step-by-step video of how to make Magnetic Button Name Tags of your own using standard button parts and Rare Earth Magnets!


Below is a list of supplies you need to make a DIY Magnetic Name Tag of your own. You can make magnetic button name tags in any standard round button size ranging from 1" all the way up to 3-1/2".


What You Need to Make Magnetic Button Name Tags:

- Button Hand Press (Standard Hand Press, Flex1000, Flex2000, or Flex3000 Machine)

- Button Shell

- Flat Back (instead of a pinned back)

- 3mm Mylar

- Button Artwork

- Rare Earth Magnet


FLAT BACK BUTTON PARTS FOR MAGNETIC BUTTON NAME TAGS

Everything for Flat Back Buttons are available kits in the following standard round sizes: 1", 1-1/4", 1-1/2" 1-3/4", 2-1/4", 2-1/2", 3", and 3-1/2".

The "Everything for Flat Back Button" kit includes button shells, flat backs, and 3mm mylar. The Rare Earth Magnets are not included, but they are available here.


RARE EARTH MAGNETS FOR MAGNETIC BUTTON NAME TAGS

These Flat Back Buttons are easily turned into Magnetic Button Name Tags when paired with the strong but mighty Rare Earth Magnet :)

Rare Earth Magnets are available in four sizes: 1/4" Round, 1/2" Round, 3/4" Round, and 1" Round. All sizes of these Rare Earth Magnets measure 1/8" in depth.

*** PLEASE NOTE THAT RARE EARTH MAGNETS SHOULD NOT BE USED BY THOSE WHO USE A PACE MAKER. THEY ARE EXTREMELY STRONG ***


WE ALSO MAKE CUSTOM MAGNETIC BUTTON NAME TAGS

Don't have the time to make Magnetic Button Name Tags for your next event? Have us make them for you :)

If you would like to order Custom Magnetic Button Name Tags, please contact us a info@peoplepowerpress.org or give us a call at (416) 204-1984.

The Custom Magnets currently available on the site are Peel n' Stick Fridge Magnets, not Magnetic Button Name Tags, and CANNOT be worn on clothing.


Read more »

Keychains Two Ways: Learn how to make Split Ring and Snake Keychains with your Model 150 Button Maker January 10 2017

Button Keychains are practical, easy to make, and come in lots of different styles and sizes to suit any taste.

Button keychains allow you to take a special picture with you everywhere you go! You can rep your favorite band, show off the cutest picture EVER of your cat, oh the possibilities!

The videos below show you how to make a 1-1/2" Round Split Ring Keychain, as well as a 1-1/2" Round Snake Keychain. Both styles are pressed on a Model #150 Hand Press and use Standard 1-1/2" Round Parts.


Split Ring Button Keychain, Button Making Parts & Supplies by People Power Press,


Supplies used to make Split Ring Keychains on the Model #150 Button Maker:

- Standard 1-1/2" Round Button Shell

- Standard 1-1/2" Round Slot Back

- Standard 1-1/2" Round Mylar (3mm) 

- Split Ring with Tab

- Button Artwork


You can find "EVERYTHING for Split Ring KEYCHAINS" kit in the drop down product menu when you click through the link. This kit includes the button shells, slot backs, 3mm mylar, and split rings with tabs (everything except the artwork). They are available in packs of 10, 25, 100, 500, and 1000 units.

1-1/2" Split Ring Keychains are also available with a Versa Back instead of a Slot Back. Learn how to press a button keychain using a Versa Back here.


Snake Button Keychians, Button Making Parts & Supplies by People Power Press,  

Supplies used to make Snake Keychains on the Model #150 Button Maker:

- Standard 1-1/2" Round Button Shell

- Standard 1-1/2" Round Slot Back

- Standard 1-1/2" Round Mylar (3mm)

- Snake Keychain with Tab

- Button Artwork


You can find "EVERYTHING for Snake KEYCHAINS" kit in the drop down product menu when you click through the link. This kit includes the button shells, slot backs, 3mm mylar, and snake keychains with tabs (everything except the artwork). They are available in packs of 100, 500, and 1000 units.


CUSTOM BUTTON KEYCHAINS

Not really a Do-It-Yourself type? No worries, we can totally make custom keychains in various styles and sizes for ya! Take a look at all of our custom button keychain options, including the 1-1/2" Split Ring and 1-1/2" Snake Keychain featured in this post!


MORE BUTTON KEYCHAIN RESOURCES

Learn more about all of the different types of keychains that we offer! Check out these blog posts for lots of great info on keychain parts and more How-To Videos courtesy of The Button Guy on YouTube :)

Keychains 101 - Part 1: Slot Back and Versa Back Keychains

Read more »

Flashback Friday: The History of Buttons January 06 2017

Have you ever ever wondered why and how pinback buttons came into existence?

Well, wonder no more! At People Power Press, we love buttons so much that we wanted to share the history buttons with all of you :)

Let's start at the beginning and go way back to when the first buttons hit the scene. They weren't like the buttons we know and love today, but hey, it was in the 1700's, an evolution was bound to happen along the way!

Enjoy the entire Short History of the Pinback Button presented by The Button Guy and learn how buttons came to be!

Can't get enough button history? You can check out an older post featuring some more REALLY old-school inaugural buttons here.


Read more »

Get That New Year's Sparkle All Year Long With Holographic Foil December 30 2016

Make your own shiny and sparkly buttons with new Holographic foil from People Power Press! When paired with artwork printed Dura-Lar this holographic foil can be used to make glittery holographic buttons at home!

Dura-Lar is another product that is great for any button maker who wants give their buttons some extra pizazz. If you're curious, take a peek at our post about How to Make Buttons with Dura-Lar Film.

Don't know how to use holographic foil for button making? Well take a look at this How-To Video from The Button Guy and you'll know what you're doing in no time :)


There are many different colors and styles of holographic foil too! Pictured below are Holographic Red, Holographic Gold Disco, Holographic Blue, Holographic Silver Disco, and Holographic Silver Glitter! Not pictured is a super fun Hologrphic Rainbow Foil which can be seen when you click through the link.
Holographic Foil, Dura-Lar, Product Feature, button making parts & supplies,


All of the button artwork above were printed on Dura-Lar Film and this printed Dura-Lar was then placed right on top of the holographic foil to get this fabulously glittery finish.

Button designs using holographic foil tend to be most successful when paired with simple clean digital artwork. Black and solid bold colours look great!


.

Read more »

New Video: How to Unjam Your Button Maker When the Dies are Stuck Together December 23 2016

How to Unjam Your Button Maker, Button Guy Video, How-To Video, Button Making Parts & Supplies by People Power Press,

Nine times out of 10, when a customer brings in a broken machine it turns out to be nothing more than a jam (which is great news)!

A button maker jam is something that is easily remedied at home, and often requires nothing more than some elbow grease and a bit of patience.

This video will teach you everything you need to know about how to un-jam your button maker when the top and bottom dies are stuck together. Hopefully it will save you unneeded stress, and an unneeded emergency visit to the button store!


THINGS YOU MAY NEED TO UNJAM YOUR MACHINE

- A large rubber mallet. Please don't use a metal hammer on your hand press!


KNOW YOUR HAND PRESS

Use this simple diagram to navigate your hand pressHow to Unjam Your Button Maker, Button Guy Video, How-To Video, Button Making Parts & Supplies by People Power Press,


USE THE RIGHT TECHNIQUE

- Hold the handle firmly in the upright position.

- Confidently hit the bottom die that is NOT stuck with the rubber mallet. Don't be shy! The mallet is rubber and the machine is super sturdy.

- Once the bottom die is released from the clutches of the top die, eject the cause of the jam by lifting the outer part of upper die. Hopefully it will pop right out!

- If the jammed button shell / artwork doesn't come out by lifting the outer part of the upper die, try pressing the button over an empty crimp die (the deeper one where the pinned back go). Usually the button will release after pressing as usual.


Though knowing how to unjam your button maker when the dies are stuck together is a really good skill to have, so is knowing how to avoid a button maker jam in the first place :) Luckily The Button Guy already has a great How-To Video for just that! SWEET!


Read more »

New Video: Tips and Tricks for Using Button Vending Machine Capsules December 15 2016

Button Vending Machine Capsules

BUTTON VENDING MACHINE ACORNS & CAPSULES

Do you own a vending machine and need some more capsules for your button vending needs? We carry many different sizes of capsules and acorns for use with the Button Rocket, Northern Beaver, and Button Hawk Vending Machines!

We discovered that there are a couple of tips and tricks that make button vending super duper easy. Take a peek at the video below from The Button Guy that will make you a vending capsule expert too :)


VENDING CAPSULE CHEAT SHEET

1" capsules: Vend up to 4 x 1" round lockpin buttons (get custom 1" buttons here)
Also suitable for 7/8" buttons


2" capsules: Vend up to 3 x 1-3/4" round buttons (get custom 1-3/4" buttons here)
Also suitable for 7/8", 1", 1-1/4" and 1-1/2" buttons, keychains etc


3" capsules: Vend up to 3 x 2-1/2" buttons (get custom 2-1/2" buttons here)
Also suitable for all button sizes smaller than 2-1/2"

** Do not use capsules for button magnets (especially ceramic magnets) because they will magnet themselves to the inside of the vending machine!**


If you have absolutely any questions about our vending machines or any of our other products, please contact us! We're always here to help with any button-related inquiries :)

Happy button making!


Read more »

New Video: Button Rocket Vending Machine December 08 2016

Button Rocket Vending Machine


The Automatic Button Vending Machine is an ideal solution for button producers looking to have their products in stores and in the public eye. The sharp design of this simple to use and maintain button dispenser allows you to keep on producing buttons (or take a break) whilst your buttons are out there selling themselves!


STANDARD FEATURES OF THE AUTOMATIC BUTTON ROCKET VENDING MACHINE

- Tubular lock included on lid and cash box door
- Made of solid cast aluminum and zinc
- Takes 1" capsules which can hold up to four 1" Round Lockpin Buttons
- Coin mechanism with built in security measuring both width and size of a coin
- High security easy access money bag with 800 coin capacity
- Straight drop through product chute


button rocket vending machine


HOW TO OPERATE THE BUTTON ROCKET VENDING MACHINE

Want to know the basics of the Button Rocket Vending Machine before you decide if it's the machine for you? Look no further :)

Here's a video from The Button Guy's YouTube Channel on How to Operate the Button Rocket Vending Machine! Check out the entire YouTube channel for a giant collection of How-To Videos and neat button making tips and tricks!


COIN MECHANISMS

The Button Rocket Vending Machine comes with one coin mechanism, but don't sweat it, if you decide you want to get another size:) Additional coin mechanisms for the The Button Rocket are available in the following sizes:

1 x 25 cents (1 quarter), 2 x 25 cents (2 quarters), 1 x $1 ($1 coin Canadian), 1 x $2 ($2 coin Canadian), Token Vend (1 x 0.984" token), Free Vend (Just turn handle - no coin).


CUSTOM BUTTONS READY FOR THE VENDING MACHINE

Love the idea of a button vending machine, but don't have the time to press all those buttons yourself? Not only do we make custom buttons, and other fun custom products, we also do custom buttons packed in capsules that are ready to vend! SO EASY :)


If you have any questions about button vending machines, or anything button-related for that matter, don't hesitate to get in touch :) Reach us at 416-204-1984.


Read more »

New Video: How to Avoid Button Maker Jams December 01 2016

Sometimes when making buttons, you run into a jam.

One video we posted a while ago gave step-by-step instructions on how to un-jam a hand press that has something stuck in it. Click through the link to watch the video on The Button Guy YouTube Channel.

Though it's great to know how to un-jam a button maker, it's also really handy to know how to avoid button maker jams in the first place...


HOW TO AVOID BUTTON MAKER JAMS

The video below is full of tips and tricks on how to avoid button maker jams! It also highlights the most common things that cause a button maker jam, so that you can avoid them from the get-go.


HOW TO AVOID BUTTON MAKER JAMS: TIPS & TRICKS FROM THE VIDEO

1. Make sure you only use 1 shell or collet at a time. They like to stick together

2. Only use 1 mylar at a time. They tend to be very easily affected by static and cling together like nobody's business

3. Only use paper that is 28lbs or less. (regular old photocopy paper is actually the best paper to use!)

4. Keep your machine well lubricated! Lubricant for button makers is really inexpensive, and comes in a tube that will last for decades

5. Stick to artwork that is drawn on paper, or printed out. Though making a 3-D collage on your button shell might look nifty, your button maker prefers nice flat artwork


BUTTON MAKER MAINTENANCE AND REPAIR SERVICES

Even if you're careful to not jam your button maker, accidents do happen. If you've tried un-jamming you button maker with no success, we do also offer maintenance and repair services!


Read more »

Shoelace Buttons: Do-It-Yourself or Custom Made Just for You! August 02 2016

What's your favorite pair of shoes?

Whether it's a crisp new pair of summer sneakers, or that trusty pair that have been through thick and thin (and a puddle or two...), it's nice to show your shoes that they're appreciated.

The best way to say "thanks shoes," is to make them a button of their very own!

Shoe Lace Buttons, Standard Button Making Parts and Supplies,

DO-IT-YOURSELF SHOELACE BUTTONS

These snazzy DIY Shoelace Buttons are sure to put a spring in your step :)

If you want to try your hand at this great DIY project, take a peek at the How-To Video below courtesy of The Button Guy!


The Shoelace Buttons come in a ton of different sizes and all of the parts you need to make your own can be found on our website!

    WHAT'S THE DIFFERENCE BETWEEN "FLAT" & "INDENTED" SHOE LACE BUTTONS?

    "Flat" Sneaker Buttons have a smooth, flat back from which the "shoelace clip" protrudes. These are great if you and your buttons like to let loose and dangle and jangle about.

    "Indented" Sneaker Buttons have a recessed back, so the clip sits deep into the button. This, in turn, pulls your shoelace tighter and keeps the button nice and snug. These are great if you and your buttons like a nice, orderly, approach to self expression.

    CUSTOM MADE SHOELACE BUTTONS

    If you like these Shoelace Buttons but DIY isn't really your thing, Custom Shoe Lace Buttons are available too! Just send us an image, or have our design team create something awesome just for you!


    Read more »

    Introducing Make-A-Button at People Power Press June 27 2016

    We've been working hard at turning our storefront into the best Maker Space it can be! Some of our favourite new additions to the shop is our Button Bar and Make-A-Button Punch Cards!

    Now whether you want to Make-A-Button or rent a machine in-store, there is a great place for you to work on your button creations. Don't worry, the kids table is still around for all of our young button enthusiasts too!

    Not sure how the whole Make-A-Button thing works? That's A-Okay! Sit back, relax, and enjoy the video: Introducing Make-A-Button at People Power Press :)


    Read more »

    Keychains 101 - Part 1: Slot Back and Versa Back Keychains June 09 2016

    INTRODUCTION: CAN I MAKE A KEYCHAIN BUTTONS WITH MY HAND PRESS?

    Many different sizes of ROUND buttons can be made into keychains. All that you need to make them are the right parts!

    All keychians use the exact same shell and mylar that are used to make pinback buttons. The only difference is the keychain backing, and keychian closure itself.

    That means that any of you out there with a Standard Hand Press, Flex1000, Flex2000, and even a Flex3000 machine are able to make keychains! You'll be good to go as long as your hand press makes standard ROUND buttons in one of the following sizes: 1", 1-1/2", 1-3/4", 2-1/4", 2-1/2", or 3".

    KEYCHAIN BACKING

    Keychains, Button Keychains, Keychains 101

    The type of keychain backings available are based on the size of button your hand press makes.

    1", 1-1/4", and 1-1/2" Keychains have something called a "versa back" which is a plastic backing that snaps into a collet.

    The versa back can be used with either a jump ring (which is compatible with all keychain styles), or a plastic tab (which can be used with a split ring keychain only).

    All of the keychain parts can be seen in the above image!


    Below is an instructional video that walks you through all the steps of making a versa back keychain.

    The other type of keychain backing is a slot back. Keychains ranging in size from 1-1/2", 1-3/4", 2-1/4", 2-1/2", and 3".


    Here is another awesome How-To Video video! This one shows you how to make a Slot Back Keychain :)

    Now that you're a pro at keychain backings, stay tuned for Keychain 101 - Part 2: Keychain Styles!


    Read more »

    Spotlight on SALES: 1" Buttons with Colourful Custom Collages May 31 2016

    Hey there button folks!

    We've got some custom 1" buttons hot off the hand press for a band called SALES. The musical duo is comprised Lauren Morgan (guitar/vocals) and Jordan Shih (guitar/programming), both supremely talented musicians and best buddies.

    Collage artist and designer Alana Questell created some awesome designs that were used not only as artwork for the album, but for their custom buttons as well!

    Alana Questell
    Alana Questell
    Alana Questell


    If you want to hear some sweet tunes from SALES, head on over to their SoundCloud or YouTube channel.

    Or, if you want a little taste of what SALES is all about enjoy the below video from a 3 part series called "from 12 to 12."

    This is part 1 - "vow"


    If you're in the market for some custom band buttons or a video to go along with YOUR cool jams, take a peek at one of our newest products: Lyric Videos and Custom Button Bundles!


    Read more »

    Machine Tune-Ups and Maintenance Services May 10 2016

    Every once in a while your trusty hand press might benefit from a bit of TLC.

    People Power Press can help you keep that machine in tip-top condition with our maintenance services :) If your machine needs a little more than a simple tune-up, there is also advanced maintenance available

    If you want to try to do a machine tune-up on your own, we have resources for that too! Check out this comprehensive video showing you how to maintain your machine.


    Below is a checklist that's a great reference if you're attempting a tune-up on your own.  The machine diagram below will help you figure out where all of the parts are on your machine:

    • Check, lubricate and tighten top bolts & shim - silicon spray
    • Check Lubricate and tighten handle - silicon spray
    • Lubricate beveled edge on crimp die - silicon stick
    • Lubricate top die - silicon stick
    • Lubricate between die table and base plate - lithium grease
    • Check and tighten brass bolts and flat head bolts on underside of base plate


    Next time your machine is in need of a tune-up feel free to get in touch :) We can help you place an order for maintenance services, or guide you through any tune-up troubles you may experience!


    Read more »

    New Product Launch! Lyric Videos & Custom Button Bundles May 05 2016

    Buttons and bands have always been a great pairing. That's why we are launching a really neat new product: Lyric Videos and Custom Button Bundles!

    There are five different styles of videos to choose from, and with each video you are able to select the size (1", 1-1/4", or 1-1/2") and quantity (100, 250, 500, or 1000) of custom band buttons you would like with it!

    TICKER TAPE STYLE


    NOTEBOOK STYLE

    If you're on a budget, the above Ticker Tape or Notebook style video may by the style for you. With either style of video, if you order 1000 band buttons we throw in the Lyric Video for free :) Pretty awesome, eh?

    If those styles don't float your boat, no problem! We offer three other Lyric Video styles which can be seen below:


    SLIDESHOW STYLE


    MOVING IMAGE STYLE


    MOVING IMAGE & TEXT

    So if you're in a band and need a video and some merch, we hope these Lyric Videos & Custom Button Bundles are exactly what you're looking for :)

    If you have any questions about this new product, send us an email or give us a call and we would love to chat with you about our groovy new product!


    Read more »

    Is There a Button Shell Stuck in my Machine? March 22 2016

    Have you ever gotten a button part stuck in your machine?

    It happens to the best of us, and can be really frustrating. However, there are a few tried and true techniques to getting that button part UN-jammed in no time!

    Here is a great how-to video from The Button Guy that shows you how to un-jam that trusty hand-press.

    HOW DO MACHINES GET JAMMED IN THE FIRST PLACE?

    Most machine jams will probably be the result of using a paper that is too thick, or putting more than 1 shell in the die. Though there are lots of different things that COULD jam a machine, these two scenarios are the most common.

    HOW TO AVOID JAMMING YOUR MACHINE.

    Though this instructional video makes is super easy to un-jam your machine, its a lot easier to NOT get a machine jammed in the first place. Here's some tips on how to avoid a jam all together.

      1. The paper is too thick: The best paper to use for button making is your good ole' fashion printer paper. If you try and use paper of a heavier weight, you run the risk of getting the mylar, paper, and shell stuck in the top die when pressing your button. Stick with a paper that is around 28 Lbs and you should be golden!
      2. There were 2 shells smooshed together and it looked like there was only 1 shell: Sometimes the shells like to piggy-back on each other. Though that sounds kind of cute, this double shell will inevitably lead to a jam, or at the very least, a button than doesn't get crimped properly. If you think there may be two shells stuck together, just throw them against a hard flat surface. Industry secret: the floor works GREAT! The impact will make the shells come apart, no tools or elbow grease required!


            Read more »

            Did You Know that The Button Guy is on YouTube? March 08 2016

            Last week we posted about Button Designer, a great free resource from The Button Guy.

            The Button Guy has yet another resource that goes beyond artwork, and touches on many aspects of the button making process: his very own YouTube channel.

            Whether you need to know how to use, make, fix, or design something button related, there is bound to be a video that can help you out!

            Here are just a few featured videos:

            HOW TO USE: HOW TO MAKE:
            HOW TO FIX: HOW TO DESIGN:

                    If you're looking for a "How To" video that isn't featured on this blog post, check out The Button Guy's full YouTube Channel!

                    If you check there, and your question still isn't answered, always feel free to Ask The Button Guy, or call into the shop for some over-the-phone assistance :)

                    Don't worry about asking us a question that you thing seems strange or silly. If it's button related, GO FOR IT! We love helping our customers have the best button making experience possible :) YAY!


                    Donate to The Button Guy's Online Button Designer


                    Read more »

                    Make Your Own Button Necklaces with Magnetic Pendants! February 28 2015

                    Available in two shapes and three different styles to suit your taste, these fun and classy magnetic necklace pendants are a great way to show off your favourite button creations in new and original ways.

                    Designed to hold a 1" round or square flat back button, the pendants are made with super strong rare earth magnets that won't let go of your button until you want them to.

                    Pendants for 1" ROUND necklaces:

                    1 inch round megnetic pendant button jewlery for 1" button necklace

                    Pendants for 1" SQUARE necklaces:

                    1 inch pendant square button jewlery for necklace


                    Infinitely customizable, you now have the greatest excuse to make all of the buttons you could ever want to wear and change up your look weekly, daily, hourly, or as often as you'd like! Without poking holes in your shirt! :)

                    Like a locket, button pendant necklaces make a meaningful personalized gift, arts and crafts project, or raffle giveaway.

                    Create and sell a series of interchangeable designs that people can buy together as a set or collect over time.

                    They can also be used as a unique and creative marketing tool. Above all else, they're a one of a kind accessory that will never get old.

                    Available individually or by the thousands (volume discounts apply).

                    To DIY it up and make them yourself, you’ll need a standard size 1” button maker.

                    1-inch button maker for making pins and badges and button jewlery

                    Or a 1” square button maker.

                     1-inch square button maker for making pins and badges, button jewelry, necklaces and pendants


                    You will also need flat back button parts to make your masterpiece.

                    Order everything for 1” ROUND Flat Back Buttons here.

                    Button parts to make 1" round flat back buttons and jewelry with buttons

                    Supplies for 1” SQUARE Unpinned Back Buttons are here.

                    Button parts to make 1" square unpinned back buttons and jewelry with buttons


                    Watch this great how-to video to see how effortless it is to make these new necklaces:

                    Don’t have a 1” machine?

                    If you love these pretty little things and want some of your own, but don’t own a 1” machine, you can buy the necklace pendants and then rent a button maker from us or have us make your buttons for you.

                    The pendants for the necklaces are sold without chains so you can wear your design with a chain you already own or choose exactly the style you want. We have a few necklace chain styles in stock and are adding more. If you are looking for a chain style we don’t have, just let us know and we can likely get what you need!

                    Be sure to check in often to see what new style options we have. Stay tuned for customizable bracelets and other new items to be introduced in the coming weeks and months!

                    Read more »

                    I've got a shell stuck up inside my button maker - button maker jam! November 17 2012

                    Syndicated Button Guy Blog Syndicated blog from TheButtonGuy.net
                    The following article is reprinted with
                    permission.
                    http://TheButtonGuy.net/

                    Great videos! I’ve always had success with the following method. When a shell is
                    stuck simply remove any parts from the crimp die, spin the die table around as if
                    you were going to crimp then pull the handle down. The shell will pop right out.
                    In the 10 years that we’ve been doing custom buttons here at punkit.com this
                    method has worked for us 100% of the time.

                    I’ve had some sort of malfunction with the button
                    press, where the entire apparatus seems to have lifted
                    off its base.


                    Article:

                    How to unjam your button maker
                    - button making machine repair.

                    Read more »

                    Making Pin-back Button designs with MSWord #1 - How to design a... October 07 2012


                    Making Pin-back Button designs with MSWord #1 - How to design a Simple Text Button using templates

                    Button making is easy.  Design is not and a good design makes a button.  A button with a great slogan but poorly designed will not work.  Focusing on the design of a button is important and I would recommend using Photoshop, Illustrator, Gimp or any real graphic design program.  But we are not all designers and sometimes you have to use something like Microsoft Word.

                    This video shows you how to setup a simple button design using MS Word.  There are 3 videos in the series.

                    Other videos in this series:

                    #2 - Making Pin-back Button designs with Word #2 - Using columns to centre graphics  link

                    #3 - Making Pin-back Button designs with Word #3 - Adding images and graphics link

                    Read more »

                    How to make a pin-back button: How are buttons made? July 19 2012


                    How to make a pin-back button: How are buttons made?

                    Read more »

                    Sale

                    Unavailable

                    Sold Out