Buttons, Badges & Pins - People Power Blog

FLEX1000 and FLEX2000 Hobby Button Maker Manuals Now Available Online June 16 2017

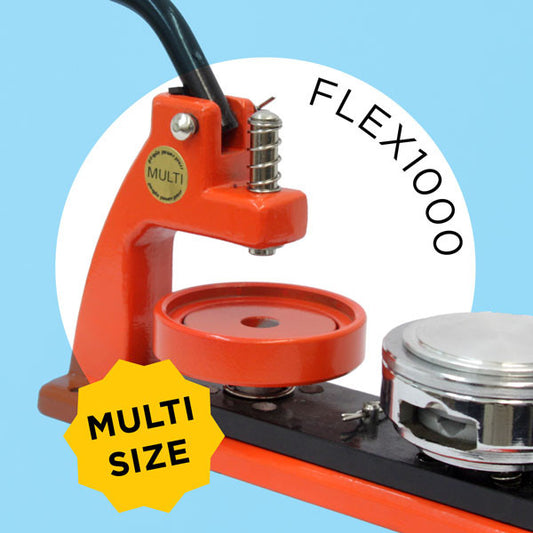
If you have a FLEX1000 or FLEX2000 hobby button maker and have lost the instruction manual that was sent with your start-up kit, don't worry! You can now download the instruction manual for each model here.

 multi-size button makerall metal hobby pin machine

Download the FLEX1000 Instruction Manual (No Rings) here.

Download the FLEX2000 Instruction Manual here.

Just a note about any reference to rings. Our newer models don't require the plastic rings so if you see any reference to them, but you never received the rings, don't worry. Your version of the machine does not use plastic rings. Not sure, give us a call and we can help you out.

Keep it paperless and access online whenever you need it or print it out if you'd like a tangible copy. The choice is now yours.

Even if you don't have one of our all-metal FLEX machines you can take a peek to walk through the steps and see how it works!

And for the visual folks out there, here are the Button Guy videos showing you the FLEX1000 and FLEX2000 button makers in action. See how both hobby pin machines work:

Read more »

Custom Rounded Rectangle Buttons are Here: A Smooth and Sleek Option for Name Tags June 07 2017

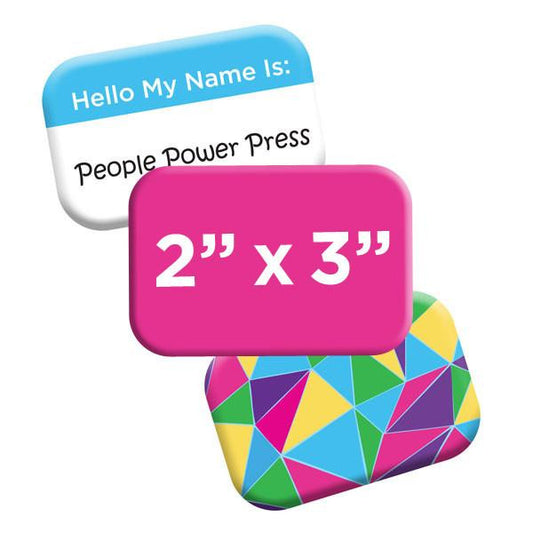
It’s not often that a new pin shape is introduced, but there is a new button kid on the block. Helloooo Custom Rounded Rectangle Buttons!

This button has rounded corners, making it a smoother and sleeker option for name tags, poster art, marketing and campaign buttons.

rounded rectangle name tag buttons

Many Great Uses for the Rounded Rectangle Button

These are just a few great choices for this new pin shape:

Name Tags - Rounded rectangle buttons make great durable event name tags for workshops, trade shows and conventions. They can double as great event souvenirs.

Marketing Buttons - Available as 1-3/4” x 2-3/4” pinbacks, these buttons are the same size as a business card, which makes this button an obvious choice for marketing your business.

Poster Art Buttons - This new pin shape is a perfect choice for poster art buttons because of their layout and retro design.

Two Sizes Available!

The new rounded rectangle button comes in 1-3/4” x 2-3/4” and 2” x 3” sizes. The smaller size is the same size as a business card. The larger size gives you a bit more room to make your message stand out.

1-3/4" x 2-3/4" rounded rectangle business card buttons2" x 3" rounded rectangle campaign buttons

A Perfect Choice for Vertical and Horizontal Layouts

The rounded corner buttons are available as vertical or horizontal pins. These layouts may be more suitable for logos and designs that are also have vertical or horizontal designs.

Now you get a rounded corner without having to adapt your design to a circle or oval shape and possibly losing part of your artwork.

But if you are looking for something with a harder edge, be sure to check out all our custom button sizes so you can make the choice that best suits your design!


Read more »

Say it With a 2” x 3” Rectangle Fridge Magnet: Great for Personal Statement Gifts, Promotional Giveaways and More! April 24 2017

The 2" x 3” Rectangle Fridge Magnet is a great versatile choice. A popular size for family photos and personal statement gifts, this magnet is a favourite souvenir shop idea and for real estate promotional giveaways too.

See the process of making a 2" x 3” Rectangle Fridge Magnet in this new video from The Button Guy. This video will show you important tips to successfully make magnets with the 2” x 3” rectangle button maker.

This essential advice includes how to cut your artwork, how to properly apply the peel n’ stick magnet and why it is important to let your magnets sit on a flat surface for 24 hours before hanging them on another surface.

Once you see how easy it is to make 2" x 3” Rectangle Fridge Magnets you will be able to get busy. Some projects include:

  • Decorating your locker or fridge with family photos and other art
  • Making personalized statement gifts for friends and family
  • Creating promotional giveaways for your business to hand out to clients and at trade shows and conferences
  • Designing your artwork like a postcard for your city's attractions for a great souvenir shop idea

rectangle magnets for promotional giveaways and more!


To get started you will need the 2 x 3” Rectangle Button Maker Kit. This machine will also make pinback buttons so you can really have some fun! You will also need all the supplies to make 2 x 3” Rectangle Peel n’ Stick Magnets.

Peel n' Stick Magnet Parts for Family Photos

Loving the idea of these fridge magnets, but not ready to invest in a button maker? We can make Custom 2 x 3” Rectangle Magnets for you with the design of your choice. Check out the other custom magnet sizes we have available.


Read more »

Machine Tune-Ups and Maintenance Services May 10 2016

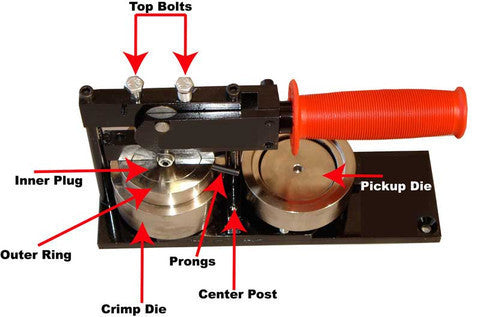
Every once in a while your trusty hand press might benefit from a bit of TLC.

People Power Press can help you keep that machine in tip-top condition with our maintenance services :) If your machine needs a little more than a simple tune-up, there is also advanced maintenance available

If you want to try to do a machine tune-up on your own, we have resources for that too! Check out this comprehensive video showing you how to maintain your machine.


Below is a checklist that's a great reference if you're attempting a tune-up on your own.  The machine diagram below will help you figure out where all of the parts are on your machine:

  • Check, lubricate and tighten top bolts & shim - silicon spray
  • Check Lubricate and tighten handle - silicon spray
  • Lubricate beveled edge on crimp die - silicon stick
  • Lubricate top die - silicon stick
  • Lubricate between die table and base plate - lithium grease
  • Check and tighten brass bolts and flat head bolts on underside of base plate


Next time your machine is in need of a tune-up feel free to get in touch :) We can help you place an order for maintenance services, or guide you through any tune-up troubles you may experience!


Read more »

2015 Holiday Gift Guide November 14 2015

Well, it’s that time of year again – holiday shopping season!

And this year we've got so many more fun gift ideas for you. You'll be surprised at all the different things a button machine and some people power can make : ) In fact, this year YOU can come and make the gifts yourself in our new Toronto Maker-Space. Just let us know what you want to make, book a time to use our machines in store, and we'll show you how to do it!

Without further ado, here is our 2015 Gift Guide for all the crafty people (and more!) on your shopping list.

Gift Idea #1: For the Crafters and Kids (or Kids at Heart!)

Hobby button makers are a great gift for craft lovers, young and old! And, at a significantly lower price than professional grade machines, they are affordable for many gift givers. In the spirit of the season, we have put together HOLIDAY themed kits for our FLEX Series of Button Makers, complete with everything you'd normally get in the start up kit plus a set of pre-cut holiday button art in both full colour and black and white (for colouring). 

FLEX1000 Button Maker Kits

The FLEX1000 Holiday themed hobby button maker kit comes with 3 sizes of button making dies and parts/supplies as well as pre-cut art. inexpensive gift ideas!

The FLEX1000 is a durable multi-size button maker, made of solid metal and can make up to SIX different sizes! Die set add-ons (required to press different sizes) can be purchased separately, if you want to start small, or in a kit, for extra savings.

FLEX2000 Button Maker Kits

 FLEX2000 Holiday Themed Hobby Button Maker machine. This cheap button maker kit comes with parts and supplies to make pinback buttons and round magnets.

The FLEX2000 is another great all-metal button maker with interchangeable dies. While it only makes four different sizes - for now! - its sliding die system makes aligning the artwork a little easier than the FLEX1000.

FLEX3000 Button Maker Kits

 the FLEX3000 hobby button maker is a sturdy machine with sliding dies that makes buttons in the 3" size only. The holiday kit includes pre-cut holiday themed button art.

The FLEX3000 is the second sliding-die machine in the series and is used for making big 3" buttons (which cannot be made with the other sliding-die machine, FLEX2000).

Gift Idea #2: For the Artist or Budding Entrepreneur

Give the gift of entrepreneurialism and self-reliance this holiday season! : ) That's right, button making is more than just fun, it can also be a successful business opportunity for someone who is keen to turn their art into cash and can even be a supplemental service for an existing business. Given the ease of use and maintenance of the professional series of machine, it is a cheap and fast way to turn fun into profits :)

Professional Button Maker Kits

 1-3/4" professional button maker kit with parts and supplies for 1.75" buttons

Gift Idea #3: For the Musicians in Your Family

Button Making Kits – Get a button maker kit to help band members make buttons to support their music. Smaller sizes like 7/8”, 1” or 1.25” are recommended!

Pre-Pay for Custom Buttons – Don't want to invest in buying a machine, but know a musician who would love to use buttons to promote their music? Give the gift of custom buttons and we will make the buttons for them!

band buttons. Custom buttons for bands. help promote your favourite artist this holiday season

Guitar Pick Punches – Musicians can make their own custom picks with our guitar pick punch. They won’t have to worry about losing another pick with this handy tool!

Guitar Pick Punch - the perfect christmas gift for musicians

Gift Idea #4: Personalized Holiday Keepsakes

Custom Buttons – We Make Them For You!
Buttons make great gifts, even if you don’t want to make buttons yourself. Did you know that we can make more than just buttons? Send us your custom button artwork or photos and will we make a special gift to give out this holiday season. We can even work with you to create your custom artwork by scratch.

Custom Jewelry - Magnetic necklace and bracelet bases let your pop your custom design in and out to be always changing your look.

Coasters - Make a truly personalized and practical gift with a set of 3.5” round coasters this year.

custom holiday coasters to give as gifts. make great keepsakes. personalized christmas presents.

Bottle Openers - Like giving practical gifts? Bottle openers can be fun, but also useful. Keyring and magnetic bottle openers are also available.

custom bottle openers. order ready to give as gifts or come into our shop and personalise them for your friends and family

Magnets – Send out your holiday greeting or family photo as a fridge magnet this year. Different shapes are available.

Gift Idea #5: Stocking Stuffers and Other Great Gifts - As low as $2 !

Make-A-Button Packs - Pre-packaged button packs come with all the parts needed to make 5 buttons, including the artwork. Then kids just bring the supplies into our retail store and get started.

Pre-Paid Make-A-Button Cards – Give a pre-paid card to someone so that they can just come into the store and make their own buttons. Make eleven buttons for the price of ten! Recipients can make one at a time or make them all at once.

make-a-button gift pack. bring your friends to people power press and make buttons in our store

Dry Erase Silly Face Tree Ornaments, Fridge Magnets, and Buttons – Choose from our Christmas Faces and Snowy Faces collections or have us turn your family and friends into blank faced caricatures for everyone to draw on and decorate in silly, silly ways :) Use outlines from real photos or your own graphics. Then draw, laugh, erase and repeat! Contact us for custom pricing!

silly face christmas dry erase buttons, magnets and tree ornamentssnowy face dry erase buttons, magnets, and christmas tree ornaments

Upcycled Library Books -These hardcover library books with coil binding make one-of-a-kind, Eco-friendly notebooks and sketch books for the environmentally friendly folks in your family :) Bound with unruled Tree Free or 100% recycled paper. Notebook (small) and Sketchbook (large) sizes available. Want a specific cover? Bring in one of your old books and we'll upcycle it into a notebook or sketchbook for you! Contact us for custom book upcycling pricing :)

upcycled sketch books and recycled note books made from discarded library books

Gift Idea #6: A Gift to Yourself (Preparation!)

Do you have enough button making supplies for all your holiday button projects and parties?

If you already have a button maker then you may already know about all of the creative ways you can use your button machine this holiday season.

Make special gifts such as coasters, ornaments, jewelry, magnets, keychains, zipper pulls and bottle openers.

Gift Idea #7: Gift Cards

Still not sure? Give a Gift Card!

If you know someone who already has a buttonmaker and is passionate about buttonmaking, but aren’t sure what machine they have or what size of buttons they make, we now have gift cards that can be purchased and redeemed online.

Gift cards are also great if you think someone would like a button maker, but can’t afford to buy a whole kit. They will appreciate your contribution to the cost of a button making kit and supporting their button making dream.

You can even use them towards button machine rentals!

An Extra Note About Holiday Shipping!

Just make sure you order your gifts and supplies in time! We recommend you place your order as soon as possible so that we have enough time to ship your order to you.

All of our couriers get extra busy at this time of year so we don’t want any delays to upset your gifting plans. Give us a shout so we can help you determine how long shipping will take to your destination.

Our Toronto retail store is now also open Saturdays so you can pick up items. Just call ahead to make sure we have what you need!

Please call us today so one of our friendly sales team can answer all your questions and help you pick out the perfect button gift.

Happy Holidays and Happy Shopping!

Read more »

Unlock the Potential of your 2-1/4" Buttonmaker! November 10 2015

A Whole World Of Products For Your 2-1/4" Button Maker!


Ever thought about branching out and making more items that showcase your message, art, or brand? Your 2-1/4” button maker may be the key to creating the key chains, bottle openers and magnets you've been dreaming of!

 2-1/4" Bottle Opener2-1/4" Key Chain


You can get a variety of parts for you 2-1/4” button maker. Pocket mirrors, bottle openers, and key chains are just the beginning! Check out our website for a complete list of products available for your 2-1/4" machine.


Everything for your 2-1/4" Button Maker


The process is no more complicated that pressing a standard pinback button so don’t be thrown off by the different backings. If you need help navigating a new product visit our blog or YouTube channel for many helpful tricks of the trade.


Don’t have a 2-1/4” machine? There are plenty of options available to make different items with all sorts of button makers! Check the product page associated with your button maker to get more details!

For daily tips and ideas follow us on social media! You can find us on Twitter, Facebook, Instagram, and Pinterest.

Read more »

Make Your Own Button Necklaces with Magnetic Pendants! February 28 2015

Available in two shapes and three different styles to suit your taste, these fun and classy magnetic necklace pendants are a great way to show off your favourite button creations in new and original ways.

Designed to hold a 1" round or square flat back button, the pendants are made with super strong rare earth magnets that won't let go of your button until you want them to.

Pendants for 1" ROUND necklaces:

1 inch round megnetic pendant button jewlery for 1" button necklace

Pendants for 1" SQUARE necklaces:

1 inch pendant square button jewlery for necklace


Infinitely customizable, you now have the greatest excuse to make all of the buttons you could ever want to wear and change up your look weekly, daily, hourly, or as often as you'd like! Without poking holes in your shirt! :)

Like a locket, button pendant necklaces make a meaningful personalized gift, arts and crafts project, or raffle giveaway.

Create and sell a series of interchangeable designs that people can buy together as a set or collect over time.

They can also be used as a unique and creative marketing tool. Above all else, they're a one of a kind accessory that will never get old.

Available individually or by the thousands (volume discounts apply).

To DIY it up and make them yourself, you’ll need a standard size 1” button maker.

1-inch button maker for making pins and badges and button jewlery

Or a 1” square button maker.

 1-inch square button maker for making pins and badges, button jewelry, necklaces and pendants


You will also need flat back button parts to make your masterpiece.

Order everything for 1” ROUND Flat Back Buttons here.

Button parts to make 1" round flat back buttons and jewelry with buttons

Supplies for 1” SQUARE Unpinned Back Buttons are here.

Button parts to make 1" square unpinned back buttons and jewelry with buttons


Watch this great how-to video to see how effortless it is to make these new necklaces:

Don’t have a 1” machine?

If you love these pretty little things and want some of your own, but don’t own a 1” machine, you can buy the necklace pendants and then rent a button maker from us or have us make your buttons for you.

The pendants for the necklaces are sold without chains so you can wear your design with a chain you already own or choose exactly the style you want. We have a few necklace chain styles in stock and are adding more. If you are looking for a chain style we don’t have, just let us know and we can likely get what you need!

Be sure to check in often to see what new style options we have. Stay tuned for customizable bracelets and other new items to be introduced in the coming weeks and months!

Read more »

The 2014 Gift Guide December 16 2014

It is time to shop for the holidays! Button makers, buttons and button supplies make great and unique gifts for the crafty person in your life. If you don’t know this yet – buttons make people very happy. And we are happy to bring you a gift guide to help you figure out the perfect button gift for that special someone. : )

Gift Idea #1: For the Kids (And Kids at Heart!)

A hobby button maker is great for anyone who likes to do crafts. The T150 and Orange Multi-Size Hobby Button Makers will both make fantastic gifts for kids and hobbyists who will not make a lot of buttons and won’t be selling their buttons as a business.

T150 Hobby Button Maker Kit


T150 Hobby Button Maker Kit - This machine has a plastic body and makes 2-1/4” buttons only. The kit comes with enough parts to get you started.


Orange Multi-Size Hobby Button Maker Kits - If you are looking at a hobby maker, but want something that is a bit more durable and offers a few different size options than the T150, then you may be interested in getting our new multi-size button maker kit. This machine’s body is metal (not plastic like the T150) and can make up to three different sizes!


 Multi-size Hobby Button Maker Kit


Gift Idea #2: For the Artist or Budding Entrepreneur

Button making is loads of fun, but it can also be a successful business opportunity.

Button Maker Kits Badge Making Pin Machine

Professional Button Maker Kits - Make the investment in the one of the fantastic and oh-so-robust Tecre button presses and you can give a gift that will last long after the holidays are over. These machines can make thousands of buttons with consistent quality suitable for people who want to sell buttons as a business pursuit, to make some money as a fun side project or to showcase their fine artwork. Different sizes available.

Gift Idea #3: For the Musicians in Your Family

Button Making Kits – Get a button maker kit to help band members make buttons to support their music. Smaller sizes of button makers are recommended!

Pre-Pay for Custom Buttons – Know a musician who would love to use buttons to promote their music? Give the gift of custom buttons and we will make the buttons for you!

Guitar Pick PunchPick Punches – Musicians can make their own custom picks with this new guitar pick punch. They won’t have to worry about losing another pick with this handy tool!

Gift Idea #4: Personalized Holiday Keepsakes

Custom Buttons – We Make Them For You! - Buttons make great gifts, even if you don’t want to make buttons yourself. Did you know that we can make more than just buttons? Send us your custom button artwork or photos and will we make a special gift to give out this holiday season. We can even work with you to create your custom artwork by scratch.

Christmas Badge Making Supplies

Necklaces – One of our newest products, these magnetic pendants let your pop your custom design in and out to be always changing your look. Contact us for pricing!

Coasters – Make a truly personalized gift with a set of 3.5” round coasters this year.

Bottle Openers – Like giving practical gifts? Bottle openers can be fun, but also useful. Keyring and magnetic bottle openers are also available.

Magnets – Send out your holiday greeting or family photo as a fridge magnet this year. Different shapes are available.

Family Photo Silly Face Buttons – Create your own dry erase design so that you can make your own silly faces. Use outlines from real photos or your own graphics. Then draw, laugh, erase and repeat!

Gift Idea #5: A Gift to Yourself (Preparation!)

Make sure you have enough button making supplies for all your holiday button projects and parties.

Holiday Button Making Supplies Pins Badges

If you already have a button maker then you may already know about all of the creative ways you can use your button machine this holiday season. Make special gifts such as ornaments, jewelry, magnets, keychains, zipper pulls and bottle openers in addition to buttons.


Just make sure you order your supplies in time to make something for everyone on your list! We will be closed Dec. 24-26 and Jan. 1-2. We are not open on weekends. We recommend you place your order as soon as possible so that we have enough time to ship your order to you. Give us a shout so we can help you determine how long shipping will take to your destination.

Please call us today so one of our friendly sales team can answer all your questions and help you pick out the perfect button gift.


Gift Idea #6: Gift Cards

Gift Certificates Make the Perfect Gift Button Makers

Still not sure? Give a Gift Card!

If you know someone who already has a buttonmaker and is passionate about buttonmaking, but aren’t sure what machine they have or what size of buttons they make, we now have gift cards that can be purchased and redeemed online.

Gift cards are also great if you think someone would like a button maker, but can’t afford to buy a whole kit. They will appreciate your contribution to the cost of a button making kit and supporting their button making dream.

You can even use them towards button machine rentals!

Read more »

How to make a button with the new Multi Size Button Maker July 15 2014

Making buttons is easy with this simple, solid metal, multi size button maker. A new multi die or multiple size button maker that works!

Interchangeable Die Button Maker

The new multiple size die button maker kits

Whilst this machine is not as fast as a pro button maker if you need buttons in smaller quantities but in different sizes this is an option. The difference in cost is substantial. The multi machine at $400 is equivalent to 3 pro button makers at $1200 – $1600. Pro machines are faster but if you are not running a button business or producing bulk buttons this could be a low cost solution.

Multiple Dies available

Interchangeable dies for button making. Picture shows 1″, 2-1/4″ and 3″ dies.

Currently this machine is available with dies in 1″, 2-1/4″ and 3″. 1-1/4″, 1-1/2″ and 1-3/4″ dies will be available by the end of the year. Additional die sets with a matching circle cutter are around $100 to $150 depending on size. To swap dies simply pull the pin out and remove the die carrier. Once you have replaced the die carrier with the size you need you slot it in place, slip in the pin and you’re away. With this style of button maker there are no upper dies which are harder to replace and often consequently do not line up correctly causing poor quality buttons. With this multi machine you should have no trouble.

interchangeable die button maker

interchangeable die button maker

As I have said before the method of using the dies is slower but it does seem to be reliable. The method is a little bit like Badge-A-Minit except these are inexpensive standard button parts and the dies are solid metal and not plastic. To make a button you flip the dies and press the button in sequence. Here’s a detailed instruction on making a 2-1/4″ pin-back button using a multi size button maker:

Before you begin check that you have everything you need!
Your machine parts:

multiple die button press base

The basic press. This machine will press dies from 1″ to 3″.

Die table with 2 dies for button making.

Die table with 2 dies for button making. Pickup die on the left and crimp die on the right. The first press uses the left hand pickup die. The second press uses the right hand crimp die.


The positioning ring

Positioning ring

The positioning ring (bottom view) Do not use this way up.

The positioning ring

The correct side of the positioning ring – Always use this way up in both the left and right hand dies.

The pressing die

Pressing die

The pressing die. Use this way up for the first press.

Flip side of the pressing die

The pressing die (View of the flip side) Use this way up for the 2nd press.

White plastic spacer rings for 2-1/4″ only

Spacer Rings

Spacer rings – Only necessary for making 2-1/4″ buttons. Not supplied for other sizes.

Spacer ring for 2-1/4" pin-backs

Adding the plastic ring when using the 2-1/4″ die is just a question of laying the ring down before inserting the pin-back


Button parts – Remember each die set will make a specific size button.
Match your buttons to the die set you are using.

button parts

And you will also need your button parts

And you will need your button image or artwork cut and ready to go.

Artwork ready to cut

Artwork ready to cut first before pressing

Remember that you can also make magnets, key-chains, mirrors as well as all kinds of items. They usually involve changing the back button part, the front remains the same. Just follow these instructions but for example for a fridge magnet use a magnet back instead of the pin-back.

Once you’ve checked you’ve got everything you need you can begin making buttons.

 Place the button maker on the solid surface and turn the die table so you can access both dies.

Place the button maker in front of you with the dies easily accessible on a solid table so you can begin button making.


Place shell in pickup die

Place a shell in the left hand or pickup die. The edge of the shell slots into the circular slit in the pickup die. The shell fits exactly into the slot.


Add paper circle to die in a multi die machine

Add your pre prepared artwork or image over the shell. It should fit snugly in the available space. Now cover your art or image with a circular sheet of clear mylar.

 Note! Adding the white plastic spacer ring is only necessary for the 2-1/4″ die set.

Spacer ring for 2-1/4" pin-backs

Adding the plastic ring when using the 2-1/4″ die is just a question of laying the ring down before inserting the pin-back.

Multi die button maker

Place your pin-back, pin facing down and make sure your pin-back and the direction of your art match as per the photo. You want the pin to end up at the top of your art. So you now have your button maker loaded with shell, image and mylar in the left die and pin-back in the right die.

Place the positioning ring over your image

Place the positioning ring over your image so that the centre of your image shows through. Make sure the positioning ring has slotted into the lower die and is firm or it may be upside down.


Placement of the pressing die

Place the pressing die on top of the positioning ring. Note how most of the pressing die is sticking out of the positioning ring making it higher.

positioning ring and pressing die

So remember, in this order: shell, image then mylar. Positioning ring and then pressing die. To see which way up they go see above.


Pick up die first press

Now swivel the die table so that the left hand die moves to a position under the press and press your button. You will note with the first press that you feel the handle give as it presses your button. No force is necessary just pull the handle down.


First press on multi button maker

Make sure you go all the way down but force is not necessary.

You should have now successfully completed the first press. Now we will transfer the button over to the crimp die to make the second and final press. You know you did it correctly if you got that give in the handle as it shaped your button.


Flip the pressing die

Once the first press is complete remove the pressing die and flip it as you put it down ready for the second press. Remove the positioning ring from the left die and you will see your image pressed into the ring ready to move to the right hand die and to match up with the pin-back.

Positioning ring

This illustrates your positioning ring from the underneath. Your shell is pressed into the ring with your image and mylar. Note the edge of your art and the mylar around the edge ready for the pin-back.  Move carefully to retain the correct position.


Move the positioning ring to the crimp die

So carefully remove the positioning ring with your art from the left hand die and place it over the pin-back in the right hand die. Match the top of the back to the top of your image.

right hand multi-size die

Remember: The position of the art to the pin-back makes a difference to your final button.


pressing die into positioning ring.

You already flipped your pressing die so place it on top of your art. It should slide into the positioning ring. Make sure the curved or button shape surface is face down.

swing the die table

Now you’re ready for the second press. Swing your die table under the press to complete the second press.


Swing the die table

This is not far enough. Swing the die table all the way to the stop. Watch it doesn’t bounce back a little.

Make sure you're in the center of the die

Make sure you’re in the center of the die.


Second and final press

Pull the black handle down all the way in the centre of the die. There is no give on the second press. No force necessary. Just a steady pull all the way down.


button press complete

Once you have completed the second press you can remove the pressing die and the positioning ring and your button will be revealed. Check the pin lines up at the top of the art so the button is straight. If not watch for this on the next button. Make sure you line up the art and the pin. Happy button making!


Read more »

Cut button making time in half with a graphic punch. July 04 2013

graphic punch

Button Making: Tecre Graphic Punches

Is it time to invest in a graphic punch for button making - we think so (it will cut your time in half). Graphic punches are used to cut out graphics, paper or photos for button making and are a faster method than traditional "adjustable cutters", scissors or quick cutters.  Tecre graphic punches are of all metal construction, have clear and easy visual centering, are compact and light-weight and require very little force to operate.  And an added bonus is that these graphic punches come with a manufacturer's life-time warranty and are useful for all sorts of fine-art related projects.


Cutting Paper Circles and Blank Paper:

cutting paper circles


 Cutting Custom Button Artwork:

 cutting button artwork


Cutting Magazine Images to make Buttons:

magazine image buttons


Cutting Patterned Paper to make Buttons:

patterned paper buttons

Remember to cut your paper, photos, magazine images or custom button artwork into strips so that they fit to the graphic punch. We carry graphic punches for all sizes of button making.   For a complete list and pricing click here.  Happy Button Making!

paper circle cutting


Read more »

Come by our shop!! March 14 2013


Come by our Button Shop in Toronto and take a look at our unique collection of Button Makers! We can give you advice on Button Making and demo how to use our hand presses.  You can learn how to make buttons : )  See you soon.

Read more »

Silicon Lubricant - A Button Maker's Best Friend... March 01 2013


Panef White Stick Lubricant with Silicone - Perfect for lubricating button makers.
Fixing or repairing a button maker can be tricky.  Lot's of spanners and wrenches and all kinds of tools.  But some problems are fixed without needing tools.  The answer can be as simple as lube for your machine.  But when fixing your button maker or making buttons NEVER use WD40 type products - they are designed to remove lubrication and rust, you need to add lubrication.  Don't use oil and grease on your dies - it will mess up your images. Use silicon lubricant in a lip balm or chapstick style tube like this:  The aerosol silicon is not so good for this particular issue - but is good for cleaning.

Recommended by THE BUTTON GUY for button maker lubrication!


silicon lubricant lube for button making


use lube to reair your button maker 

Over time a button maker will become unlubricated and produce mylar sealing problems (pictured above).  This white stick lubricant will combat that problem - simply lubricate the upper die on your button maker.  Be sure to wipe the grease off of your first few buttons after application and you should be good to go. 


Fixing or repairing a button maker 

This is what your edges should look like! To order a stick, click here or include one in your next order!  Happy Button Making.


Read more »

Non-Profits, Not-for-Profits, Charities, Organizations – Why you need a button maker! February 15 2013

Non-Profits, Not-for-Profits, Charities, Organizations all need to raise funds for their causes.  There are many ways to do this.   Many of them get into the junkmail business, many canvas door to door or on street corners.  Many of the canvassers do not even care for the cause and are paid quite well for bugging people.  The large charities employ sub-contractors to knock on doors and if they make a sale of, say, a $10 monthly subscription the first 2 years or as much as $240 will go to the sub-contracting company and only the subscriptions in the third year and beyond benefit the charity.  I know I’m going to get angry emails from the large charities telling me “It’s only the first years subscription that goes to the sub-contractor” but whatever the deal is and I know they vary, I don’t think the generous subscriber new they were filling the coffers of the for-profit canvassing company. Full disclosure and real volunteers would be a better way to go, but I actually believe these charities harm their image when they call people on the phone during dinner or knock on doors when people are relaxing (or sleeping).  As for the junk mail?  That’s just got to stop.  Our household has given annualy to possibly 10 charities for years.  We probably get more than 1000 letters a year.  Yes averaging more than 3 unnecessary letters a day.  You could argue that’s a lot of trees but it’s also a lot of cash that should be going to saving whales, fighting climate change, or building women’s shelters.  It should be used for whatever the money was actually intended for. 


Darfur campaign button Anti-poverty fundraising button Haiti relief fundraiser
Darfur, Sudan relief
Anti-poverty Haiti relief
campaign button fundraising button fundraiser


Fundraising with buttons is extremely low cost, fun, attracts new subscribers and interested parties and does not bug anybody because people come to you

There are many ideas for using buttons to fundraise and I will layout a few ideas to show that instead of sending junk mail getting a button maker is a better investment.

1) Buttons are a low cost way to promote your organization.  Get your name logo out there.  It’s obvious but simple.

2) But what about a “Make your own buttons table” in front of your office, at street festivals, yard sales, schools, universities or any public events.  As well as your button maker you need blank circles, crayons, pens and markers. Get people to draw their designs and put it in a button for them right there and then. People will flock to your table and as they come they will bring more people (naturally, you don’t have to set up a robocall)  Make it for a donation for your cause and you will get $5, $10 for a button that costs 8 cents.  I once even got $50 for a single button because the donor believed in the cause.  You should also have your own designs available at the table for people who don’t want to draw.  Not just a button with your logo but a load of buttons that are relevant for your cause.  Make them funny, make them pertinent, make them serious. Make some radical and some gentle.  Have buttons that describe the full array of your cause with humour and with passion.  All the time people stand at your table, reading your button designs, more people will come. ( You won’t have to bludgeon anyone with your clipboard anymore, they will come to you.)

Do get a graphic designer to design your buttons!  Good design is the key!!!

QR code button 

3) Got something interesting on your website? Draw traffic to the page with a QR code.  What’s a QR code?

Pin-back buttons, pins, badges or whatever you call them are an ideal vehicle for promoting websites but what about a button that can be scanned on a cellphone and the image takes the cellphone user straight to your website.

QR codes don’t just need to go to a homepage, you can generate a QR code to lead a browser to any web address, to a special offer page, to a secret page or a surprise page.  Follow a QR code button on your smart phone and see where you end up!


4) Use your button maker as a tool to leverage volunteers.  If you have a large number of volunteers coming in to help then that’s great but you need a way to utilise that people power.  You also need a way to give those that do volunteer a sense of satisfaction, the sense that there voluntary labour was put to good use.  I used to be involved in an organization that had lots of walk-in volunteers. I found that if I invested time in explaing tasks to them I would sometimes be dissapointed as they could loose interest and drift away.  On asking I found they often thought the volunteer jobs pointless.  But explaining to a new volunteer how to make buttons takes literally a minute or two.  They work away at making buttons and as the finished buttons pile up they get a sense of achievement. You can use the button maker to judge staying power in your new volunteer.  Once they have proved themselves making buttons for your next event, you can invest some time and take them to the next level, they have earnt it.

5) A printing press in your office.  Once you get good at making buttons you can publish a new button even daily, it takes minutes. As and when a new campaign slogan comes up, a reaction to a press release or a new idea formulates; put it on a button.  Have new designs on the website with a pile of freebies at the front desk for drop ins, for a donation or otherwise. Those buttons will go forward and spread the word. Let your supporters spread the word for you.

  • Buttons are inexpensive
  • Buttons are excellent low cost fundaisers (Do the math!)
  • Buttons draw people to your organisation
  • Buttons draw traffic to your website
  • Buttons can be used to leverage volunteer power
  • A button maker is like your own printing press in the office
Syndicated article from The Button GuySyndicated blog from TheButtonGuy.net
This article is reprinted with permission.
http://TheButtonGuy.net/
Read more »

Question: Are the tecre machine molds interchangable or are the units fixed? February 15 2013

Hi  Yes Tecre or all good button makers are fixed.  There are 2 problems with interchangeable die button makers.

  1.  Interchangeable die button makers use a plastic base for the die carrier.  After a short time this wears and the button maker no longer lines up properly.  All good button makers are single die non-interchangeable and they last 25 years.
  2. The 2 common manufacturers of multi die machines are BadgeAminit or of Chinese origin.  Made in China button makers are not North American standard but European standard with sizes in millimetres.  (a) They are very expensive  (b) They are not well made, often using glued pins or white plastic backs.  Badge-A-Minit button parts are equivalent to standard North American Button Parts but they are up to 3 x the price.


I would always recommend a solid metal button maker, no plastic parts (on the button maker or the button parts) and the button maker should be of a standard North American size so that you can use cheap, good quality button parts.  At the end of the day your customers, clients or purchases of your buttons don’t care how you made your buttons.  But they do want an excellent quality all metal button and you want to produce that at the best price – so get a Tecre Button Maker.

Plastic parts in a button maker

Looks all very well but the white plastic base will wear out pretty quickly and the button maker will not align any more


Tecre Button Maker

All metal, solid steel, no plastic – How a button maker should be!


Tecre button maker

Tecre button maker with the distinctive black with red handle.

Syndicated article from The Button GuySyndicated blog from TheButtonGuy.net
This article is reprinted with permission.
http://TheButtonGuy.net/
Read more »

For Your Valentine... February 11 2013

Button Maker 

Nothing says I Love You like a Button Maker :)

Read more »

Renting a button maker in Toronto January 19 2013

Renting a button maker in Toronto couldn't be easier.  We all possible sizes of button maker in our rental program from less than an inch to 6 inches.  We have round, square, rectangle, oblong and oval button, badge and pin making machines.

Button Maker Rental Program from $58.04 / day.

Order online

People Power Press
3095 Dundas St West
Toronto, ON M6P1Z9

Tel: 416 204 1984  Open Monday-Friday from 11am to 5pm and Saturdays 11-4

We are open weekdays for button making machine rentals in Toronto. Closed Weekends.  You can pickup a machine and the necessary parts from our store in the Junction from 11am to 5pm.  To rent a button maker you need a credit card and we take a security for the value of the machine on your card.  It is better to call in advance and book your rental so we can also prepare the machines as well as the button parts you will need.  On pick up we will show you how to use the machine if you need it. BUTTON MAKING TRAINING INCLUDED

With our rental service you can rent a wide range of button makers from less than 1” to 6” round as well as oval, square, oblong and rectangular shapes in varying sizes.

Below is a link to our online Toronto Button Maker Rental product.  Rentals include the button maker as well as the corresponding Graphic Punch for circle cutting. You can place your order online. 

Toronto Button Making Rental 

This is the perfect Toronto button making rental opportunity! If you need to rent a button maker in Toronto we have everything you need!

If you have questions please feel free to call us on 416 204 1984 with any questions. Checkout the online order form.

Rent a button maker Toronto

Read more »

What printer and what ink would you use for business level quality graphics? January 14 2013

Syndicated Button Guy Blog Syndicated blog from TheButtonGuy.net
The following article is reprinted with
permission.
http://TheButtonGuy.net/
  • What kind of printer do I need to start a custom button making business?
  • What paper is best for making custom buttons?
  • What is the cost of printing custom button?
  • How can I lower the cost of making buttons
Original question:   In your experience with button making what type of printer and ink would you   use for a business level quality graphics? I know that over time ink can sun   bleach and paper can break down, so for a good quality product for my   customers any ideas? I have not started my button side of my business yet but   looking to soon. Love your site btw and thank you for your time. Have a great   day.

Paper choices for Button Makers and Button Making.

Button makers are mostly designed for standard 20lb (75gsm) to 32 lb (120 gsm)paper.  There are some special photo button machines designed for thicker photo paper but in the digital age photo paper is a bit obsolete so the special machines are quite rare and not really necessary.   I think the key to good buttons is that you choose a super white paper, the look and the way it prints being more important than the weight.  That way when you print black (or any other color) on white you have the maximum contrast. I have also found that papers with a gloss finish print well.

When purchasing paper I have always found better prices and quality from commercial print shop suppliers rather than retailers like Staples.  A standard pure white glossy commercial printer paper will do it.  No problem.

Printer choices for Button Makers and Button Making.

Your choice is basically Ink Jet or Laser.  Inkjet will give you better quality for photos and artwork especially if you get a high end Epson but you will pay dearly for the ink. Inkjet or bubble jet have higher resolution than laser. Laser printers are not as good quality but are generally reasonable quality and are much cheaper per page.  I have tried many but I have not found a good quality entry level laser printer (Up to $800) that can compete with the big machines installed in copy shops.  A good copy shop can give you really high quality results but don’t just go in and accept what you’re given. All print jobs need a little tweaking.  Colours can be enhanced, saturation improved.  Find a printer that cares and then give them lots of business.  Remember the quality of the printing can make or break your custom button business.  Once you’ve established your business it becomes time to consider the big expensive photocopier on a 5 year lease with a click charge per 18″ x 12″ print.

If you decide to print from your home or office with a $300 printer that can work too.  Make sure you’re maximizing the page and remember you do not have to print right up to the cut-line.  Save ink and take out any unnecessary color on your artwork that does not show – the buttons are not affected.  See the example below.  These are 1” buttons and 42 buttons fit on each letter size page.  The cut size for 1” buttons is 1.313” but we cut the color short – the white does not show on the button.

print sheet for custom buttons

Also speaking of saving ink, I personally have had no luck with refilling my ink cartridges.  The colors coming out of my printers have always suffered.  I am not supporting Canon, Xerox and the rest for overcharging for their cartridges and I have saved money by refilling cartridges locally but quality always declined. If color is not crucial it’s a good way to go.

Some companies, like Xerox have solid ink printers. These printers are not ideal for button making if you are making custom buttons for clients because the colors are way off and that can be a problem.  Solid ink printers may be good (or not so bad) for the environment but people are often fussy about their corporate logos and business colors and that can lead to problems if your printer cannot match colors on the monitor.

Issues with bleaching and paper deterioration.

I have never found bleaching or  paper deterioration to be a problem.  I have a few buttons that are maybe 20 years old.  Yes the paper changes color but that even adds to the effect for an old button.  You could try using acid free paper but I don’t think it’s necessary, buttons are pretty durable.  I had a store with a south facing window that got direct sunlight all day.  I filled the window with a mosaic of buttons and yes after a year buttons began to fade and after 18 months it was necessary to change them, but that is exceptional exposure for a simple button.

Cost of button printing.

The cost of printing buttons varies tremendously.  I calculated that some photo buttons using a cheap Canon printer ($400) with a 4 colour cartridge system ($440 for 4) were costing $1.30 for a full sheet.  Ouch!   But that was the luxury of doing it at home and not going to a printer and that meant printing costs of 3 cents for a 1” button (42 up) and 8 cents for a 2-1/4” button (9 up).  These days I have an 18” x 12” Xerox @ 8 cents a sheet.   That means the 2-1/4” button print costs 8 cents per 18 buttons as opposed to 8 cents each. The difference in the cost of printing buttons can be huge!  But if you’re selling a custom button service print quality is key.

Read more »

Which button maker, badge machine or pin maker would you recommend for a young artist. January 12 2013

Hi Button Guy,   I’m a young artist and lately I have had customers asking for customized   buttons. I really like the idea but I’m not totally sure on where to begin, I   don’t have that much money to spend on a machine and supplies at the moment.   Out of the machines you have tried, which would recommend for a first timer   on a budget? Also, what companies do you recommend getting the supplies from?  Julieann – Indiana

Hi Julieann

I work closely with Button Giant:  http://ButtonGiant.com

They do have a good starter machine. http://buttongiant.com/collections/frontpage/products/2-1-4-t15o-button-maker-hobby-kit-circle-cutter-250-button-parts-and-free-sample-pack   I have tested this kit.  It’s cheap, works well,  But read on!!

As a designer or as an artist, buttons are a great way for getting income, promoting your projects and creating a following. Whilst your designs and style will change and develop over the years, you will be able to use buttons at gallery openings, for website promotion, even as a calling cards or business cards.  The low cost of buttons means if somebody picks up one of your creations and pays $2, $1.90 is your cost excluding labor.  Sometimes it’s better to ask for a donation, then you’ll get $5 or even $25.  Few products offer that kind of margin.  But the most important thing? – People just like buttons.

I would actually recommend not getting the above starter kit unless you are in a real hurry.  I would wait, save your cash and get an all metal button maker that takes low cost, standard button parts.  The starter kit mentioned above will make buttons for a few years but an all metal machine will make buttons for a lifetime – your kids could use it!!

Avoid Button Makers with plastic parts, avoid button makers made in China (expensive parts often with ugly plastic backs), avoid Badge a Minit (expensive parts, starter kits often fail), avoid interchangeable dies (impractical & expensive parts)

Here’s a link to a solid all metal button maker on Button Giant:  http://buttongiant.com/collections/button-makers-and-diy-button-making-kits/products/1-1-4-button-maker-kit-with-graphic-punch-500-button-parts-includes-free-sample-pack

Here’s a link to an article about button making equipment:  Checkout my button maker guide!

Hope it helps!
The Button Guy

Button Maker Kit for artists and designers

A great button making kit for artists and designers


Read more »

Buy a kid a button and he’s happy for a day. Give a Kid A Button Maker and you’ve got happiness for a lifetime! December 08 2012

Syndicated Button Guy Blog Syndicated blog from TheButtonGuy.net
The following article is reprinted with
permission.
http://TheButtonGuy.net/

Have you considered giving a button maker as a gift this year?  Christmas, graduation, birthday, Kwanzaa, Hanukkah or whatever the occasion, a button making kit will be the gift that inspires!

Button makers are ideal gifts for kids, teens and young adults because, unlike most fads and toys, they will last for years and keep their appeal through the ages and stages of your child’s development. The button designs may change, the button machine just keeps on pressing buttons.

 Children are fascinated by the idea of designing their own buttons.  What better than a creative gift?  Their first button making experience was often at a children’s party or school event but that’s not the same as owning your own button press. Once they see their artwork transformed into a wearable pin or stickable magnet, they’re hooked and can’t get enough. Making buttons encourages young children to be creative and to hone their design and aesthetic senses.

creative gift idea christmas gift, present

Older children love the idea of being able to wear a message they have designed. It gives them a way to tell the world who they are and what they like. As teens move through the school and university system, button makers move with them. Having the ability to produce ‘campaign’ materials for a variety of projects is a bonus during those stages when being included is so important. Button makers become part of social events that encourage teamwork, creativity and collaboration.

 To top it all off, button makers are not expensive relative to their value: a good quality, solid metal machine and circle cutter costs less than $500 and comes with a starter kit with usually more than 500 buttons. After that, button parts are relatively cheap (less than 10 cents a button) and you never need to buy batteries! If given a minimum of care, the machines will last for years and produce thousands of buttons.

holiday gift idea

There are cheaper options, I have seen kits for $189 like this one on Button Giant: $189 button maker kit  This kit works well but this is a hobby kit, if you can stretch to $300 you can get a metal machine that will work in elementary school and then still keep on pressing when your kids in University. $500 gets you the full enchilada.

There are few toys that match button makers for sturdy construction, ease of use, educational and social value, and affordability. Think about getting your kids into button making this year!  A memorable Christmas gift, graduation gift, birthday present or holiday surprise. Whether for Kwanzaa, Hanukkah, a Bar or Bat
Mitzvah, Christmas or New Year,  a button maker is the perfect creative gift.

what to get my kid for christmas kwanzaa, Hanukkah, birthday present

Read more »

I am an artist that attends various anime conventions throughout the year – What kind of button maker do I need? December 08 2012

Syndicated Button Guy Blog Syndicated blog from TheButtonGuy.net
The following article is reprinted with
permission.
http://TheButtonGuy.net/

Hi Button Guy

I am an artist that attends various anime conventions throughout the year. I had made a post about purchasing a button maker, in Deviantart’s forum, and you answered it, which I recently responded to. I figured that you may not get on DA frequently so I decided to try and catch you this way. Seeing as I’m going to get a machine within this month.

What I wanted to know is if the T150 model’s 2-1/4 die could be switched out with a 1-1/4 die? The 2-1/4 size is great for the mirrors I’m seriously considering adding to my table but not as buttons. Most of the buyers I’ve had at conventions prefer 1 to 1.5 size buttons. So if the T150 can swap out then I’ll have a 2-n-1 machine, which is exactly what I need.   Nat

comicon comic-con button maker

Hi Nat

 The above picture shows the T150 Hobby Kit for Button Making.  It’s good value! But it is a hobby kit.  Not a pro button maker. Unfortunately the T150 Button Making Kits do not have any options.  I have only seen dies for 2-1/4” buttons.

badge press as seen at comicon

You see the die is metal but the attachments on the Hobby Button Maker are plastic, if you’re knocking out buttons for your anime conventions or Comic-Con, how long will these plastic pieces last? I did not see anyone using a hobby kit at Comic-Con, San Diego or Comicon in Toronto or Vancouver

 As an anime artist going to conventions I would recommend an all metal button maker anyway.  And yes, 1”, 1-1/4” & 1-1/2” buttons are the most popular sizes for anime.

 The higher price is a barrier, but in the long term the metal button maker will last years.  I have a number of button makers at least 8 years old.  The paint has scratched off, they have been extremely well used and they still make a button perfectly every time with little to no maintenance.

 For anime conventions a button maker is a great addition to your product range, find a way to get a solid all metal machine and you won’t look back!

Cheers,  The Button Guy

Website    http://TheButtonGuy.net
Blog         http://blog.TheButtonGuy.net

Directory http://Button-Guy.com

button machine as seen at comicon

The above is a solid all metal button maker available from Button Giant or People Power Press. This is a pro machine suitable for anime conventions, comicon and serious uses. Look at the solid steel dies on this below: These machines just keep on going, they are precise, well made and worth the extra few bucks.

button maker as at comic-con

The perfect button maker, badge press, button machine, pin press or button making kit for anime conventions, fanexpo, comic-con, comicon or wherever you as an amime artist sells your art.

Read more »

I've got a shell stuck up inside my button maker - button maker jam! November 17 2012

Syndicated Button Guy Blog Syndicated blog from TheButtonGuy.net
The following article is reprinted with
permission.
http://TheButtonGuy.net/

Great videos! I’ve always had success with the following method. When a shell is
stuck simply remove any parts from the crimp die, spin the die table around as if
you were going to crimp then pull the handle down. The shell will pop right out.
In the 10 years that we’ve been doing custom buttons here at punkit.com this
method has worked for us 100% of the time.

I’ve had some sort of malfunction with the button
press, where the entire apparatus seems to have lifted
off its base.


Article:

How to unjam your button maker
- button making machine repair.

Read more »

I've had some sort of malfunction with the button press, where the entire apparatus seems to have lifted off its base. November 15 2012

Syndicated Button Guy Blog Syndicated blog from TheButtonGuy.net
The following article is reprinted with
permission.
http://TheButtonGuy.net/

Button Maker Problemo

Hi Button Guy  I came and scooped up one of two 2 1/4” button makers with my mom as you may remember.  I’ve had some sort of malfunction with the button press, where the entire apparatus seems to have lifted off its base.  I’m trying to make buttons with a heavier photo paper and it worked fine once, but this second time, it seems to have jammed the damn thing.  Unless you have a secret tip to help dislodge the thing, perhaps I could bring the thing in and have it diagnosed.  I’ve attached a picture of the press to show you what I mean.  The press part won’t become disengaged from the dome side of the swivel.         Thanks,   John

Jammed Button Maker


Hi John    This is a straightforward jam by the look of it.  But you never know.  It could mean you have more than one shell or mylar stuck inside or it could be your photo paper was too thick.  I’m inclined to think it’s just the parts got doubled up inside.

 You are welcome to swing by with your button maker and I will unjam your button machine.  You could also checkout this video.

 http://thebuttonguy.net/videos.html     At the bottom is unjam your button maker - How to fix a button maker jam.     Let me know if it helps.   The Button Guy

Button Guy, you’re a genius!  I should have consulted the videos straight away.  Problem fixed.  I just didn’t want to take a big hard tool to my wonderful button maker.  But I suppose they’re designed for some hard goings-over! Thanks,   John

Do go steady with your dies John. The inside of the dies are sensitive and yes they are solid metal button makers but you have to be sensible when using a tool to unjam the machine. You do not want to void the warranty or damage the die. Glad it got fixed quickly.  Cheers  The Button Guy

Read more »

How do I get people or businesses interested in getting buttons made or using buttons for fundraisers? October 23 2012

Faisal asked

“I’m interested in button making and I design fanart too. How do I get people or businesses interested in getting buttons made or using buttons for fundraisers?”

Thanks for the question Faisal, it’s a big question and I will try to answer it here in short form and at the end I will link to other related articles that I have written.  Cheers!

How do I start my custom button making business?  How do I market my buttons? How do I start a button making business.

1. Create your tools.

2. Identify your market.

3. Create your marketing plan for your launch.

4. Consider timely or seasonal and ongoing strategies.

1.   Create your tools:

Your tools are what you need when you walk in the door the first time to meet a potential customer.

Samples and Business Cards.  Keep samples handy, that way when you see your friends, family or meet new people, you can give them one. They’ll probably compliment the design, at which point you can say “Thank you! I made it myself. If you ever need buttons for an event or business, let me know”. They might not need them right away, but they’ll have you in mind for when they (or someone they know) do. Better yet, make your samples double as your business card: put your contact info on a button and voila! You’ve got a button business card. It can be round, square, or whatever shape and size you want. If you make them as magnets instead of pinbacks, you have the added benefit of the free publicity you’ll get when they put it on their fridge, locker, etc. The 1-3/4” x 2-3/4” rectangular button maker makes great business card sized magnet or pin-back buttons. BUT REMEMBER: if that’s your card, people may ask for the same shape and size, so be ready to buy that machine – or limit your business cards to the size of the button maker you own.

You need a price list.  That means an easy to read, single piece of paper with your prices.   Give price breaks for larger quantities, but don’t go too cheap.  No point making 100,000,000 buttons if you’re going to lose money (and time) on every single one!

You need a website. This can be a free site (such as Wordpress). To start, make sure you have 2 pages: one that says who you are and what you do and the other with your contact information so potential customers can get in touch to place an order. Having a website with your address, phone, etc. increases trust while publishing prices online assures customers they are getting a fair deal.

2.   Identify your market:

You have, in your question, identified fundraisers as a potential market.  Who raises funds?  Community groups, Non-profits, church groups and activist organisations. Start with a list of local groups that you wish to contact.  Send them samples (5 buttons or magnets, or a mix of both, is more than enough) and a pricelist.  If you see an excellent potential client, make them a personalized button and go and meet with them face to face (perhaps at one of their events!).

If you want to sell CUSTOM buttons (meaning, you use or create designs specifically for your customer):

Any local business is a potential customer, canvas your local business area or drop a business card button through the door whilst taking the dog for a walk.  Local small businesses are your best bet when starting out, as big chain stores often buy at head office and not at branch level.

Don’t forget your friends: they are your biggest supporters, probably your first customers, and will be the happiest to tell other people that their friend is in the button making business. Create a personalized button for each of your friends (if they like Godzilla, give them a Godzilla button with their name on it). They will wear it, go forth and spread the word.

If you want to sell YOUR buttons (meaning, you want to sell your own art in button form):

Set up a booth at local farmers’ markets, flea markets, or one-of-a-kind shows.

Create an online store on etsy, ebay, or other online shop.

Do a “crowdfunding” campaign. Rockethub is a great company to help you with this and can give you more information. Simply put, you set a goal for the amount of money you want to raise (which can go towards establishing your button business: maybe you don’t have a machine yet, maybe you want to get another one) and then you promise your donors a product in return for their donation (which you give to them once your campaign is complete). This is a great way to a) get the funds you need to purchase your gear and, b) start establishing a word-of-mouth client base before your business even begins!

Identify potential resellers. Look for stores in your area that could resell for you and take it a step further: ask the local bicycle store if they want to sell bicycle buttons, ask the computer store if they want to sell nerd buttons, ask the pet store if they want to sell animal buttons / fluffy animal buttons / animal rights buttons.  Then use your creative genius to design a set of buttons for them to sell.  Either they buy a box of buttons from you or you negotiate a cut of consignment sales. Talk to them, get their ideas. For example, you could create 5-30 designs for them, laid out on a clean, professional looking board (or in a counter top box or jar) in the store and split the sale 50/50 with the store owner.  You may have to settle with a consignment deal – meaning, you get paid when they sell (so you’ll have to keep an inventory and check in from time to time).  But if the store owner allows a small add on the board that says “I Make Custom Buttons” and contact info, then it could be the beginning of something good.

NOTE: Match the buttons you create to your personality and the personality of the store (and owner) you choose to work with.  If you’re an avid cyclist do cycle stores.  If you’re a tech wiz do computer stores.  YOU WON’T CREATE GOOD PRODUCTS IF YOU’RE NOT INTERESTED!   Example: If you’re allergic to anything furry and hate animals it will be harder for you to identify with animal lovers, likely your buttons won’t be so good.  If you’re an animal rights activist and want to make anti-cruelty buttons (and I’m 100% with you), there is still no point going to the local pet store that sells Chihuahua’s with pink bows if the store owner isn’t an activist.  Put a Chihuahua with a pink bow on a button and you will win that customer.  (Disclaimer:  Here I apologize to all animal activists that have Chihuahuas with pink bows – I have a Pitbull that behaves like a Chihuahua and wears pink bows sometimes.)

3.   Create your marketing plan:

A marketing plan for a new business usually means a $0 budget but there are still free online notice boards, free classifieds, crowd funding possibilities, trade/swop ideas and tabling event possibilities. Follow this simple list, add your own ideas and work through the list. That’s a plan!

Free classifieds: There are many local online noticeboards such as Craigslist and Kijiji. Just go in, use the free option and place some ads. Search for free classifieds online. Some newspapers allow free classifieds but keep it local to start. You can get into shipping, returns, credit card payments etc. later. This may bring an order or two but it’s a good place to start, you begin to formulate in your own mind why you are better, why people should use your service and primarily that will be because you are “local”. People like to deal with neighbours. Don’t just be cheap! Underselling products is a key reason for small business failures.

Tabling, Festivals, Street Parties, Yard Sales:  Tap into your local community, what’s coming up? Setup a table at your neighbours’ yard sale. What about the Christmas fundraiser at the church. Does your local business community run a festival? Talk to the Business Improvement Association. Even if you go there and stand all day and sell just $50, next time your neighbour talks to someone they may just say, “I know someone who makes buttons.”  Do not underestimate how much money you can make at a school or college lunchtime break if you can setup a table. What about a “Make your own button table.” Basically any public event is a potential button marketing event.

Birthday party events for kids:   What about doing birthday party events for kids with your button maker?  It’s simple to organize coloured pens, markers and pre-cut circles for kids to draw on.  Don’t forget to take a few magazines or comics so the kids can cut out the stuff they’re into. Create a craigslist (or other) post specifically about your birthday party services and see what happens!

Trade / Swop: You’re starting out, you have no cash – what if the local church wants $30 for a table – offer them custom buttons instead.  If a local business is willing to trade products or advertising in exchange for buttons, that could be a good way to get the ball rolling and lower your start up costs.

4.   Consider timely / seasonal and ongoing strategies.

Whether it’s for the launch of your business or for ongoing business you’ve got to be timely and seasonal.  As I write, Christmas is looming. So why not offer to put family pictures on a button for people to give out as Christmas gifts or include with their yearly Christmas cards?  In the Spring you want to be thinking about Summer events/festivals and planning ahead.

Here’s a simple framework – I know it’s not rocket science – for how a button maker should be thinking and preparing:

Spring:     Summer events, street festivals, beer gardens, yard sales

Summer:  Back to school

Autumn / Fall: Halloween, Harvest Festival, Kwanzaa, Hanukkah,

Winter:   Christmas, Holiday Season, New Year, New Year Resolutions, Valentines

All year round:  Birthdays, Marriages, Funerals, Graduations, Births.  Also new movies, trends (QR codes), comic books (any new Marvel release) and then the humdinger of them all: ELECTIONS at every level: local school or National Presidential elections all need buttons!

Some final words for reflection and advice:

Starting ANY business takes a lot of legwork to get it up and running.  The most effective advertising is ALWAYS word of mouth.  Do a good job for each customer and they will become your ‘sales representatives’.  It may go wrong occasionally (don’t ignore it!), do what it takes to win that customer back (but remember that once in a while you’ll run into a client that can never be pleased. Don’t take it personally).  Go a step further for your customers: Under promise and over deliver. Establish your customer base and as long as your service and product is good (and fills a need) it will grow naturally without expensive advertising.  Be creative. Don’t try to get too big too quick, steady as she goes and I wish you luck with your new button business! 


The Button Guy Blog on People Power Press

Starting your own business with a button maker

Starting a button making business from home? - Do I need insurance?

Fundraising with buttons

Read more »

Using thick Photo Paper in a button maker? Creating photo buttons with my button machines. October 20 2012

  • Robert: I am wondering if there is an adjustment I can make to use photo paper (thick) in a button maker. I would use photo paper exclusively so it could be set up once and left that way. Right now I have some of the badge parts inc machines. Thanks for you help
  • The Button Guy: Hi Robert First thing is size? What size photo buttons do you want to make? Depending on size you may just need to cut your image slightly smaller. That could mean buying a graphic punch sized for photos. Depending as well on what make of button maker you have. The manufacturer can reset some of the sizes, tolerances on your machine but this may be more expensive than just getting a photo button maker, ready sized for photos. So let me know the button size and I’ll let you know what you need to do.
  • Robert: I have a 1 3/4x 2 3/4 oblong model 700 maker from badge parts inc. Is the work on the machine something I could do? I’m pretty handy and have access to lathes, mills etc. Thanks
  • The Button Guy: I do not have a 1-3/4” x 2-3/4” oblong machine from Badge Parts here and I know Joe at Badge Parts does not make all his machines standard so I do not know the exact size. But you could ask Joe at Badge Parts if he can reset the machine. A simpler and cheaper solution is to change the cut size of the cutter. This you can test with scissors. Cut your photo paper so it is not the normal size you would use for a button but cut it smaller so the paper fills the front of the button but does not fold around the back. Experiment with this and you should find the size you need. You want to fill as much of the front of the button as you can but not go around the back. The mylar which is normally the same size as the button image will be larger in this case. The mylar will hold your paper in place. Then make or get a die maker to make you a die that cuts the special size and you’re done. With my 1-3/4” x 2-3/4” oblong machine I can put quite thick paper, even fabric in it anyway but as I say it’s a different manufacturer and possibly a different size.

The two photos show the same button maker. The first shows a circle cut for a photo button.  The second shows a circle cut for a standard button.

circle cut for photo button

  • The Button Guy: Generally speaking button makers can mostly make buttons with relatively thick paper but seeing as most photography is digital today and can be printed on standard 24 lb paper it is quite rare these days to find specially sized photo button makers and photo circle cutters. In most cases as I mention above the solution is just to cut the paper smaller than the mylar so that the paper does not need to fold around. Thicker paper tends to tear on the edge as some fabric does when it is pressed around the button. Sizing the image to the front of the button will normally solve the problem. There are some “specially” sized photo cutters or graphic punches that do just that. They are available for 2”, 2-1/4” and 2” x 3” buttons.

Note how this circle fills the full die whereas the photo button cut above only fills the inner circle of the button maker. This is the same button machine.

circle cut for a standard button

  • What the smaller cut size of a PHOTO CUTTER does is match the inner circumference of the button maker allowing you to still centre your image.
  • There are also some photo button makers in 3”, 3-1/2” and 4” but my advice would be to print your photos on thinner paper and get standard button maker/ cutters. The special photo papers are covered up by a layer of plastic anyway. So there is no great advantage and they are certainly more expensive than standard papers. The best paper for button making is ultra white 20 lb paper.
Read more »

A button maker for Christmas - A creative gift for your kid! October 20 2012

Have you considered giving a button maker as a gift this year?  Christmas, graduation, birthday, Kwanzaa, Hanukkah or whatever the occasion, a button making kit will be the gift that inspires!

Button makers are ideal gifts for kids, teens and young adults because, unlike most fads and toys, they will last for years and keep their appeal through the ages and stages of your child’s development. The button designs may change, the button machine just keeps on pressing buttons.

 Children are fascinated by the idea of designing their own buttons.  What better than a creative gift?  Their first button making experience was often at a children’s party or school event but that’s not the same as owning your own button press. Once they see their artwork transformed into a wearable pin or stickable magnet, they’re hooked and can’t get enough. Making buttons encourages young children to be creative and to hone their design and aesthetic senses.

creative gift idea christmas gift, present

Older children love the idea of being able to wear a message they have designed. It gives them a way to tell the world who they are and what they like. As teens move through the school and university system, button makers move with them. Having the ability to produce ‘campaign’ materials for a variety of projects is a bonus during those stages when being included is so important. Button makers become part of social events that encourage teamwork, creativity and collaboration.

 To top it all off, button makers are not expensive relative to their value: a good quality, solid metal machine and circle cutter costs less than $500 and comes with a starter kit with usually more than 500 buttons. After that, button parts are relatively cheap (less than 10 cents a button) and you never need to buy batteries! If given a minimum of care, the machines will last for years and produce thousands of buttons.

holiday gift idea

There are cheaper options, I have seen kits for $189 like this one on Button Giant: $189 button maker kit  This kit works well but this is a hobby kit, if you can stretch to $300 you can get a metal machine that will work in elementary school and then still keep on pressing when your kids in University. $500 gets you the full enchilada.

There are few toys that match button makers for sturdy construction, ease of use, educational and social value, and affordability. Think about getting your kids into button making this year!  A memorable Christmas gift, graduation gift, birthday present or holiday surprise. Whether for Kwanzaa, Hanukkah, a Bar or Bat
Mitzvah, birthday, Christmas or New Year,  button maker is the perfect creative gift.

what to get my kid for christmas kwanzaa, Hanukkah, birthday present

Read more »

Are you familiar with the Artec Button Maker? October 17 2012

Melissa: Are you familiar with the Artec Button Maker? I can't find anything about it anywhere...excepts its listings on ebay. Thank you!

The Button Guy: The Artec Button Maker is something I have not heard of. I looked at the ebay pictures and I see it has the standard dies and base of any of the run of the mill Chinese button makers with a fancier handle. This probably means that whilst they call it a 1-1/4” it will in fact be a European size 38mm machine. If this is the case the biggest issue is the button parts tend to be expensive. Whilst I have never tested this particular machine it looks identical to Chinese button makers I have tested (apart from the handle) and the other issues are you see it has a white plastic base for the dies. This will wear and after a while often does not line up with the top die anymore. These machines certainly do not have the longevity of a solid metal made in USA button maker which usually will still be good in 20 years.

But back to the main issue: Expensive button parts but not only that, the Chinese button parts are a bit cheesy, very light metal, plastic backs for some sizes, stick on pins sometimes, depending on size and generally just not as cool as your standard Made in USA button. Note the white plastic backs in the photo! The difference in quality of the keychains, fridge magnets and mirrors etc these machines produce are worlds apart. But none of these are included in the kit anyway.
So if you want a low volume hobby kit it could be an option but then when I look around you can get a T150 machine that takes standard, low cost buttons for under $200: http://buttongiant.com/collections/frontpage/products/2-1-4-t15o-button-maker-hobby-kit-circle-cutter-250-button-parts-and-free-sample-pack
But if you’re more serious about button making I would recommend an all metal American made machine but you will need to spend $300 or more!
Read more »

Question: What's a good button maker for magnets and will it actually hold a piece of paper to the fridge? October 09 2012 1 Comment

What's a good button maker machine and how much paper does a button magnet / fridge magnet hold up on the fridge?


Kim: Thanks for your website. Still need help. Looking for a nice machine that I would use mainly for fridge magnets. Also what magnet to use that will actually hold a piece of paper like on the fridge. Have had some that can't do it.

The Button Guy:
What size magnets are you making? Even if you are undecided, give me an idea. The 1” round machine is small but with a ceramic magnet will hold up to 7 letter size photocopy sheets on a fridge. Whereas the standard 1” sticky back magnets will only hold 3 letter size sheets on a fridge. But you may be talking 2-1/2” x 3-1/2” so let me know a size.

Kim: Thanks for such a quick response. I am thinking larger buttons like the 2 1/2".

Magnet button maker    The Red and black machine is great for magnets.


The Button Guy: 2-1/2” has magnets and holds 7 sheets of letter size paper on a fridge. This is with the 4.5mm improved magnets from Button Giant. The standard 3.3mm magnets that most vendors have hold 4 sheets. (Will vary a bit according to fridge). Here’s a link to the parts page for 2-1/2” on Button Giant. http://buttongiant.com/collections/button-parts-for-button-making/products/everything-for-your-2-1-2-button-maker They have 2 button maker kits: http://buttongiant.com/products/2-1-2-button-maker-kit-500-button-parts-includes-free-sample-pack Or with the graphic punch: http://buttongiant.com/products/2-1-2-button-maker-kit-graphic-punch-incl-500-button-parts Let me know if you have further questions.

magnet parts for fridge magnetsceramic magnets for magnet buttonspeel n' stick magnets for button makingflatbacks with magnet for fridge magnets, magnet buttons


Kim: Thanks Button Guy


The Button Guy: No worries and here's a link to a YouTube video: How to make a button magnet

Read more »

after a marathon button making session, some very thin magazine paper became jammed inside my 1" circle punch cutter. however, i can't figure out what kind of tool i need to unscrew the 4 black screws on top and open it up. it looks like an allen wrench, October 09 2012

Before you open up your graphic punch to fix a paper jam try this:

All you normally need is a strip of aluminum or tin. It should be less than 6 mil thick.  Ideally 6” to 12” long and not more than 4” wide.   Pass this through where the paper normally goes.  Move it back and forth and clear out the paper that’s stuck inside.  Use the front edge to push out remnants inside.  You should hang on to that piece of tin.  You may well need it again!!
As for opening up the graphic punch, this will void any warranty!

repairing a circle cutter, how to unjam a graphic punch.       graphic punch repair & maintenance


But if you must:  Use a 3/16 hex key to remove the top 4 bolts. This separates the top from the base and the punch mechanism.  You should now be able to separate the top and bottom plate and get at any paper remnants.

I highly recommend using a piece of tin first and not opening up the graphic punch.   Cheers,  The Button Guy

 The Button Guy
Button Making Antipreneur!
Checkout the blog: http://TheButtonGuy.net


Read more »

Maintaining & lubricating a button maker August 28 2012 1 Comment

 Maintaining your button machine.

Button makers, or at least the good ones require very little maintenance.  Remember a good button maker is all metal, NO PLASTIC PARTS!!   I have a number of the Tecre style button makers that are 10 years old, they have made trillions of buttons and work with very little maintenance.  But these are smaller button sizes, 1” or 1-1/2” round.  I also have larger button makers that need more attention and certainly need silicon lube.  This is just a smear of lubrication every 500 buttons or so.  It’s cheap, quick and just becomes a habit.  If you have a button maker you definitely need to get some silicon lube.  This can also help and certainly does not hurt a smaller button maker.

Relevant question from a customer:

“I’ve used my button maker to make buttons since purchasing it from you, and I noticed upon pressing my latest set that the machine isn’t wrapping the mylar tightly around the edges of the button at the very top of every couple of buttons I make. There is a little bubble of empty space between the edge of my button and the mylar itself. I’ve double checked that I’m not putting in double sheets of mylar or anything, and I’m using fairly thin paper (28lb) for the designs… What could be causing this? Thanks for your help!  

Stick lubricant for maintaining a button maker.

The question above is certainly a likely candidate for silicon lube.  Mylar problems are often caused by need for a little lubrication I would recommend visiting your local hardware store or buy a stick of lube online.     the button guy

How to maintain a button maker by the Button Guy
  To buy silicon lube online

HOW TO USE SILICON LUBRICATION ON YOUR BUTTON MACHINE.

1.  Do not use oil, WD40 or anything but a clean silicon lubricant.  Some people use silicon in an aerosol but for the button makers I find stick lubricant works better.   This is to protect your images and your buttons.  Grease or oil stained buttons will not do well!! Keep your button maker clean!

2. Identify the crimp die in your button maker.  (See image below)  Regardless of style or make of your machine you will have a crimp die where you put the pin-back in.  (The pickup die is where you put the shell, image and then mylar)   Most crimp dies have a 45 degree surface just visible above where the pin-back goes in. This is the spot!  Just put a bit of the stick lube on your finger and rub it around the crimp die.  Think of it more as massaging it in as to just smearing it across the surface.  The purpose is to fill microscopic damage to the die making it smooth to allow the mylar to pass easily across the surface on the second press.

That usually does the trick and in normal circumstances will be enough.  If you have very serious problems or you picked up a used button maker that’s been in an attic for 25 years you could:

3.  Slide or rotate the lower dies to allow easy access to the upper die.  Using a silicon lubricant stick just put a little on your finger as if you were using lip balm, chapstick or lip gloss.  Apply a modest smear to the perpendicular walls of the upper die.  Massage the lubricant all the way around that upright wall of your upper die.   Just enough to leave a thin film of silicon. No need to use much.

4.  Go through the button making motion a couple of times to get the lube where you need it.  Then make a button as normal.  The first button or maybe two will need wiping with a clean cloth.  After that your back in business.

5.  Repeat every 500 buttons or as necessary. This maintenance requires very little lube.  1 lube stick will last a lifetime.

6.  Another problem solver option for older or damaged button makers is to make sure the dies are clean, free from rust or paper, metal or plastic debris.  You can use a cloth or if you’ve got it: compressed air to clear away the grunge.  Then soak the dies with the more liquid style aerosol can silicon lubricant and then wipe clean with a clean dry cloth. Search the die for metal burrs and damage.  Clean up any damage with very fine emery paper and then clean the die again with liquid silicon to remove any metal dust.

7.  Sometimes an older red and black Tecre button maker grinds a bit when it swivels. DO NOT USE WD-40.  Using lithium grease, available from any hardware store you can grease the base plate with a smear of silicon grease between the die carrier plate and the base plate. Just smear the base and swivel getting the grease between the two plates.

WHERE TO BUY SILICON LUBRICANT

Lube sticks are available at dollar stores and are inexpensive.

 To buy silicon lube online

How to repair & maintain a button maker

Maintaining a button machine

Read more »

How to make a pin-back button: How are buttons made? July 19 2012


How to make a pin-back button: How are buttons made?

Read more »

Do I need a circle cutter if I am buying a button maker? July 10 2012

People ask me all the time if the circle cutter is necessary when buying a button maker.  Do I need a graphic punch to make buttons? What is the graphic punch for?

No you do not need a graphic punch or circle cutter to make buttons.  You can cut circles with scissors.  A button made with a circle cutter or graphic punch looks identical to a button cut with scissors when finished.  The difference is the time it takes to make the button or more relevant the number of buttons you wish to make at a time.  If you’re making a few buttons at a time, up to say 20, you can do that with scissors.  Once you start thinking you need 100 buttons in an hour that will be difficult with scissors - and not much fun.  If you need 1000 buttons in a day: impossible but certainly doable with a graphic punch.

A Graphic Punch for cutting circles to make buttons

If you are doing “make your own button” events, tables or workshops with kids then you also do not have to get a circle cutter.  Better to buy pre-cut circles to match your button maker. I know People Power Press sell the pre-cut circles here:  http://peoplepowerpress.org/products/copy-of-mylar-bulk-mylar-for-button-making

 There are different kinds of circle cutters.  I recommend the graphic punch from Tecre for speed and excellent centering. (See picture above) Good centering is key, when buttonmaking! http://peoplepowerpress.org/search?q=graphic+punch  If you are doing low volume circle cutting or if you buy pre-cut circles and just want a circle cutter for occasional and not volume use then this is a reasonable cutter for $20 - (You do get what you pay for)  http://peoplepowerpress.org/products/hobby-cutter-adjustable-for-circle-cutting

A hobby circle cutter for button making Inexpensive hobby cutter

If you are considering getting more than 1 button machine and looking to save money.  Say you have your eye on a 1” button maker now but further down the road maybe a 2-1/4” then an adjustable cutter makes sense.  Not if speed is your driving force, graphic punches are faster, but a well priced machine that cuts multiple size circles is the adjustable rotary punch:  http://peoplepowerpress.org/products/adjustable-cutter-for-circle-cutting-for-multiple-button-makers   A big plus for the rotary punch is that it cuts fabric!!!  A lot of people make fabric buttons - without mylar so you get the fabric texture and graphic punches do not cut fabric.

adjustable rotary circle cutter Adjustable Rotary Circle cutter


Any feedback on your experience with circle cutting and/or this article welcome!

Read more »

Advantages and problems with multi-size / interchangeable die button makers April 03 2012

Multisize button makers sounds great.  A button maker that makes different sized buttons because it has interchangeable dies - sweet idea!

But the reality is not so sweet………..

Problems with multi-size button makers are many.  The advantages of multi-size button makers are few, in fact I can’t think of any but if you have bought one and see an advantage let me know.  I would love to hear about it.

1) Most multi-size button makers including the badge-a-minit use a plastic base for the dies.  This is problematic, as the plastic wears quickly and the button makers no longer line up.  This also applies to some of the made in China machines.

badge-a-minit 3-in-1 Badge-A-Matic Combointerchangeable die, multisize button maker
Badge-A-Minit: 3-in-1 Badge-A-Matic Combo  $1099 on sale!
$1699 on sale with cutters & parts.


2) Price!  The badge-a-minit machine is the same price as 3 standard button makers!!

3) Button parts -  Badge-A-Minit takes non-standard button parts up to 300% more expensive than standard button parts.and also certain chinese machines use button sizes with European mm dies.  Also non-standard.

4) And for me the biggest point is that button making is labour intensive.  One machine with multi dies means only 1 person can work at a time and you have to keep messing with the dies.  

Give me 3 different machines any day!

Read more »

How to "Tune-up" a Tecre, red & black, button maker. April 03 2012

How to “Tune-up” a Tecre, red & black, button maker.

Firstly I personally do not believe in fixing stuff for the sake of it.  Fiddling with or dismantling your button maker is a bad idea.  These button machines are solid and well made and have a warranty - if it ain’t broke, don’t try to fix it!

So these button machines have proven to be extremely reliable, doing a little preventive maintenance, from time to time, can help to keep your machine operating smoothly  If used with care the following information will show you how to “tune-up” your button maker.

If for any reason you are uncomfortable following these instructions, give us a call or swing by and we will make arrangements for you to return your machine and have us do the tune-up your machine for you.

Don’t simply try to pry apart the dies, if you have it jammed, as you will likely damage the dies.

Also, DO NOT attempt to dis-assemble your machine, as you most likely will be unable to re-assemble it and have it work properly and may well damage it in the process.


Doing maintenance on your button making machine.

To do a tune-up, you will first need to gather a few items. You will need:
a 7/16” wrench, a can of silicone spray lubricant, a 3/16” allen wrench, and paper towels.

Step 1: Spray a small amount of silicone spray at each location marked by the arrow, in the photo below. (If you use too much silicone spray, it will end up on your button designs, which won’t be good).


Step 2: Now take the handle and work it up and down 5 or 6 times. You want to work the silicone spray down into the upper crossbar that the two bolts go through (shown in the photo below) Also spray a little silicone where the handle attaches to your button machine. Do so on the other side of the handle, as well (not shown).

button maker tune-up, fix your button press

Step 3: Rotate the pick up die and crimp die so they are positioned as shown in the photo below. Take the paper towel you sprayed with a small amount of silicone spray and rub it around the beveled edge of the Crimp Die. Doing so will help prevent an issue where the mylar disc doesn’t crimp tightly and has a bit of a “bubbled” look at the edge of your button. The silicone spray allows the mylar to slide smoothly.

You may repeat this last step anytime your mylars don’t seem to be as tight as they should be..

Lubricating your button maker

Stick lubricant works very well if you are having issues with the mylar not crimping properly.

Stick lubricant available in your local hardware store or also online: here.

Step 4: Now rotate the pick up die so that the upper die is located directly above it. Then push the handle down all the way so the upper die slides into the center of the pick up die (not shown).

Step 5: Next, take the 7/16” wrench and tighten the two top bolts (shown below) until they are both snug. DO NOT overtighten these bolts, as doing so will damage your machine.

tightening up your button maker

Step 6: Now spray a small amount of silicone spray onto a paper towel and spread it around the outside of the inner plug on the upper die (shown below). Doing so will make it easier for the outer ring to slide up and down during the button-making process.

And spray a little silicone spray on the base plate on which the dies rotate (shown below). Doing so will make it easier for you to rotate the dies as you are making buttons. Again, not too much or you will get it on your hands and on your buttons.


Step 7: Now turn your machine over and use the 7/16” wrench to tighten both brass colored bolts (in the photo below). Make them tight, but DO NOT overtighten them, as doing so will damage your machine.

button making machine tune up


Step 8: And finally, find an allen wrench that fits inside the “Flat Head Bolts”. First slightly loosen the Flat Head Bolts (see image above) and then snug them down. DO NOT overtighten them, as doing so will damage your machine.

That’s all there is to it. Your button machine should now work as good as new!

If it doesn’t, or if you are uncomfortable following these instructions, give us a call and we will make arrangements to have you return your machine to us and we can do the tune-up for you.

Under no circumstances should you attempt to dis-assemble your machine.

Read more »

How to “Un-Jam” your Tecre button making machineBefore we get started with the... April 03 2012

 How to “Un-Jam” your Tecre button making machine 

Before we get started with the instructions on how to un-jam your machine, take a look at the photos below and familiarize yourself with the names of the various parts of your button machine. Doing so will make it easier to follow the step by step instructions.

Jamming a button maker is very easy to do.  You can get a jam if you don’t notice that two shells (fronts) or two mylar are stuck together.  Another thing that happens is that after you have put a shell image and mylar into the top die using the first press you get distracted….. the phone rings and then you go back and load the first die again, you press and kathump!  You’ve got a jam.

So as I say, it’s easy to jam a button maker and it’s not too difficult to unjam it.  Read on……

unjam your button maker

Button maker jams


Unjam your button machine

If your button machine has jammed, the information below will show you how to free it up.

In attempting to unjam your machine, DO NOT use a hammer or screw driver to pound or pry the metal parts of your machine. Doing so WILL damage your your dies!!

If you are unable to unjam your machine, or are uncomfortable following the steps listed below, you can swing by or return your machine to our office and have us un-jam it for you.

The three most common reasons that can cause a machine to jam are:

A. Placing more than one shell (the button front) into your machine.

B. Placing more than one mylar disc (the plastic) into your machine.

C. Going back to your button maker and forgetting that you already have a shell in the upper die.

You can sometimes “un-jam” a machine simply by moving the handle up and down several times in rapid succession.

If you are able to do so, try rotating the dies (without using force) so the upper die is above the crimp die (the die that holds the button back). Then move the handle up and down 5 or 6 times. If that action is going to free up your machine, 5 or 6 times should do the trick.

If it doesn’t, or if you are unable to rotate the dies without using force, proceed to the next step.

If the previous step didn’t work, the upper die is unable to return to it’s normal position because a button is stuck in the upper die. And because the upper die is “stuck in the up position” you are unable to rotate the dies.

So what we need to do is to free the upper die assembly.

I recommend using the following strategy to accomplish this.

Take a piece of wood, such as a 1” x 2”, 2” x 2”, or a thick wooden dowel) and with your button machine sitting on a table or counter, position the piece of wood so it sits on top of the “Outer Ring” but doesn’t cross over to the “Inner Plug”. Hold the piece of wood length-wise and use a hammer to tap the edge of the wood (NOT the machine itself). What we are attempting to do is separate the outer ring from the inner plug. Doing this should loosen the stuck button part from the upper die.

It is recommended NOT TO FORCE OR PRY the dies apart, as this will damage them. Ease them apart without damaging your die.

Hopefully, this will have freed the jam and the dies can now swivel but you may still have button parts jammed up inside the upper die.  These need to be removed.  If you put your finger up inside the upper die you should be able to feel the screw hole.  If it’s smooth you still have a button inside.

An awl is useful for removing jammed buttons also try this article.

Read more »

How to fix a button maker - button maker jam - how to unjam your button machine March 25 2012


Read more »

Tecre button machine tune up. How to fix up & maintain your button maker. March 25 2012


Read more »

The Pro's and Cons of Multiple/ Interchangeable Die Machines March 12 2012

Multisize button makers sounds great.  A button maker that makes different sized buttons because it has interchangeable dies - sweet idea!

But the reality is not so sweet...........

Problems with multi-size button makers are many.  The advantages of multi-size button makers are few, in fact I can't think of any but if you have bought one and see an advantage let me know.  I would love to hear about it.


1) Most multi-size button makers including the badge-a-minit use a plastic base for the dies.  This is problematic, as the plastic wears quickly and the button makers no longer line up.  This also applies to some of the made in China machines.


badge-a-minit 3-in-1 Badge-A-Matic Combo interchangeable die, multisize button maker
Badge-A-Minit: 3-in-1 Badge-A-Matic Combo  $1099 on sale! $1699 on sale with cutters & parts.


2) Price!  The badge-a-minit machine is the same price as 3 standard button makers!!

3) Button parts -  Badge-A-Minit takes non-standard button parts up to 300% more expensive than standard button parts.and also certain chinese machines use button sizes with European mm dies.  Also non-standard.

4) And for me the biggest point is that button making is labour intensive.  One machine with multi dies means only 1 person can work at a time and you have to keep messing with the dies.  

Give me 3 different machines any day!


Read more »

Spring Pins or Pin-backs? March 05 2012 3 Comments

Question from Kelona 05/03/2012

Hi Button Guy! What is the difference between the pin-back button sets that come in 3 pieces (shell, mylar, pin back) vs. four pieces (shell, mylar, collet with separate pin? I notice some companies sell both. What is the purpose of the 4pc set? How is it used? and why do companies sell both?

Firstly here are some photos to see what we are discussing:

Standard pin-back button.  Shell pinback mylar
PIN-BACK BUTTON PARTS WITH PIN ALREADY INSERTED
SPRING PIN BUTTON PARTS USING A SPRING PIN THAT IS INSERTED AFTER MAKING THE BUTTON.


Standard pin-backs are only available for 1-1/4" buttons or larger. Spring Pins come standard with buttons smaller than 1-1/4" so that is the 1" and 7/8" button sizes.  They have Spring Pin backs only.  This is actually because the pin-back pins are too big for 1" or smaller buttons.


 Spring pins are also made for the 1-1/4" and 2-1/4" sizes and I think it is simply because people like and want them.  I see no real advantage for the end-user as pinbacks tend to stay on better and longer than spring pins.  Also spring pin buttons take longer to make as adding the spring pin is an additional step.  Spring pins are in some cases slightly cheaper because the manufacturer does not pay to pin the back..... the end-user does it for them.

 So if you have a button maker that is 1-1/4" or larger you have the choice of pin-back or spring pin.  If your button maker is 1" or smaller you have no choice.

 If anyone out there sees an advantage to spring pins that I have missed do let me know!! But personally, when they are available I would go for pin-backs (with the built in pin).


-----Original Message-----

From: KELONA [mailto:shopifycontactform@outofthesandbox.com]

Sent: March-05-12 9:00 AM

To: The Button Guy - People Power Press

Subject: Message from KELONA


Name: KELONA

Message:

 What is the difference between the pin-back button sets that come in 3 pieces (shell, mylar, pin back) vs. four pieces (shell, mylar, collet with separate pin? I notice some companies sell both. What is the purpose of the 4pc set? How is it used? and why do companies sell both?


------------------

Submitted from: http://peoplepowerpress.org/pages/about-us

Read more »

Starting your own business - Button making - low start up costs, great margin. November 23 2011

Small business does it betterSmall business big rewards for entrepreneursentrepreneurs wanted - business startup 

If you walked into the offices of one of those Wall Street bankers, you know the ones, fancy suit, insincere smile and the habit of licking his lips each time your hand goes anywhere near your wallet.  Yep you know the guy, that crook that the Occupy movement is talking about......  Anyway you walk in and say I have a business where you invest 530, lets say million, in capital equipment including an 80 million investment in stock.  Sales in the first quarter will be 2000 million or two billion and you then have the choice to sell off the equipment as an asset for a further say 300 million or you invest back 81 million of the handsome profit and this time reap the full benefit of the additional 2 billion sales without the capital expense.  The Wall Street Banker would say it's not possible.  There is no such easy investment - but there is - the scenario I have described is that of someone starting their own button making business.   

Ok the millions and billions are exaggerated but do the math:

Button Maker, Circle Cutter and all the pieces for 1000 buttons.   $530
Sale of Buttons: 1000 @ $2 = $2000
Resale value of a used button maker after 1000 buttons = Easily $300, probably more!
Better still: Cost of buying a further 1000 complete button parts = $81

Total revenue on 2000 buttons @ $2 each = $4000   Cost = $611   It's profitable, It's fun and unlike the bankers job, it's honest!

There are few pieces of equipment with such low start up cost that give this kind of return even if I have not included a few photocopies or your own home computer and printer that you may well already own.

So where do you sell your buttons...... ideas!

Make your own button designsAntique buttons - Business startup potential Hand drawn buttons with income potentialButton collections - small business income

  • Schools, Universities, Colleges.  Take the button maker and make buttons on the spot!
  • Setup a table at conferences. Make buttons related to the conference.
  • Flea Market - Photo buttons or just make your own!
  • Sports clubs, team buttons, football / hockey / soccer buttons.
  • Fundraising and awareness for non-profits
  • Advertising and promotional buttons - almost every local business is a potential client
  • Festivals, Trade Shows and exhibitions.
  • Music and band buttons - every school band is a potential client and so is U2!
  • Weddings, birthdays, funeral memorials and parties.
  • And speaking of parties and birthdays: Yes Kids birthday parties are huge and lucrative.

And what else can you do with buttons...... more ideas!

 Support small business entrepreneursGood jobs are in small businessesSmall business matters

Remember you can do more than design buttons using graphics programs like Photoshop, Illustrator or Corel Draw. What about:
  • Fabric Buttons
  • Artists buttons - Draw your own.
  • Collector buttons from comic strips and cartoons
  • Modern Art buttons using contemporary magazines
  • Collage buttons from newspapers and printed materials
  • Photo buttons we already mentioned and they are very popular
  • And last but not least paper, markers, crayons and a bunch of kids.

Whether you are thinking part-time or full-time button making is a great addition to a small business or a good platform to start a business.  It's good for people who like people. It's fun, artistic, lucrative and low investment.

If you want to discuss opening your own button making business you need to talk to The Button Guy!

Button Guy Small Business Advisor


Read about button making workshops for school kids and daycare 

Fundraising with buttons

Read more »

How to unjam your button maker - button making machine repair. November 18 2011 2 Comments

 I get lots of people in the store with a jammed button maker.  Andrew sent me some good pictures of his button maker.  He thought his button maker was broken and needed repair.  But it was only jammed.

Andrews jammed button machine

jammed button maker

This is Andrew's button maker.  It is a side to side action button maker, made in Wisconsin, USA.  These are good heavy duty button machines that you can add air power and go industrial if you need it.

This is the view from below up into the upper die of the jammed button maker.  It is smooth, no screw hole so there is a shell stuck up in there or maybe two.

Upper Die on a Tecre Button Maker

This is the view up inside an upper die of a Tecre Button Maker that does not have a shell stuck inside.  This is how it should look.  You don't have to turn it upside down to look.  Just get in the habit of putting your finger up inside to see if you can feel that screw hole.  If it's smooth (see top right) it's jammed.

This is what Andrew's button maker will look like  looking up inside the upper die once the shell has been removed. There can be even 4 or 5 jammed up there.

 THE QUESTION: 

Hi there, I have a 3" button maker that needs a part. I can send pictures of the part needed. It basically does not wrap the paper around the backing...as a student pushed down so hard, he flattened the plate that has a ridge.  Sort of hard to explain. Hope you can help. 

Pictures sent are top left and right.


Hi Andrew

 Looking at the photo it looks like you do not need a part or have a serious problem.  There is merely a shell stuck in the upper die.  Maybe 2 shells or even 3.


 This happens when you do the first press and then maybe get distracted.  The first shell is up inside the upper die and instead of then loading the pin-back you go back and load another shell and press the first press AGAIN.  Now you've got 2 shells pressed up inside your upper die and the button maker is jammed.

 If you walk away from the button maker or get the button maker out of the cupboard the first thing to do is put your finger up inside the UPPER DIE.  You should be able to feel a screw hole.  If it is smooth AS PER YOUR PICTURE then you've got a shell stuck up inside.

 TO REMOVE A SHELL (Or as is often the case multiple shells).  You need an awl or a bradawl.

 An awl is a long pointed spike. It may be a:
* Bradawl, a tool for making holes in wood    * Scratch awl, a tool used for marking wood.  * Stitching awl, a tool for piercing holes in leather

 Turn the button machine upside down and move the die mechanism in such a way to gain access to the upper die.  Using the awl pick at the edge of the shell that is stuck inside the upper die and try to pick up an edge WITHOUT DAMAGING THE DIE.  Once you have picked up an edge you can often pierce the tin with the awl and pull it out.

Now put your finger up inside again.  Can you feel the screw hole or is it smooth.   If it's smooth ... repeat.  I have pulled 5 shells out of an abused button maker.  Repeat until you can feel or see that screw hole.

Here's a photo for people with a Tecre Button Maker.

Image showing upper die in Tecre Button Maker 


 If you have the classic red n' black Tecre Button Machine the same thing applies if you need to fix a jam in your button maker.

The offending shell (or probably shells) will be up inside the upper die.  Turn upside down. Swivel pickup die out of the way and try to catch the edge of the shell thats stuck using an awl.  BE CAREFUL NOT TO DAMAGE YOUR DIES.  Feel free to send your machine in to the Button Guy to fix.  If you're a customer he may just fix it for free!


Ask the Button Guy.  He's the Button Making expert! 


 Got questions?  Ask the Button Guy!

Read more »

What Size Button Maker do I need. What size buttons are good for what purpose. September 23 2011

When thinking about buying a button maker the first question is WHAT SIZE?

There are many sizes and various shapes for buttons.  Round are the most cost effective but oval, rectangular, square and oblong are all useful for different effects.

Worlds smallest button size  Size comparison.  The smallest buttons available.

Checkout the button size list here This will give you an idea of all 21 sizes of buttons available and you can download templates for making your artwork.

But what size button should I make? Here are a few examples.  These are not rules they are just a guide of what the majority of button makers are doing.

1-1/4",2-1/4" & 3" buttons with coin for size comparison 1-1/2" button with coin for size comparison 2-1/4" button with coin for size comparison
Left image shows 1-1/4", 2-1/4" and 3" buttons with toonie for size comparison. The centre image shows 1-1/2" pinback with toonie. The right image shows a 2-1/4" button.

Round buttons - Usually the most cost effective buttons!

7/8" - Cute japanese comic buttons. 

1" - Band Buttons or Music related buttons are most commonly 1"

1-1/4" or sometimes 1-1/2" are often used for designer buttons or "One of a kind" show buttons.

1-1/2" - Very popular middle size

1-3/4" - Small election buttons

2-1/4" - Most common button of all.  Good for Elections but also good for small photo buttons.  Most common size for daycare centres, schools and events where kids are making their own designs with markers etc and you put it in a button for them.

3" / 3-1/2" - Most common for large election buttons.  Mirror buttons.  Most popular sizes for photo buttons where you take a photo and put it in a button - great for Hockey or Football team buttons.

6"  Great for clock buttons.

Square, rectangular oblong and oval button shapes.


1" Square - Cute Designer buttons - square shape is quite unusual, makes them stand out!

1-3/4"x2-3/4" - Rectangular or Oblong - Great for business card buttons and magnets

1-3/4" x 2-3/4" oval - Very cool retro style

2" sq, 3" sq, 2"x3", 2-1/2"x3-1/2" rectangular - All very popular for fridge magnets and larger business buttons like "Ask me about......."


Still cannot decide your size?

One point is that a big button will be worn on the day at the "event". But a big button will be taken off as soon as people get out of the building.  A smaller more subtle button can be worn for weeks after the "event".  Good idea is to have BIG staff buttons and then smaller buttons for visitors.

 If you're still in doubt you can always ask the button guy! 

Ask the button guy - He's the button making expert.  He's the expert!


Read more »

Maintenance on a button maker September 20 2011 3 Comments

 Maintaining your button machine.

Button makers, or at least the good ones require very little maintenance.  Remember a good button maker is all metal, NO PLASTIC PARTS!!   I have a number of the Tecre style button makers that are 10 years old, they have made trillions of buttons and work with very little maintenance.  But these are smaller button sizes, 1" or 1-1/2" round.  I also have larger button makers that need more attention and certainly need silicon lube.  This is just a smear of lubrication every 500 buttons or so.  It's cheap, quick and just becomes a habit.  If you have a button maker you definitely need to get some silicon lube.  This can also help and certainly does not hurt a smaller button maker.

Relevant question from a customer:

"I've used my button maker to make buttons since purchasing it from you, and I noticed upon pressing my latest set that the machine isn't wrapping the mylar tightly around the edges of the button at the very top of every couple of buttons I make. There is a little bubble of empty space between the edge of my button and the mylar itself. I've double checked that I'm not putting in double sheets of mylar or anything, and I'm using fairly thin paper (28lb) for the designs... What could be causing this? Thanks for your help!  


Stick lubricant for maintaining a button maker.

The question above is certainly a likely candidate for silicon lube.  Mylar problems are often caused by need for a little lubrication I would recommend visiting your local hardware store or buy a stick of lube online.     the button guy

How to maintain a button maker by the Button Guy
  To buy silicon lube online


HOW TO USE SILICON LUBRICATION ON YOUR BUTTON MACHINE.

1.  Do not use oil, WD40 or anything but a clean silicon lubricant.  Some people use silicon in an aerosol but for the button makers I find stick lubricant works better.   This is to protect your images and your buttons.  Grease or oil stained buttons will not do well!! Keep your button maker clean!

2. Identify the crimp die in your button maker.  (See image below)  Regardless of style or make of your machine you will have a crimp die where you put the pin-back in.  (The pickup die is where you put the shell, image and then mylar)   Most crimp dies have a 45 degree surface just visible above where the pin-back goes in. This is the spot!  Just put a bit of the stick lube on your finger and rub it around the crimp die.  Think of it more as massaging it in as to just smearing it across the surface.  The purpose is to fill microscopic damage to the die making it smooth to allow the mylar to pass easily across the surface on the second press.

That usually does the trick and in normal circumstances will be enough.  If you have very serious problems or you picked up a used button maker that's been in an attic for 25 years you could:

3.  Slide or rotate the lower dies to allow easy access to the upper die.  Using a silicon lubricant stick just put a little on your finger as if you were using lip balm, chapstick or lip gloss.  Apply a modest smear to the perpendicular walls of the upper die.  Massage the lubricant all the way around that upright wall of your upper die.   Just enough to leave a thin film of silicon. No need to use much.

4.  Go through the button making motion a couple of times to get the lube where you need it.  Then make a button as normal.  The first button or maybe two will need wiping with a clean cloth.  After that your back in business.

5.  Repeat every 500 buttons or as necessary. This maintenance requires very little lube.  1 lube stick will last a lifetime.

6.  Another problem solver option for older or damaged button makers is to make sure the dies are clean, free from rust or paper, metal or plastic debris.  You can use a cloth or if you've got it: compressed air to clear away the grunge.  Then soak the dies with the more liquid style aerosol can silicon lubricant and then wipe clean with a clean dry cloth. Search the die for metal burrs and damage.  Clean up any damage with very fine emery paper and then clean the die again with liquid silicon to remove any metal dust.

7.  Sometimes an older red and black Tecre button maker grinds a bit when it swivels. DO NOT USE WD-40.  Using lithium grease, available from any hardware store you can grease the base plate with a smear of silicon grease between the die carrier plate and the base plate. Just smear the base and swivel getting the grease between the two plates.

WHERE TO BUY SILICON LUBRICANT

Lube sticks are available at dollar stores and are inexpensive.

 To buy silicon lube online

How to repair & maintain a button maker

Maintaining a button machine


Read more »

Flat Button edges - Third Press Operation - How to flatten button edges. July 21 2011


Read more »

Badge-A-Minit Button Parts - The Button Guy Blog July 13 2011

 Badge-A-Minit Button parts are NOT compatible with other size button parts.  This is bad news for people with badge-a-minit button makers because they are more expensive than standard button parts.  You cannot use standard button parts in a badge-a-minit hobby kit or machine!

Size Tips!   Badge-A-Minit only makes 3 sizes: 1-1/4", 2-1/4" and 3"

The 1-1/4" BAM size is not compatible with the Tecre standard 1-1/4" button size even though the difference is minimal.

The 2-1/4" BAM is in fact 2-3/8" and the cut size is 2.75"

The 3" BAM size is a slightly smaller 3" button with a cut-size of 3.377"  

See our size guide here or Ask the Button Guy if you have questions.  If you need help with artwork for Badge-A-Minit sizes you can buy a simple program for Badge-A-Minit sizes here: Button Builder software

If you need anything Badge-A-Minit: supplies, machines, accessories click here

Examples of Badge-A-Minit Button Makers

   
Read more »

Identifying your button size for ordering. June 17 2011 3 Comments

How to identify your button size.  It is possible to simply measure a button but it is often the case that they are not exactly say 2-1/4" even if it is a 2-1/4" machine.  I just measured the diameter of a 2-1/4".  It is 2.198".  And then you have different manufacturers, particularly Dr Don's and Badge-A-Minit make non-standard button sizes.

Read more »

The Button Makers Guide. May 29 2011 2 Comments

My personal button making guide.  A little help for people thinking about getting a button maker or those just sniffing around wanting to know a little more.

I just finished the guide and I will clearly have to keep working on it but I hope it helps people interested in getting started.  I'm hoping questions I get on this blog will help me tailor it to the needs of those looking around.  I bought my first button maker maybe almost 10 years ago.  It's a 1" It still works and it has probably clocked up 100,000 buttons.  I now have 30 or so machines from starter kits to professional electronic button makers.  I think I really have tried them all.

Tecre 1" button Maker Kit with Graphic Punch.   If you haven't seen the
"Button Makers Guide" check it out here.

   If you've got questions you can always ask the Button Guy   Ask the Button Guy - He's the expert button maker  He's the expert!

Read more »

Sale

Unavailable

Sold Out