Buttons, Badges & Pins - People Power Blog
The Button Shop est la première boutique en son genre au Québec. October 10 2014


La boutique ouvre officiellement ses portes le 11 octobre 2014. (Now CLOSED)
The Button Shop est la première boutique en son genre au Québec. C’est aussi l’atelier dans lequel nous fabriquons tous nos produits.
Voici quelques photos qui vous donneront un petit aperçu de l’endroit. N’hésitez pas à venir nous voir et nous questionner, il nous fait toujours plaisir de partager notre expertise et notre passion!
Read more »
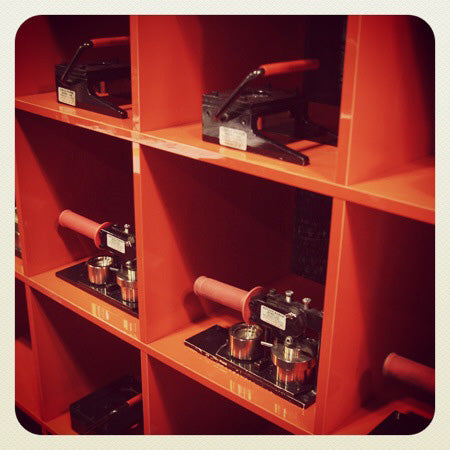
Button Guy in Montreal at the new Custom Button Store in Quebec October 08 2014
We had a great year in Quebec in 2019. Our best year yet so to thank all our customers in Montreal, Quebec City and right through the province we are starting 2019 with a discount code.
322 visitors have used this code for custom buttons and button parts in quebec so far as of July 2019
$20 of orders in Quebec if you spend $100 or more. Use discount code: Quebec2016thankyou$20 at checkout and get $20 bucks off. Just because you're in Quebec. Valid for a limited time only. We reserve the right to make changes to refuse or make changes to this discount button offer. Available on Custom Buttons, Button Machines and Button Parts. So come on down and celebrate buttons in Quebec.
I hopped in the car and took the trip to Montreal to see how Nic is doing setting up the custom button store in Montreal.
It’s very cool. He's not setup yet but the opening party is this Friday in Montreal. They’ve got it all: Button Making Machines, Button Parts and a really fast setup for Custom Buttons. Nic is after all the fastest button maker on the planet!
Checkout the Button Store in Montreal here
Here are some pics:

Button Store Montreal

Button Shop Quebec
Read more »
Buttons for Peace! September 19 2014
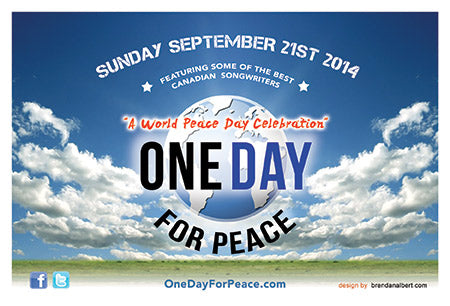
People Power Press is proud to be the official custom button maker of the 2014 #OneDayForPeace in Toronto - an event spreading hope, love, positivity, and awareness through music and in support of Amnesty International.
Hosted by the One Fire Movement (an organization dedicated to peace and change through art since 2009) and in collaboration with Canadian and international artists, One Day for Peace is launching as an annual celebration and taking place at Revival this year in Toronto to raise funds for Amnesty's great work in building a better tomorrow through a commitment to protecting and promoting human rights internationally.
Performers include:
- Ania Soul & The St. Royals
- Christian Bridges
- Brendan Albert
- The Responsables
- Jessica Speziale
- Dean West
- Alissa Vox Raw
Join in on the One Fire Movement and their message of peace at 8pm on Sunday, September 21st 2014
@ Revival (783 College Street)
Like One Fire on Facebook and tweet using the #OneDayForPeace hashtag on Twitter
Do you want buttons or other message boosting swag for your own fundraiser or music event? Send us your design or an idea you have. We can make them for you and workout solutions for any budget! You can even rent our machines and make the buttons yourself :)
For more info, visit our custom button page or give us a call.

Read more »
A new button store opening in Montreal. Custom Buttons galore in Montreal September 17 2014
After more than 2 years established in Quebec we have had our best year yet in 2018. As a thank you to our customers we are giving a simple $20 off (Call it free shipping) any order that is going to a Quebec address. Any order (over $100) for custom buttons, button machines or button parts gets $20 discount.
Use discount code: Quebec2016thankyou$20 at checkout. Order at PeoplePowerPress

Great news for all button makers and button people in Montreal. Nic from The BUTTON SHOP is open in Montreal too. Checkout Nic's website:
Nic is possibly the best button maker I know but we never did have the button making Olympics we planned to see who really is the best. He's making custom buttons right there in Montreal and he is a very experienced button maker who can help and advise on any button making project. Ontario has had a button store for some time, in Toronto, but this is the first button store I have heard of in Quebec. He is stocking button makers, button machines and button parts right there in Ville-St-Laurent very close to the Du College Metro Station in Montreal.
This is what the store looked like in August 2014 but this closed and is now in the downtown.

New Button Store opening in Montreal
Yes I don’t see a button shop either. But this was Google street view, it’s always out of date!
The new store was the one with the “Bieres” sign and next time I’m in Montreal I’m going to swing by and see how Nic is doing. I will provide a new update with the current picture soon. In the meantime lets support the Montreal Button Shop.
If your placing an order let Nic know you got his contact from The Button Guy.
Read more »
Buttons on the Fringe! August 19 2014

Chase Padgett (6 Guitars) and Stacey Hallal (Curious Comedy) are touring their musical sketch comedy show Chase and Stacey Present: Joyride. Joining them on the road are their custom fringetastic buttons, a perfect way to bring the comedy home with you and show your Fringe colours all year long!
Featuring sketches and songs about time travel, elderly crime sprees, and ribbon dancing, Joyride is a hilarious exploration of life, spontaneity, and the choices that define us!
Selected as Patron’s Pick, Orlando Fringe 2014 and Best of Fest, Ottawa Fringe 2014. CBC Manitoba gives it 4 stars!
If you're in Edmonton or Vancouver this summer, check them out. And pick up a button!
August 14-August 24 @ Edmonton Fringe
August 4-September 14 @ Vancouver Fringe
www.chaseandstacey.com
Want your own custom buttons for plays, improv, festivals, musical shows, fundraisers, or any other event?
Give us a call or Order online :)
Read more »
How to make a button with the new Multi Size Button Maker July 15 2014
Making buttons is easy with this simple, solid metal, multi size button maker. A new multi die or multiple size button maker that works!

The new multiple size die button maker kits
Whilst this machine is not as fast as a pro button maker if you need buttons in smaller quantities but in different sizes this is an option. The difference in cost is substantial. The multi machine at $400 is equivalent to 3 pro button makers at $1200 – $1600. Pro machines are faster but if you are not running a button business or producing bulk buttons this could be a low cost solution.

Interchangeable dies for button making. Picture shows 1″, 2-1/4″ and 3″ dies.
Currently this machine is available with dies in 1″, 2-1/4″ and 3″. 1-1/4″, 1-1/2″ and 1-3/4″ dies will be available by the end of the year. Additional die sets with a matching circle cutter are around $100 to $150 depending on size. To swap dies simply pull the pin out and remove the die carrier. Once you have replaced the die carrier with the size you need you slot it in place, slip in the pin and you’re away. With this style of button maker there are no upper dies which are harder to replace and often consequently do not line up correctly causing poor quality buttons. With this multi machine you should have no trouble.

interchangeable die button maker
As I have said before the method of using the dies is slower but it does seem to be reliable. The method is a little bit like Badge-A-Minit except these are inexpensive standard button parts and the dies are solid metal and not plastic. To make a button you flip the dies and press the button in sequence. Here’s a detailed instruction on making a 2-1/4″ pin-back button using a multi size button maker:
Before you begin check that you have everything you need!
Your machine parts:

The basic press. This machine will press dies from 1″ to 3″.

Die table with 2 dies for button making. Pickup die on the left and crimp die on the right. The first press uses the left hand pickup die. The second press uses the right hand crimp die.
The positioning ring
")
The positioning ring (bottom view) Do not use this way up.

The correct side of the positioning ring – Always use this way up in both the left and right hand dies.
The pressing die
")
The pressing die. Use this way up for the first press.

The pressing die (View of the flip side) Use this way up for the 2nd press.
White plastic spacer rings for 2-1/4″ only

Spacer rings – Only necessary for making 2-1/4″ buttons. Not supplied for other sizes.

Adding the plastic ring when using the 2-1/4″ die is just a question of laying the ring down before inserting the pin-back
Button parts – Remember each die set will make a specific size button.
Match your buttons to the die set you are using.

And you will also need your button parts
And you will need your button image or artwork cut and ready to go.

Artwork ready to cut first before pressing
Remember that you can also make magnets, key-chains, mirrors as well as all kinds of items. They usually involve changing the back button part, the front remains the same. Just follow these instructions but for example for a fridge magnet use a magnet back instead of the pin-back.
Once you’ve checked you’ve got everything you need you can begin making buttons.

Place the button maker in front of you with the dies easily accessible on a solid table so you can begin button making.

Place a shell in the left hand or pickup die. The edge of the shell slots into the circular slit in the pickup die. The shell fits exactly into the slot.

Add your pre prepared artwork or image over the shell. It should fit snugly in the available space. Now cover your art or image with a circular sheet of clear mylar.
Note! Adding the white plastic spacer ring is only necessary for the 2-1/4″ die set.
Adding the plastic ring when using the 2-1/4″ die is just a question of laying the ring down before inserting the pin-back.

Place your pin-back, pin facing down and make sure your pin-back and the direction of your art match as per the photo. You want the pin to end up at the top of your art. So you now have your button maker loaded with shell, image and mylar in the left die and pin-back in the right die.

Place the positioning ring over your image so that the centre of your image shows through. Make sure the positioning ring has slotted into the lower die and is firm or it may be upside down.

Place the pressing die on top of the positioning ring. Note how most of the pressing die is sticking out of the positioning ring making it higher.

So remember, in this order: shell, image then mylar. Positioning ring and then pressing die. To see which way up they go see above.

Now swivel the die table so that the left hand die moves to a position under the press and press your button. You will note with the first press that you feel the handle give as it presses your button. No force is necessary just pull the handle down.

Make sure you go all the way down but force is not necessary.
You should have now successfully completed the first press. Now we will transfer the button over to the crimp die to make the second and final press. You know you did it correctly if you got that give in the handle as it shaped your button.

Once the first press is complete remove the pressing die and flip it as you put it down ready for the second press. Remove the positioning ring from the left die and you will see your image pressed into the ring ready to move to the right hand die and to match up with the pin-back.

This illustrates your positioning ring from the underneath. Your shell is pressed into the ring with your image and mylar. Note the edge of your art and the mylar around the edge ready for the pin-back. Move carefully to retain the correct position.

So carefully remove the positioning ring with your art from the left hand die and place it over the pin-back in the right hand die. Match the top of the back to the top of your image.

Remember: The position of the art to the pin-back makes a difference to your final button.

You already flipped your pressing die so place it on top of your art. It should slide into the positioning ring. Make sure the curved or button shape surface is face down.

Now you’re ready for the second press. Swing your die table under the press to complete the second press.

This is not far enough. Swing the die table all the way to the stop. Watch it doesn’t bounce back a little.

Make sure you’re in the center of the die.

Pull the black handle down all the way in the centre of the die. There is no give on the second press. No force necessary. Just a steady pull all the way down.

Once you have completed the second press you can remove the pressing die and the positioning ring and your button will be revealed. Check the pin lines up at the top of the art so the button is straight. If not watch for this on the next button. Make sure you line up the art and the pin. Happy button making!
Read more »
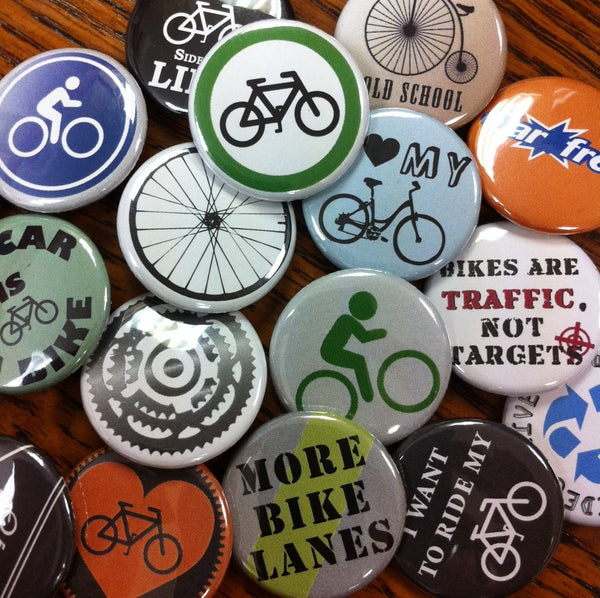
National Bike Day - and our new Button of the week May 21 2014
"I thought of that while riding my bicycle." ~ Albert Einstein on the Theory of Relativity
National Bike day is May 26th, 2014. About 50% of our staff cycles to work daily, some all year round. We're really into biking here so of course we wanted to celebrate Bike day, Bike month and ride your bike to work day with custom bike buttons as our button of the week. In our online collection we have additional transportation buttons, or talk to us about making a custom bike button for your event.
Some awesome Toronto Cycling communities have more information on Bike Day 2014 and Cycling in Toronto:
CycleTO is kicking off Bike Month with a bike to work group commute and pancake breakfast at Nathan Philips Square, and other events throughout the GTA can be viewed at bike month.
Our friends at Community Bicycle Network are a registered non-profit organization founded in 1993 on the belief that bicycles are a powerful tool for positive change. We agree!
"The bicycle is the most civilized conveyance known to man. Other forms of transport grow daily more nightmarish. Only the bicycle remains pure in heart."
Iris Murdoch, writer (1919-1999)
"Every time I see an adult on a bicycle, I no longer despair for the future of the human race."
H.G. Wells
"When the spirits are low, when the day appears dark, when work becomes monotonous, when hope seems hardly worth having, just mount a bicycle and go out for a good spin down the road, without thought of anything but the ride you are taking."
Arthur Conan Doyle
HAPPY BIKING!!!
And for more awesome bike buttons, visit our Pinterest board!
Read more »
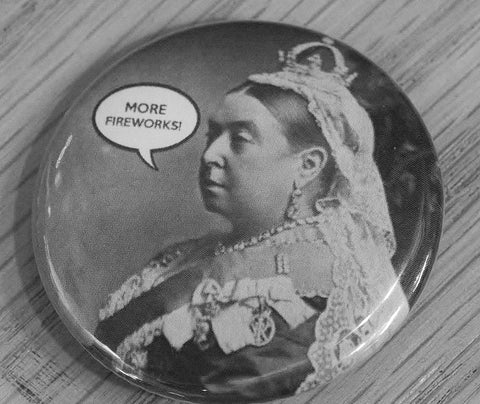
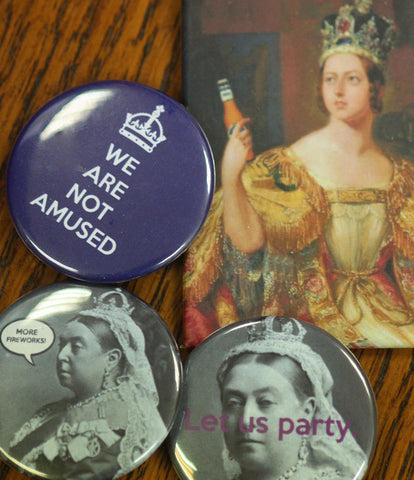
Victoria day buttons- May long weekend! May 15 2014
Happy Victoria Day! Or May 2-4 :-) as it's affectionately known.
We will be closed on the holiday Monday- May 19, 2014, so take the day off from button making, kick back, and celebrate with Queen Victoria and a beer and go see some fireworks!
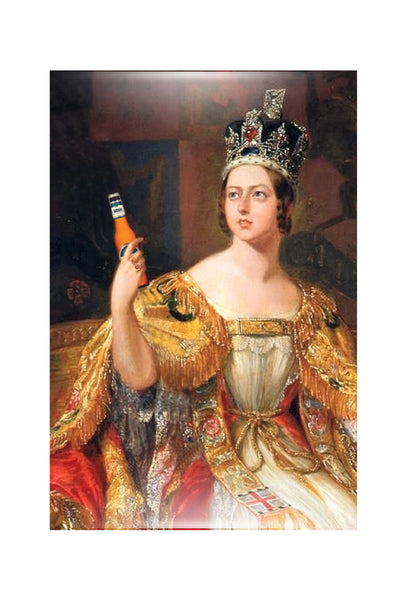
Our custom buttons of the week are Queen Victoria buttons and are available for free at the shop this week.
Read more »
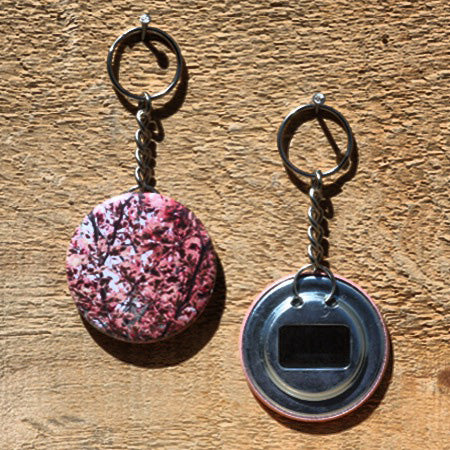
Sakura in High Park - Cherry blossom buttons! May 12 2014
Cherry blossoms have begun to open! My favorite time of year and just steps from our office. You can track the progress of the blooms in High Park. Also, according to the High Park site, the Toronto Islands also have 30 Cherry blossom trees on Centre Island!
According to updates, they have started to bloom, with full bloom in the next few days. But be sure to hurry before it rains!
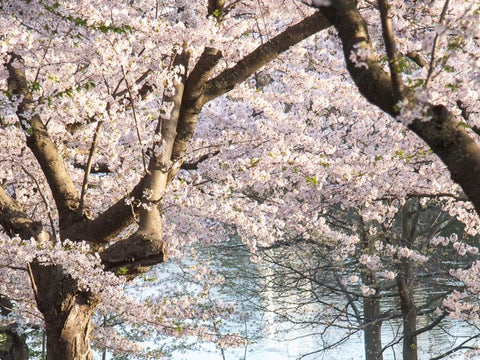
To celebrate Sakura- we're giving away cherry blossom buttons as our button of the week! Come in and get a free sakura button :-)

Read more »
Mother's day custom buttons and Rosettes! May 08 2014
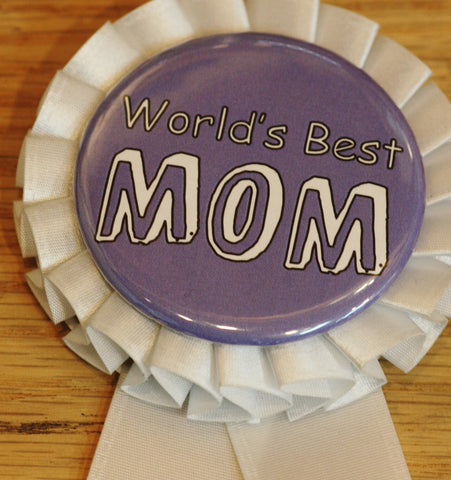
Want to show your mom that she's the greatest? You can make her a custom mother's day button! Don't have a button maker? All buttons are for sale in our store, come on by and pick one up!
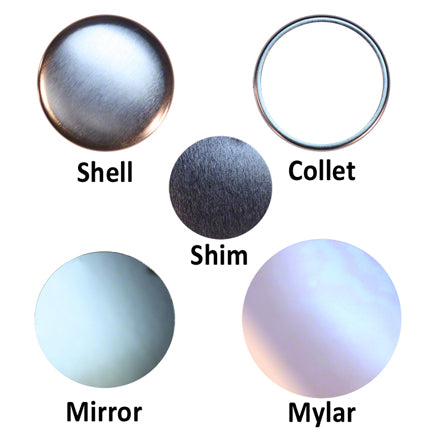
Or really go fancy with a rosette. To make a rosette you need a button maker and prong back button parts: a shell, mylar, a prong back and a plastic back pin-back. We can also make custom buttons with rosettes in the shop.

We also have a more gender neutral button that can be appropriate for alternative families.

Read more »
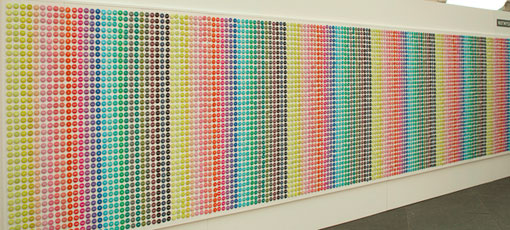
Bright interactive button installation for Not Myself Today - A mental health button campaign. January 20 2014
In the summer of 2012, Blok Design took over Yonge and Dundas square in Toronto. They created a a button installation of 31,000 buttons, over 30 ft long to bring awareness to the Not Myself Today” Campaign for Partners for Mental Health an organization dedicated to transforming mental health in Canada.
The installation was intended to draw people into a conversation about mental health by encouraging people to select buttons directly off the wall, describing various moods. Buttons ranged in emotions-'up, moody, wired, edgy' etc.
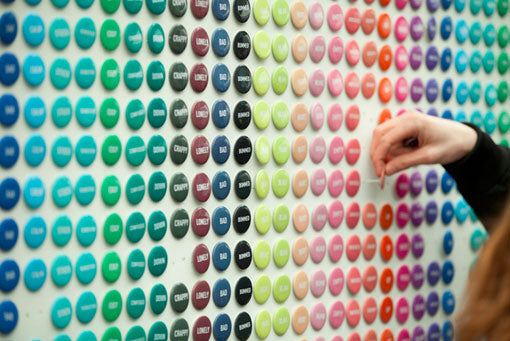
As well as being brilliant and effective, these mental health campaign buttons looked extremely cool! What a fantastic idea.
Read more »
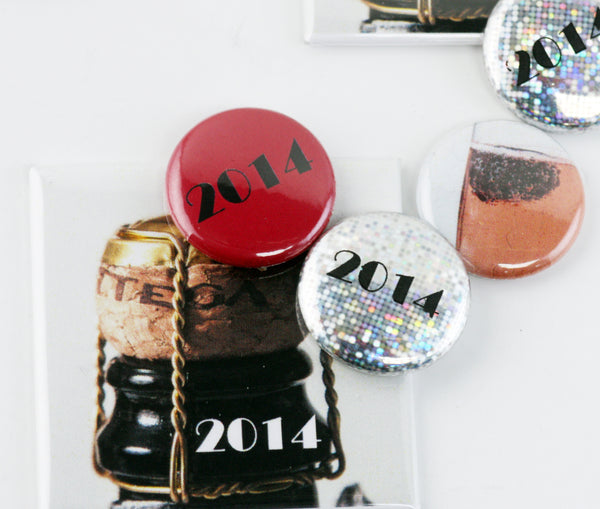
Who's going out for New Year's eve? Throwing a party? Make 2014 buttons! December 20 2013
Add a festive touch to your celebration with these glittery New Year's buttons!
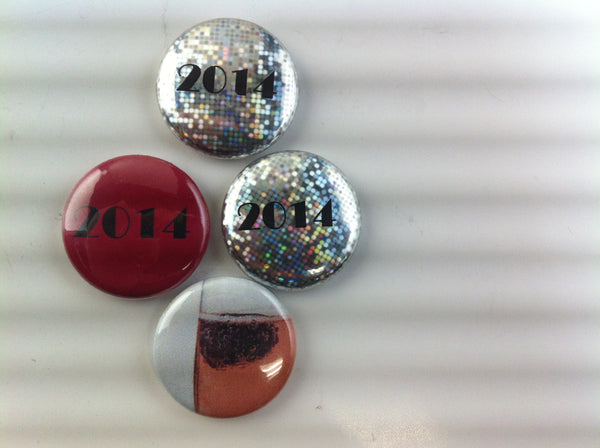
The sparkly buttons are made by printing the text directly on a sheet of mylar, being see-through, you can use any shiny paper you'd like underneath. Another great option to recycle wrapping paper.
Don't want to pin on to your clothing? Use a rare earth magnet back and a flat back on your button, and no holes in your fancy clothes!
Let our New Year's resolution be this: we will be there for one another as fellow members of humanity, in the finest sense of the word Goran Persson
HAPPY NEW YEAR!
Read more »
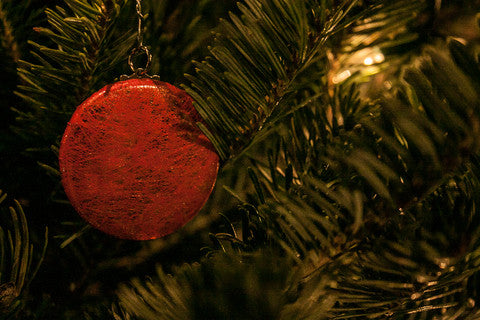
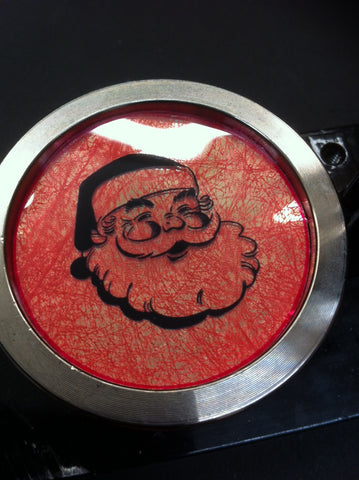
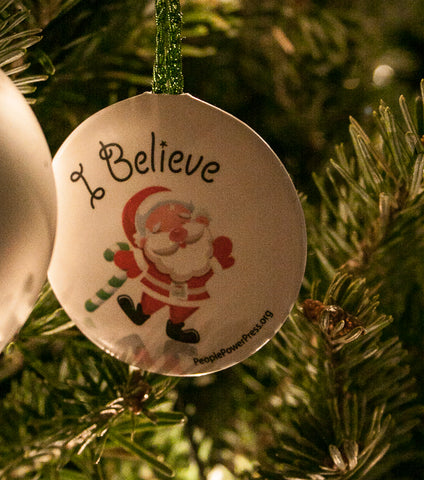
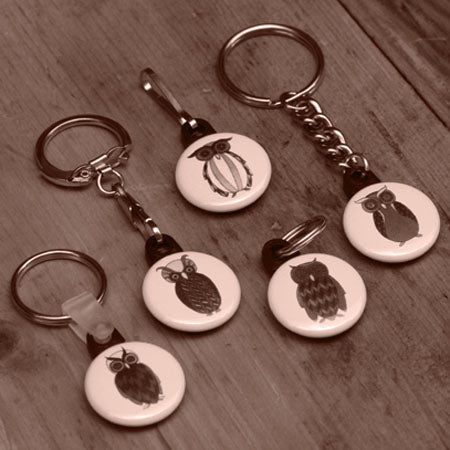
Pretty button ornaments! December 17 2013
Have a button maker? Why not start a new tradition and make some fancy button ornaments over the holidays? A great way to recycle some pretty wrapping paper and easy to make.
These ornaments pictured are made using a 1.75" button maker with a keychain back, chain tabs (without the chain), some metallic wrapping paper and a light mesh wrapping paper. The image is printed on Dura-lar (available through our store) instead of paper.
What you need:
Shell and keychain backs
Chain tabs
Your design, or paper
Ornament hook
The other way to make Christmas ornaments is covered here.
Read more »
Comicon! This weekend! December 10 2013
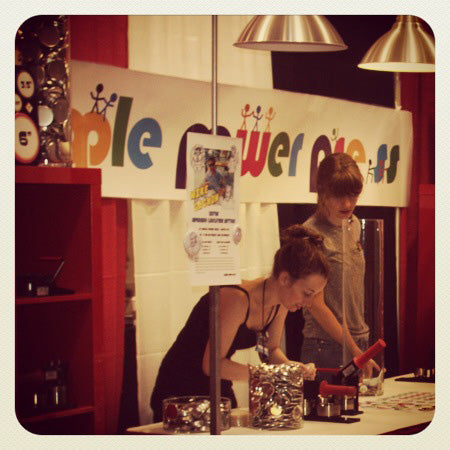
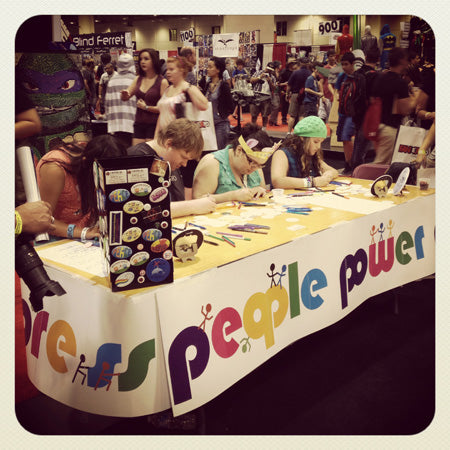
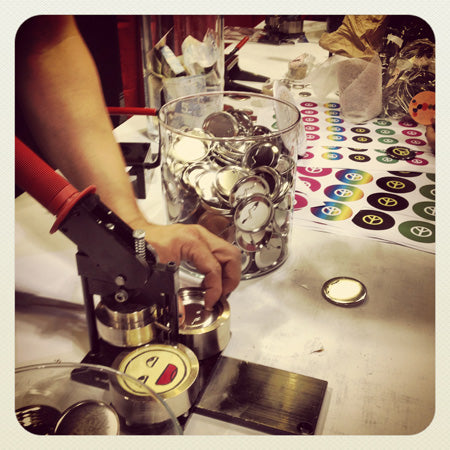
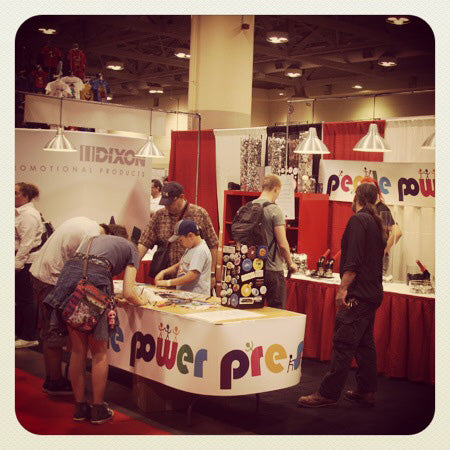
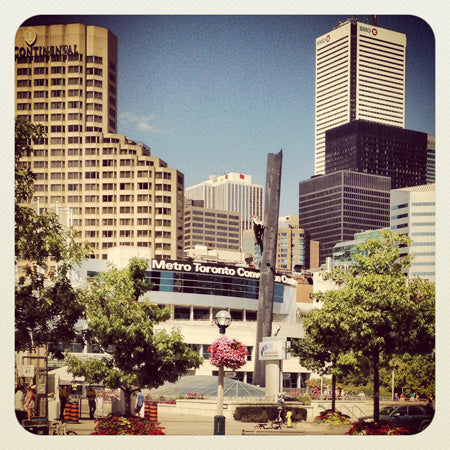
This weekend we're super excited to have a booth at Comicon Toronto where we will have a photo booth for portraits, and be creating custom buttons for you, on the spot.
Comicon is at the Metro Toronto Convention Centre (South Building) on Sunday, December 15th, 2013 from 11am to 5pm. It's a special holiday edition of Toronto Comicon / AnimCon. Admission is only $10 at the door and that gets you into BOTH events! Two Show for the price of one! Kids 12 and under are FREE with paying adult.
Our team will have various sizes of custom buttons for you to make, as large as 6" buttons for photos. We will also have our gumball vending machines for buttons, and button makers of all sizes. (If you are behind on your Christmas shopping, pick up a button maker for someone you love!)
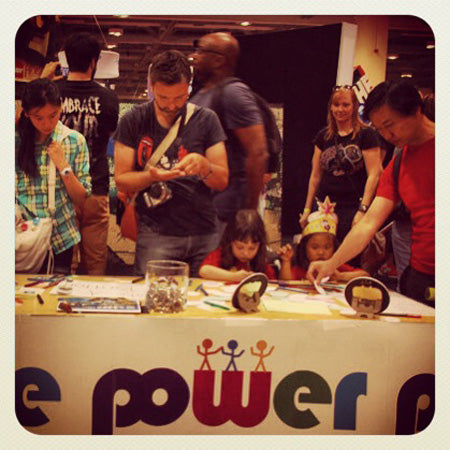
Here we were this past summer at Fan Expo, and if that was any indication, this weekend should be a blast. We'll have a similar set up, and a photo booth! Event photos of Comicon to follow...
Come by and say hi, get a photo taken, and get your art on!
Read more »
Community Bicycle Network celebrates 20 years! December 05 2013
Our friends at Community Bicycle Network are celebrating their 20th year! Congratulations on your awesome, award winning service!!!
Their vision is:
- bicycles are used to experience everyday life
- bicycles, parts & accessories can be purchased affordably without sales tax, encouraging sustainable mobility
- used bicycles can be repaired, resold and re-used or striped for parts and recycled in an environmentally-friendly manner
Come help them celebrate 20 years on Friday, December 6th at 8:00pm at 761 Queen Street West in Toronto!
Or you can support CBN by donating online.
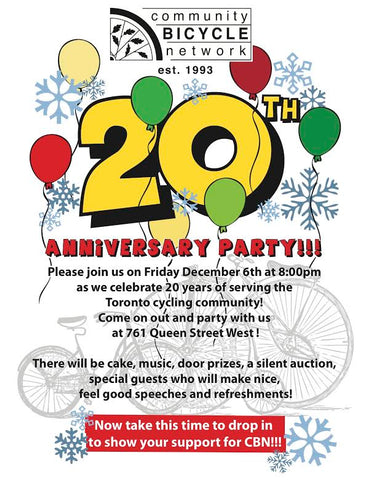
Here's to another 20 years! And if you're at their anniversary party, you can get one these snazzy buttons!
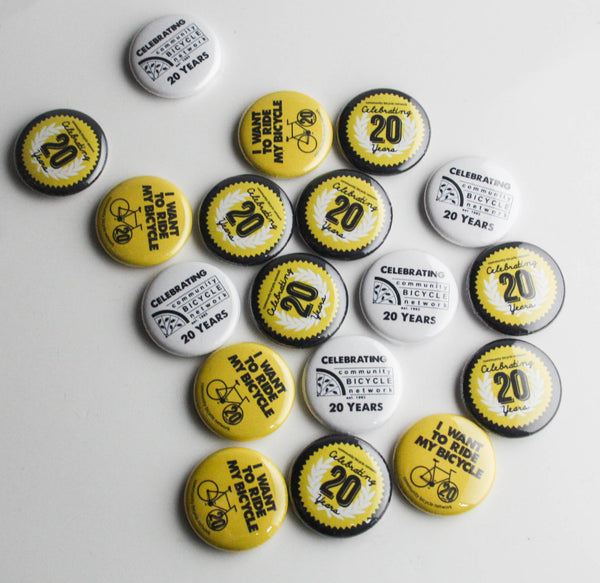
I want to ride my bicycle!
Read more »
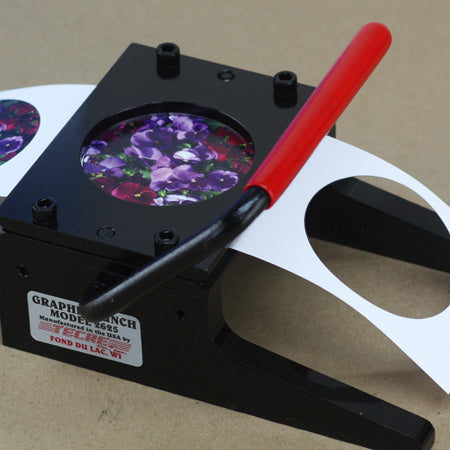
Help with a sticky Graphic Punch for Button Making December 03 2013
Graphic punches are used for circle cutting. A question we get over and over is why does my graphic punch get stuck, or not work as cleanly as it should, and what can I do about it?
Usually this is caused by cutting stickers. This can can cause the punch to get sticky or gummy. There is an easy and low maintenance fix for this. You do NOT need to take it apart to clean it.
Take a piece of of tin/metal which you can buy at any hardware store, or use the shell part for a rectangle or square button if you have one. (also known as a shim.)
Just slide it in the punch where you would normally put the paper.
![]()
...and quickly insert it a few times to get rid of the gum.
![]()

This should clear off any of the stickiness and start cutting properly again. You should do this periodically to ensure the sharp cutting of your graphic punch.
Happy Punching!!
Read more »
Cauldron's Brazil's lost Tour 2013 November 29 2013
We have some friends in the band Cauldron who are currently finishing up a Brazilian tour. Check out the custom band buttons that they made!
These buttons are METAL!!! :-)

If you want to check out their music you can go to their Myspace. And like them on Facebook! While you're at it, you can follow there shenanigans on Twitter!

Their 6 city tour details are:
Nov. 26 - Belo Horizonte, Brazil - Matriz
Nov. 27 - Rio de Janeiro, Brazil - Teatro Odisseia
Nov. 28 - Sao Paulo, Brazil - Manifesto
Nov. 29 - Curitiba, Brazil - Hangar Music Hall
Nov. 30 - Porto Alegre, Brazil - Beco 203
Dec. 01 - Hortolandia, Brazil - Barka-Mada
So if you're in Hortolandia, get yourself to Barka-Mada to see the awesomeness in person!
Read more »
Congratulations to our very own designer Mariel! She made pretty custom wedding buttons! November 06 2013
Our super talented button designer Mariel was recently married to Patrick and she designed these fantastic custom buttons for her wedding.
Mariel said that her personalized wedding buttons were a huge success with her guests and we can understand why, they look amazing! She's a skilled illustrator and the button design really captures the essence of the happy couple. For more of Mariel's work check out her Love story comics

The wedding was in Ottawa, and the lovely wedding photos are courtesy of Mondays with Mac Photography.
We wish her all the best and hope she is enjoying her honeymoon!
Read more »
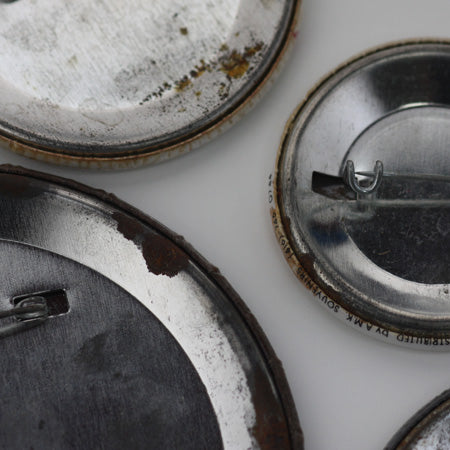
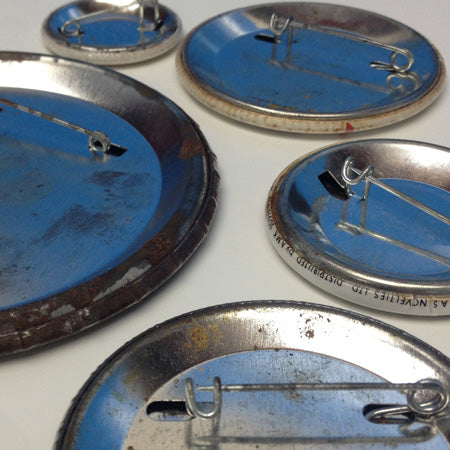
Rusty Buttons? Why do my buttons rust? Button Rust? September 20 2013
Quick question....I've been making buttons for a while now using a Tecre model 100 and their parts. I've noticed that after like 6+ months, my buttons are rusting around the inside edges when you look at them from the back....what causes this and how can I prevent it? Thanks!
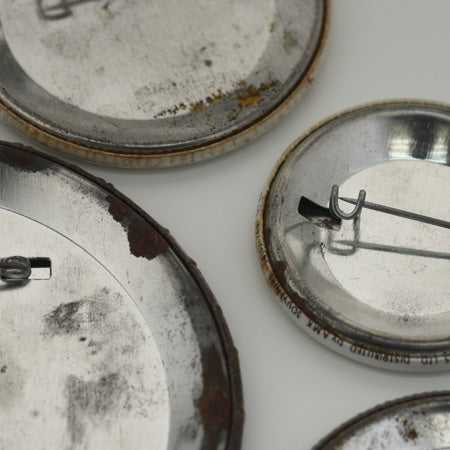
Buttons are tin and will rust very quickly.
I of course don’t know your specific situation but do you do outdoor events? Do you keep your buttons in plastic buckets? If on the end of a humid day you put a lid on and seal your buttons in plastic they will rust. Of course from rain but even just from humidity.
This is a good reason to save and collect those silica gel sachets that come with all kinds of products. Chuck some of these in with your buttons when you store them after a humid day and don’t seal the boxes up. If you leave stuff in your car overnight or store buttons in an unheated garage get a heater and/or dehumidifier – or bring them into the house.
Read more »
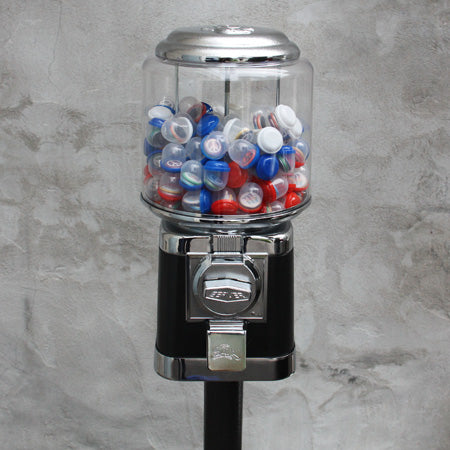
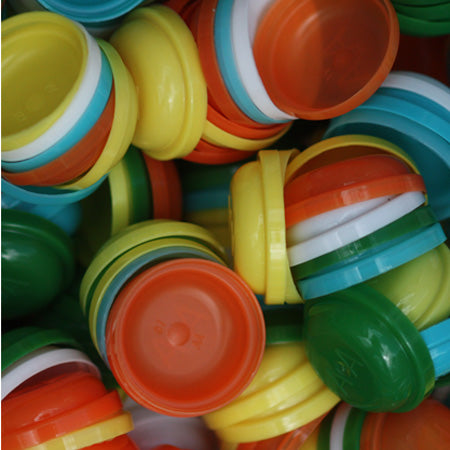
Button Vending Machines – Put your button sales on automatic – Gumball machines for buttons! September 07 2013
Selling your button designs in stores can be a great way to launch your button business. But buttons are a low cost item that can walk very easily if you have them in a jar or on a board. Packaging buttons is a good way to go. You can make sets of matching buttons and put them on a display card or 4 in a bag with a header card. I will be writing a separate article about button packaging in due course. Another way to ensure you don’t loose buttons to pilfering is sell them using a button vending machine.
These machines are traditional gumball machines converted to take capsules. You can then add multiple buttons in a capsule or also put a special offer or a coupon code in the capsule. People enjoy putting in a coin and turning the handle to see what they are going to get. There is a nostalgia surrounding the gumball machines. Everyone remembers them from their childhood. Button vending machines work for you whilst you are somewhere else, maybe making or designing buttons, maybe at home tucked up in bed with a good book. Put your button sales on Automatic!

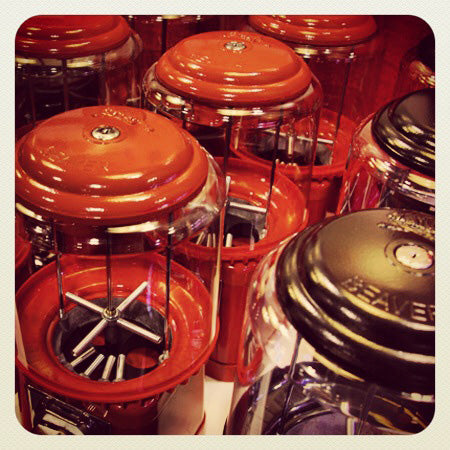
Beaver Meridian Gumball Machine

Button Vending Machine uses capsules
This is the flagship! The Beaver Meridian Gumball Machine is a very cool retro style solid metal machine in bright red and designed like a globe. I think it looks very cool. As with all these machines there are some options for the coin mechanism. You can go for a coin mechanism that takes a quarter, two quarters or even 4 quarters. If your in Canada you can have a loonie or toonie coin mechanism. You can even have 2 x $1 or 2 x $2. All these machines also have the option for TOKENS or FREE VEND options.

Coin Mechanism for a Beaver Meridian Gumball Machine
The above Button Vending Machine – Meridian is quite pricy ($600 – $800) and at 70 lbs it’s quite expensive to ship. But there are other options:

Northern Beaver Vending Machine
The Northern Beaver takes 1″ or 2″ or 3″ capsules. You can fit 3 1″ buttons or magnets in a 1″ acorn capsule. You can fit 3 buttons or magnets up to 1-3/4″ in a 2″ acorn capsule. The 3″ capsules are a quarter each so I find them a bit expensive but they do take a few 2-1/4″ buttons. The 2″ acorn capsules are only 5 cents each, the 1″ acorn capsules go down to 3 cents each. I see more opportunity in those than the 3″ buttons.

Round Beaver Button Vending Machine
The Round Beaver has all the coin mechanism options but is only available for 1″ vending capsules. The stand is also an optional extra. They sit nicely on the counter and come with fixtures for bolting down or attaching a security wire (as do all Beaver vending machines). The Round Beaver you can pickup for around $150.
Marketing and promotion options using a Button Vending Machine.
Above I’m talking about selling buttons but there are also other uses. These machines have interchangeable coin mechanisms. Those coin mechanisms can have some interesting possibilities. The FREE VEND option is a coin mechanism that requires no coin. Just turn the handle and out pops the capsule. Why is this useful?
Think of putting a machine in a local venue like an art gallery or a café. When someone turns the handle they get a free button and an ad. That ad could lead potential clients to your store, your website or to your latest special offer. A great way to get customers coming to you.
What about TOKEN VENDING? Our mechanism takes a 0.984″ token which is a pretty standard token size. You can get tokens personalised, stamped with your website or your logo. You can send a token to your mailing list, give a token out at trade shows or even walk the streets and hand out your token. It will bring people to your store or event. Event and party organisers can use tokens to distribute “random” capsules that are a kind of lottery. What about a party where you have to find the person with the matching button. The Button Vending Machine keeps the mix random.
How do I promote my website or business with a Button Vending Machine.
Depends on your business ….. but let’s say you have a bicycle store for example. Come up with 5 or 10 slogans about cycling. I love my bike! Cyclists do it better! Watch for cyclists! etc. Make some cool designs, add a button or magnet business card so there are 2 buttons in the capsule. Get a Button Vending Machine with a $1 mechanism and set it up in your cycle shop. Your customers will like the slogan, buy the button and take home your business card for the fridge. If it cost a $1 they will appreciate it – If you give them away we all know how many end up in the garbage! Entertain your customers AND promote your business. The $1 coins will pay for the buttons and the machine in no time. This method can be adapted to almost ANY BUSINESS and it works.
Read more »
Customized buttons online or renting a button maker and doing it yourself? September 05 2013
You're thinking of getting some customized buttons made. These maybe photo buttons with a text or buttons with your own design. If you are looking to get 100 custom buttons and pins or even 250 custom made buttons it's not really worthwhile to rent. You might as well let someone else make the buttons for you. You can easily order custom buttons online with us at People Power Press or with Button-Designer from The Button Guy.
But if you are thinking of making customized buttons, custom photo buttons or any custom buttons and pins in a quantity of maybe 500 or 1000 then renting a button maker could be a serious, easy custom button alternative. This could save you a lot of $$$$. Basically you supply the labor and the customized button design and we supply the machine and the button parts. If you have lots of time, volunteers or workers with not enough to do renting a button maker could just be the way to get your custom pins buttons at a much better price. Here are some links:
Renting a Button Maker Checkout pricing and details about renting!
Customized Buttons Checkout customized buttons from People Power Press - We can customize for you!
Custom Photo Buttons Checkout larger customized photo buttons and add text to your photo
Customized buttons online Try the free online button designer and customize your own buttons and pins!
The great thing about buttons is the low cost of the button parts if you make them yourself. If you are doing an event regularly every year then buy a button maker and you will find all kinds of occasions to get the button maker out. With standard button parts at somewhere between 6 cents and 12 cents each you can have a lot of fun with a button maker for a very small amount of money!
Read more »
Mike Gagnon: Freelance Comic Creator helped out at FanExpo August 29 2013

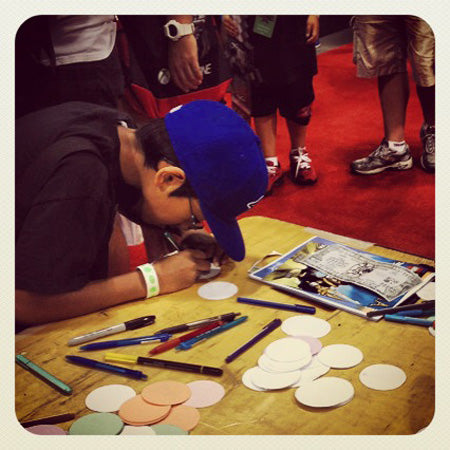
Mike Gagnon: Super Hero Buttons
A friend of ours, Mike Gagnon helped out this year at FanExpo by drawing people as super hero's for their button. It was a great sucess - people were lined up for the opportunity. Mike is a freelance comic creator. To see more of his fantastic work visit his website here.
Read more »
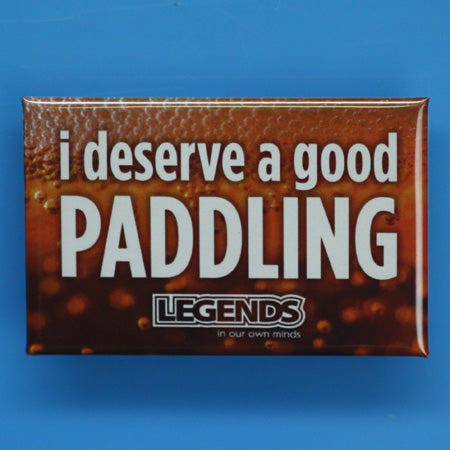
Legends in Our Own Minds - Tales of a Dragon Boat Team August 28 2013
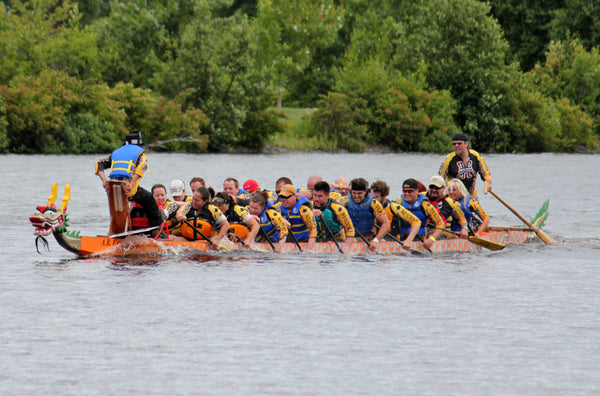
Read more »
Our First year @ Fan Expo August 27 2013
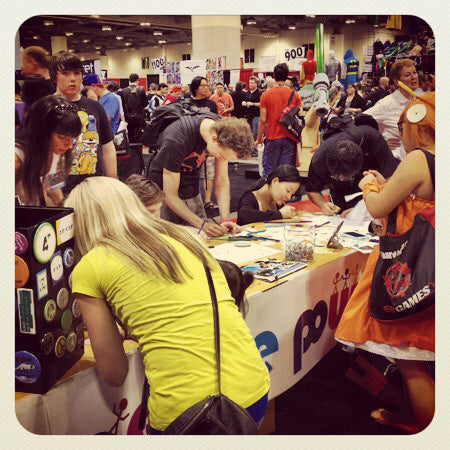


Read more »
Do you do the Zombie Walk? I Hate Todd is looking for you... August 21 2013
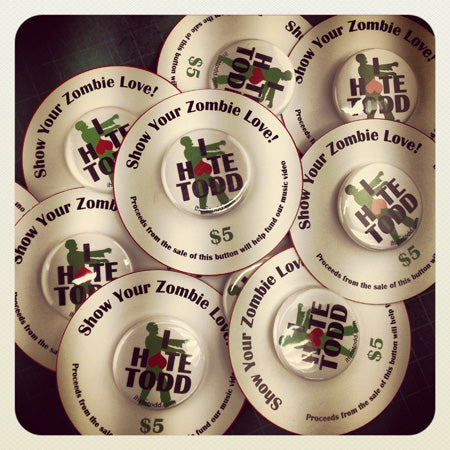 I Hate Todd Fundraising Buttons with Custom Packaging.
Local Toronto Band I Hate Todd is filming their first music video for their soon to be released single "Zombie Love" and they need Zombies (and crew). For more information or to be a part of their video check them out on Facebook. Plus a $5 donation gets you an exclusive, limited “zombie” edition I Hate Todd fundraising button with the proceeds helping toward funding the video.
Sounds like a great cause for getting your Zombie on!!
Website: www.ihatetodd.com
Twitter: https://twitter.com/IHateToddmusic
Want to be in the "Zombie Love" video? : http://allevents.in/events/ZOMBIES-I-Hate-Todd-needs-YOU-for-a-music-video/463856917044462
Read more »
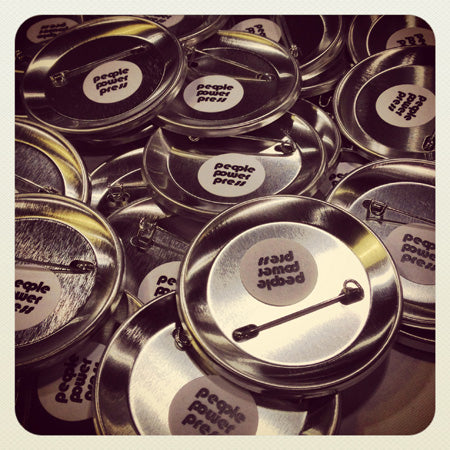
Hanging out with the button supplies at People Power Press! August 15 2013
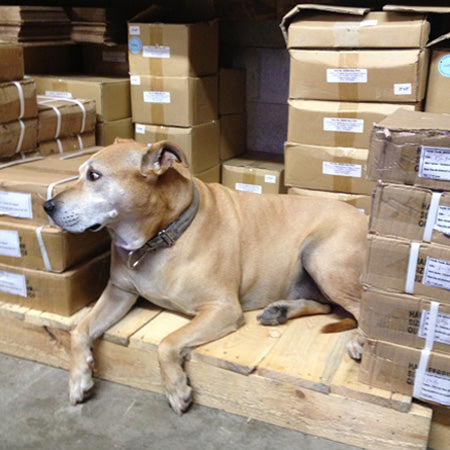
Pancho! taking a break with some Button Supplies at the People Power Press Button Factory.
Read more »
NEW! Make selling custom buttons Easy! Use a button vending machine. August 06 2013
Put your button sales on automatic! Use a simple machine that safeguards your art and collects the cash for you. Whilst your sleeping, in the bath, in the bar. I mean it! Earn money while you sleep with your custom button designs.
Custom Buttons in a Button Vending Machine - Simple but effective!
What a Great Idea! Sell your own custom buttons in a Button Vending Machine. Our shop is currently loaded up with everything to get you started: Let someone (or something) else do the selling whilst you are creating your art. Stay in creative mode whilst the business side takes care of itself. Use a simple button vending machine to sell your designs.
Remember those bubblegum machines when you were a kid? Well this is the same but it's not for selling gum. It's a machine for turning your designs into cash. A custom button vending machine for your art and designs - it's personal!
Checkout this link. You can order just a machine or you can order a machine already filled with your designs in capsules ready to go. Put your custom button sales on automatic.
You choose the sale price: 25 cents to $2. You choose button quantity 1 - 3. You choose button, magnet, key-chain, but don't forget to include your business card and a special offer or two. The silent salesman will still be working for you.
If you've got good designs, we've got good button vending machines to sell them.
We stock three different styles of Button Vending Machines and two different sized Capsules for your Custom Buttons.
Please see website for more details!
Read more »
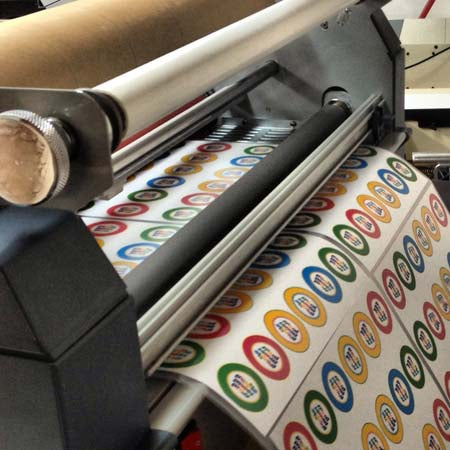
Nature Canada engages youth to Naturehood with "Official Guardian of Nature" Buttons August 01 2013
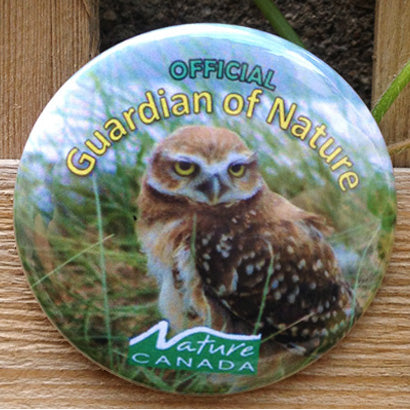
Lac Deschênes - Ottawa River Important Bird Area Guardian of Nature Custom Buttons!
Lac Deschênes Ottawa River Important Bird Area (IBA) is one of 600 sites across Canada recognized internationally for its importance to birds. However this IBA is particularly interesting because it is found along the Ottawa River right in the heart of the National Capital region. This site is a significant resting spot for migrating waterbirds and there is always something interesting to see along the Ottawa River.
Nature Canada calls this site Naturehood and they are working to connect Ottawa and Gatineau residents to the nature in their own backyard. These “Guardian of Nature” buttons will be a great way to engage youth in the Naturehood program by proclaiming them an “official Guardian of Nature.”
For more information, please visit:
Lac Deschênes Ottawa River:
Nature Canada:
Read more »
Rosette Buttons July 29 2013
Rosettes are used for many purposes; they are great for events or as reward buttons, award buttons and as tokens of appreciation. These rosettes are hand-made in Canada and have a soft, full, plush feel and are of excellent quality. And now you can make your own!!
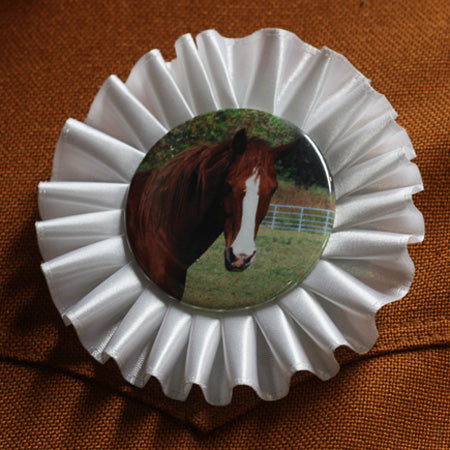
Rosettes: A button related specialty
Horse Show Buttons with Rosette
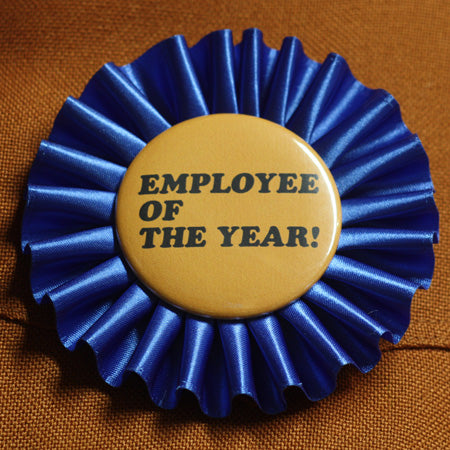
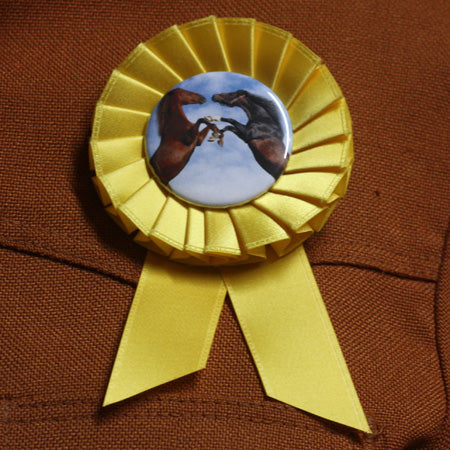
Employee Award Buttons with Rosette

Reward Buttons with Rosette
We stock both 3" and 4" diameter rosettes. The 3" rosettes have ribbons that hang bellow. Both sizes can accommodate up to a 2-1/4" sized button. To make a rosette you need a button maker and prong back button parts: a shell, mylar, a prong back and a plastic back pin-back. In smaller sizes (1", 1-1/4" and 1-1/2") you use a centre hole back and stick the brad prong pin. Don't worry, when you order rosettes the parts come complete.
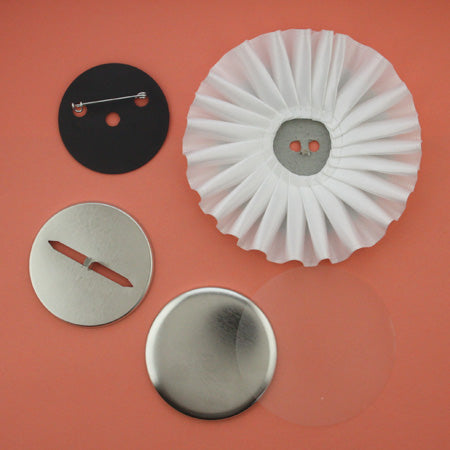
Rosette with Prong Back Button Parts: For 1-3/4", 2" and 2-1/4" Buttons
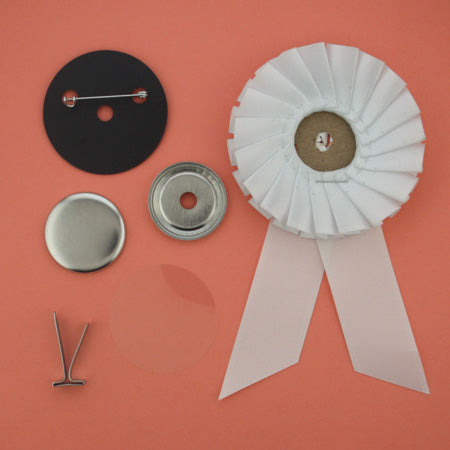
Rosette with Center Hole Prong Back Button Parts: For 1", 1-1/4" and 1-1/2" Buttons
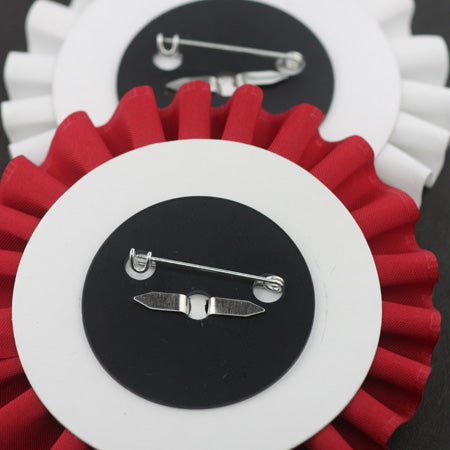
To make a rosette button you first need to make your prong back button or center hole prong back button using your button maker. Next push the prongs through the cardboard holes of the rosette and then through the center hole of the black plastic pin-back. Flatten the prongs to hold the rosette onto the button. We stock rosettes in white, red and blue but they are available by special order in 50 different colours. Special order colours may take up to 4 weeks to ship but stock colours will ship the same day.
Read more »
Buttons at the Toronto Vintage Bicycle Show July 26 2013
Come One Come All!
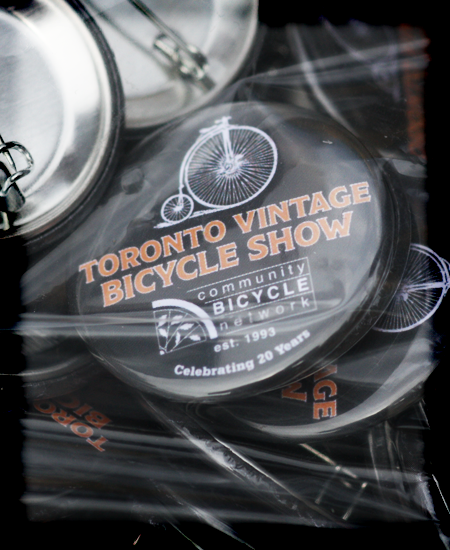
Get your exclusive Toronto Vintage Bicycle Show buttons this weekend at Trinity Bellwoods park in Toronto.

Just as Adrian for one!
Alternatively, you could also get a bike, bring yours in for repair, or just geek out with all us fun bike loving people.
The show, organized by the Community Bicycle Network was launched in 2012 and is the CBN’s featured event.
It runs from 12-5pm on July 28th, 2013 : )
See you there!
Read more »
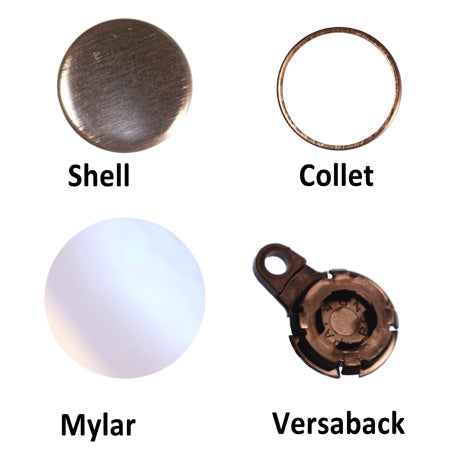
Add Versatiltiy to 1" buttons with a Versaback July 17 2013
1" Button Versabacks
Convert 1" buttons into key chains or zipper pulls using a snap in versaback. A versa back is a black plastic button part that snaps into the back of a 1" collet and replaces the lock pin. Once the versa back is inserted it is a permanent and secure back with a 1/8" hole extending out from the back of the button. Attach split rings, key chains or zipper pulls through the hole to add functionality to your 1" buttons.
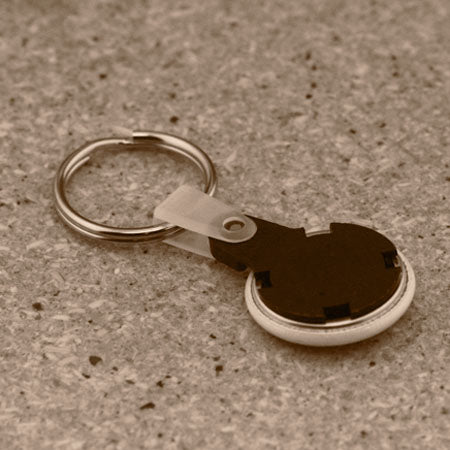
Split Ring Keyring with Plastic Tab Versaback.
(Split Rings are too big for 1" button versabacks and require the use of a plastic tab).
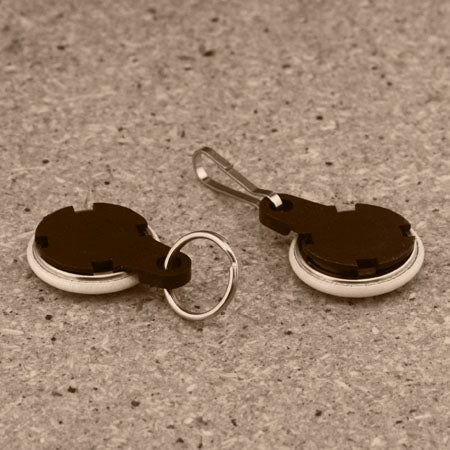
Mini Split Ring and Zipper Pull Versabacks
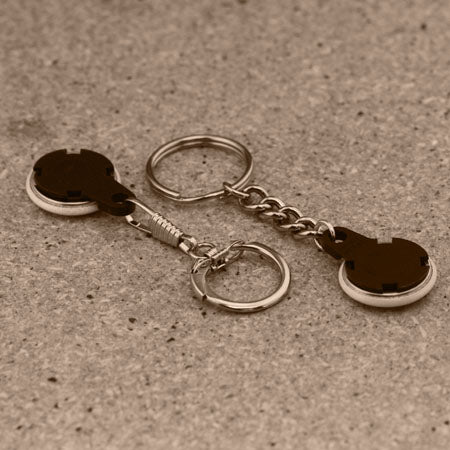
Snap Hook and Chain Keychain Versabacks
** Versabacks are also available for 1-1/4" and 1-1/2" buttons - Happy Button Making!! Versabacks also known as versa-backs, versa backs and snap backs. Can be available in black or white.
Read more »
Cut button making time in half with a graphic punch. July 04 2013
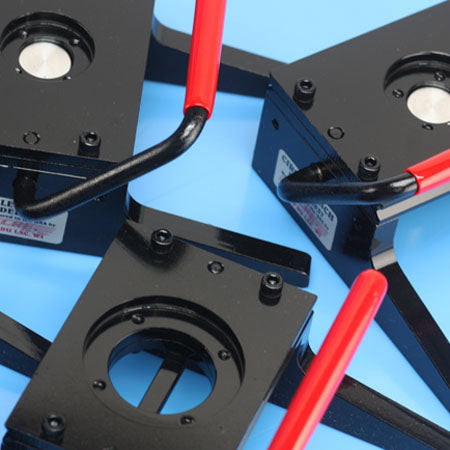
Button Making: Tecre Graphic Punches
Is it time to invest in a graphic punch for button making - we think so (it will cut your time in half). Graphic punches are used to cut out graphics, paper or photos for button making and are a faster method than traditional "adjustable cutters", scissors or quick cutters. Tecre graphic punches are of all metal construction, have clear and easy visual centering, are compact and light-weight and require very little force to operate. And an added bonus is that these graphic punches come with a manufacturer's life-time warranty and are useful for all sorts of fine-art related projects.
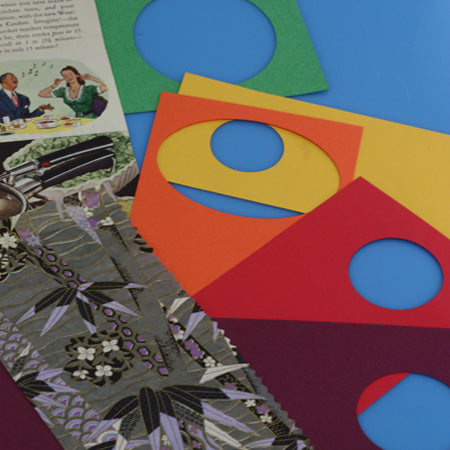
Cutting Paper Circles and Blank Paper:
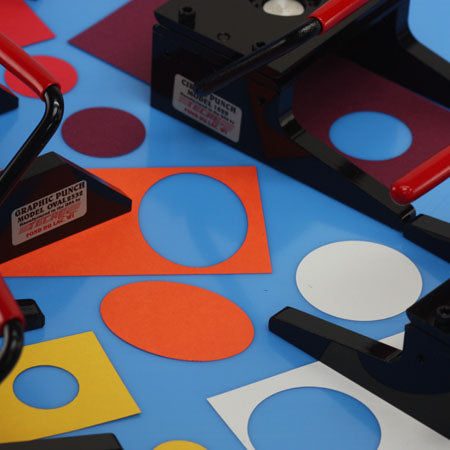
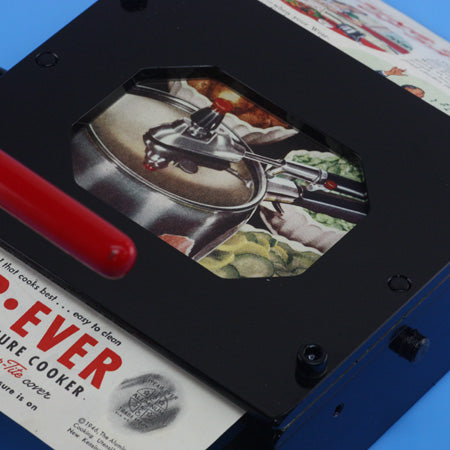
Cutting Custom Button Artwork:
Cutting Magazine Images to make Buttons:
Cutting Patterned Paper to make Buttons:
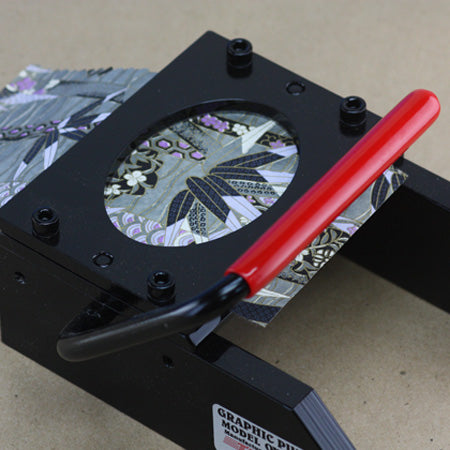
Remember to cut your paper, photos, magazine images or custom button artwork into strips so that they fit to the graphic punch. We carry graphic punches for all sizes of button making. For a complete list and pricing click here. Happy Button Making!
Read more »
Fluorescent Up Your Day June 27 2013
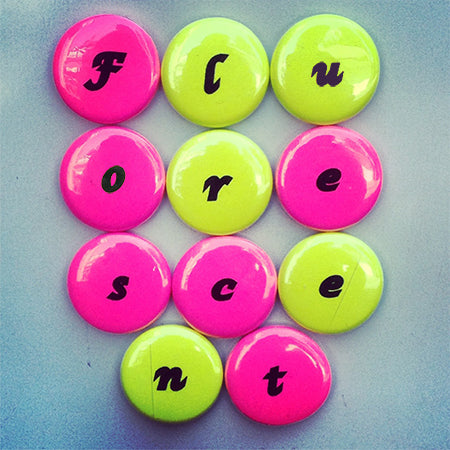
Fluorescent 7/8" Buttons
Fluorescent buttons stand out but as we all know, printing fluorescent color can be next to impossible. I decided to experiment using fluorescent paper and print my artwork on clearacetate, which is available in both Matte or Gloss and in various thicknesses. Acetate also eliminates the need for using mylar. It is fun to experiment with printing different colors on the acetate and see how they appear when pressed on top of the fluorescent paper or other colored paper (see example below).

Read more »
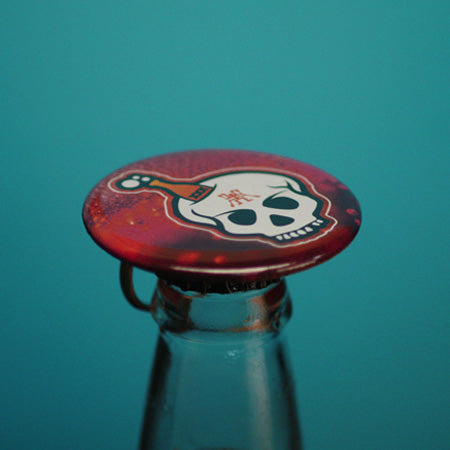
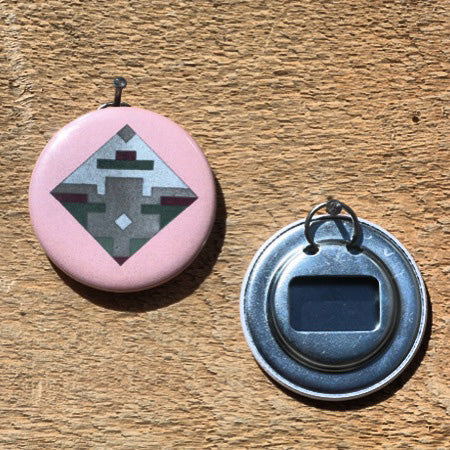
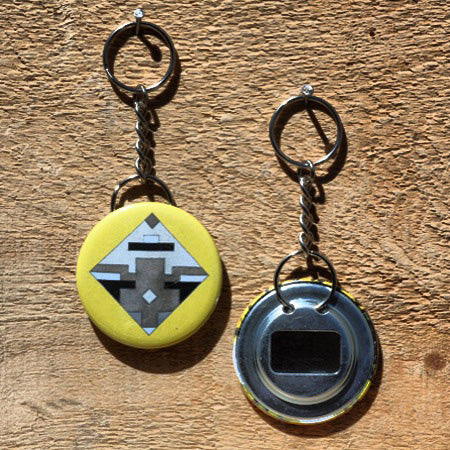
Metal and Magnetic Bottle Openers June 20 2013

I just wanted to add that we supply both metal and magnetic bottle openers for 2-1/4" button making machines. The benefit of using the black plastic bottle opener is that it has a magnet insert which allows you to store it on the fridge or other magnetic surfaces. Both the metal and plastic magnetic bottle openers can accommodate key rings.
Read more »
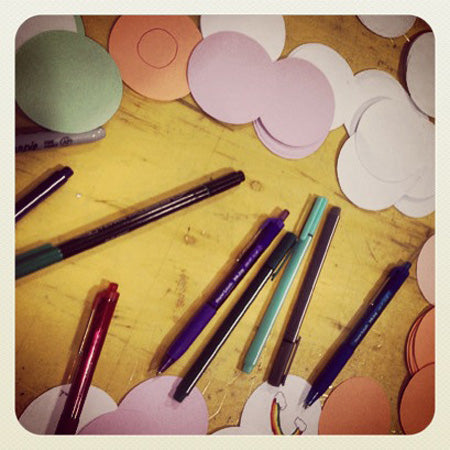
New Pastel Circles... June 14 2013

Pre-Cut Paper Circles for Button Making in New Pastel Paper!
Read more »
Right Beside You: An Evening of Stories with David Delisca June 13 2013
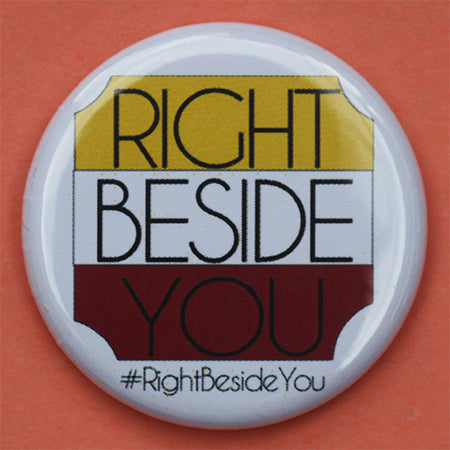
Custom Event Buttons for #RightBesideYou
Check out Right Beside You - an evening of performance presented by poet David Delisca and IFreeCan on Sunday, June 16 at The Drake Hotel (doors open at 7pm and show starts at 8pm) The evening will feature poetry and story-telling, humor, live music and much, much more including special guest performers. For more details, please see below:

#RightBesideYou Facebook Event
#RightBesideYou Twitter
David Delisca Facebook
David Delisca website
IFreeCan website
Read more »
Get Your Bottles Open - Bottle Openers Just in Time For Summer!! June 06 2013

Bottle openers come in handy all year round but a bottle opener attached to your key chain is especially handy during the summertime. It is simple to design and make your own custom bottle openers using button parts. Here are a few examples using split rings, keyrings and keychains.
Split Ring Bottle Opener

Mini Split Ring Bottle Opener
Chain Keychain with Split Ring Bottle Opener
Chain Keychain with Mini Split Ring Bottle Opener
Pull-Apart Keyring Bottle Opener

Read more »
Matte Buttons Or Glossy! May 24 2013
I wanted to post a photo that Illustrates the difference between a matte and glossy finish for button-making. The matte button examples are pictured on the left, and the glossy buttons are on the right. Notice how the gloss finish is reflective and allows the colors to "pop" or appear brighter and the matte finish produces a more subdued feel with very little sheen. Which one you choose will depend on the effect you wish to achieve.
Gloss buttons are created by using standard transparent, high-gloss mylar over top of your artwork and matte buttons are created using laminated artwork (see below) and do not require mylar. Button-making mylar is currently only available in high-gloss but we and button makers alike are hoping that soon that won't be the case. Bring on the matte!
Read more »
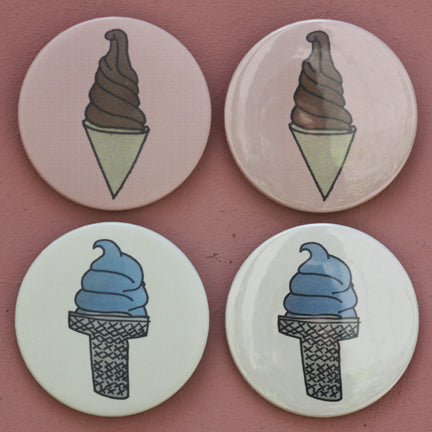
Summer Fun Custom Mirrors May 22 2013
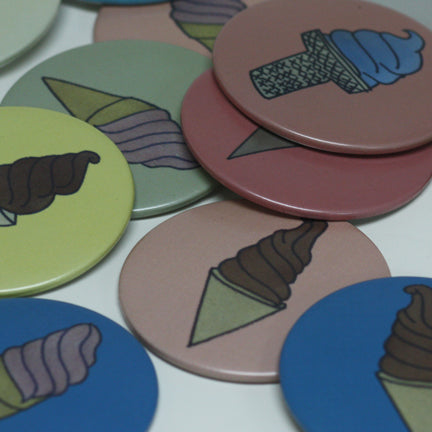
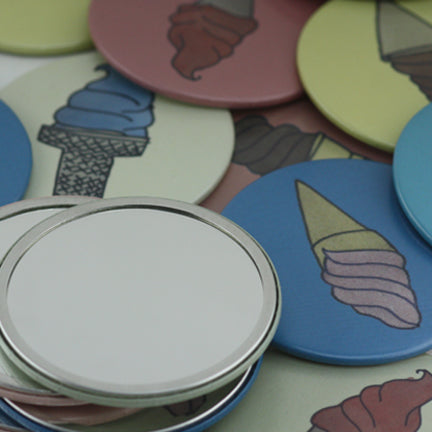
Read more »
New Online Button Designer Software just went live! Free online button designer! May 10 2013

New online button designer from The Button Guy. Easy button design and button artwork creation.
We just went live! Checkout this simple button design software: it’s free. A great tool for designing buttons and creating button artwork. It even takes your button design and lays it out on the sheet for you. With a 2-1/4″ button you make your design and then you go to print and it puts 9 up on the page in a pdf, ready to print. In your profile you can collect and save all your designs and then print 9 different buttons on each sheet if you wish. Simple and effective.
If you’re a graphic designer then no problem, stick to Photoshop, Illustrator, Gimp etc. But if you are not a graphics person then you can instantly make your button artwork and then the system lays your button artwork out on a page ready for printing. Sweet!
Remember your button design is key. Once you have a good button maker, making buttons is inexpensive and pressing them is easy. Coming up with great button artwork or a really good button design is not so easy. Invest time in your designs. It will pay off. Remember a few tips:
- More is less! Do not clutter your button.
- Bright but simple works well
- Button designs with white backgrounds work very well on buttons.
- One bright colour works well on buttons. eg. Black white then a splash of red.
- If you’re using multiple colours ensure they hang together well.
Read more »
Making Metallic Buttons May 03 2013

Add Some Shine to your Buttons!
We've also been experimenting with making silver buttons. The process is very simple: Print your artwork on acetate transparency or use Dura-Lar Film for printing and button making in reverse, cut it out and press - and let the silver shine through. Press the button with your artwork shiny side up as the printed image will scratch off.
You print your image in reverse and put it ink side down when making the button. This stops any chance of the ink scratching off the button once it's made. The ink is inside and protected.
Put the acetate print side down on a naked button to get the silver effect.Simple. Want to make gold buttons? Lay a metallic gold paper under the acetate. Fluorescent? Yes you can use fluorescent or glow in the dark papers!
You can buy acetate or clear dura-lar on our website. Also bright gold sheets!
Read more »
Copper Buttons with optional embossing April 30 2013
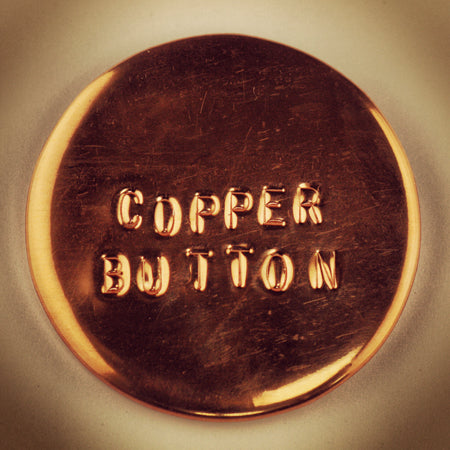
Hey Guys - Check out our latest discovery!!! You can make creative buttons out of copper sheet metal. Use the copper sheet metal as your artwork instead of paper and you do not require mylar and you get a really nice copper finish. In the above example we embossed the copper with an old embossing machine. It marks the soft copper and gives a kind of old fashioned typewriter effect.
This is just another example of different ways to make art buttons. You can really get creative with your button machine!
Read more »
Gold and Silver Pin-Back Buttons – Button Making Ideas! April 20 2013
The problem is quite simple. How do I make buttons that are fluorescent? My printer cannot print fluorescent colours. How do I make gold or silver buttons? My printer cannot print gold or silver. Well the fact is very few printers can print fluorescent colours or gold. Even bright pink is difficult to reproduce so this article explains how to get around the limitations of printing and put really bright colors on a button. So if you want bright pink buttons just use this idea and substitute the gold paper for fluorescent pink or whatever color you choose.
I will use the example of gold because no printer can print shiny reflective gold.
What do you need to make really shiny gold buttons:
- Gold foil paper
- Printable acetate transparencies
- Circle cutter, printer and button maker (Just like you need for any button making job)
Make your artwork just like you would for any button and then reverse it. Then simply print the reverse image on a transparency. Lay the transparency over a sheet of the gold foil paper and cut out the gold sheet and acetate together. If you have trouble with the gold foil you can always cut it separately with scissors and put it under the acetate. It only need show through where there is no colour printed on the acetate. You don’t even need to cut very accurately. Now put acetate with gold backing into the button maker and press as normal. Voila!
Another tip is to print the image NOT reversed and lay the acetate over the gold foil print side down. This way the print side is protected. Depending on your printer and acetate combo the ink may scratch off. This way your print is protected.

A printed transparency with the image showing through the clear acetate. The printer printed on the reverse of this transparency to protect the print surface.

The printed sheet is placed over a gold foil sheet with printed side down but image showing correctly through the acetate. Note the photo here cannot reproduce the shiny gold as per the actual gold leaf. You need to see this button. It shines!

Here we cut the acetate and the gold leaf die simultaneously using a cutting die. If you are using a graphic punch to make your buttons then cut the acetate with your punch and cut the gold leaf with scissors.

Finished buttons with shiny gold showing through the acetate. A great way to make visually striking buttons. This photo here cannot reproduce the eye catching gold.
Make one yourself and see what I mean.
 Syndicated blog from TheButtonGuy.net This article is reprinted with permission. http://TheButtonGuy.net/
Read more »
New product for 1″ Button Makers – Button Jewelery – Artclix Pendants and bracelets with 1″ button art! April 13 2013
A great way to utilize a 1″ button maker to make interchangeable jewelry with FLAT BACK Button parts (sold separately: click for Round or Square).
The Artclix metal pendants and bracelets have a rare earth magnet inside so you can change the design of your bracelet or pendant as often as you change your undies! Or more often, depending on how you roll : ) haha

Artclix jewelery for pendants and bracelets with your 1″ button maker.
You can find the bracelets here on People Power Press. Pendants here.

Button bracelets available so you can have interchangeable sets of button designs on a magnetic bracelet button holder.
How do you spell Jewelry Jewellery Jewelery? No idea!
Syndicated blog from TheButtonGuy.net
This article is reprinted with permission.
http://TheButtonGuy.net/
Read more »
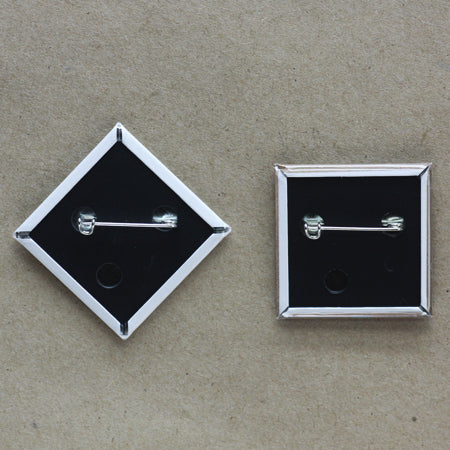
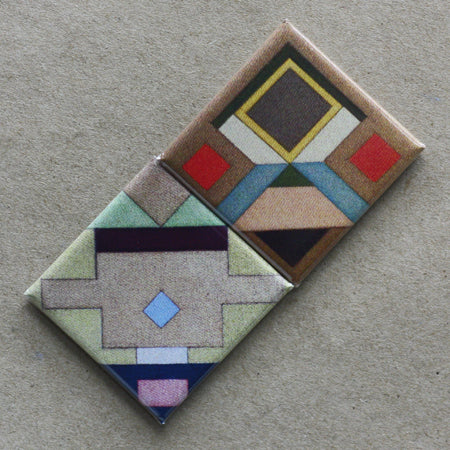
Diamond Shaped Buttons March 28 2013

Put your own artwork on a Pin-back Button! I chose to make a Diamond Pin-back Button based on a painting I'd done of diamond designs. Diamond Pin-back Buttons are made using square pin-back button parts; the square pin-back (which is black plastic) comes with three holes which can be pinned straight across for square, or diagonally for diamond. We carry four square sizes to suite your needs: 1", 1.5", 2" and 3" and have parts to make either pin-back buttons or magnets.
We would be happy to make diamond or square buttons for you - click here for pricing or you can look at our selection of square button makers and make them yourself! Happy Button Making!
Read more »
We Miss You "Stompin' Tom" Connors March 27 2013
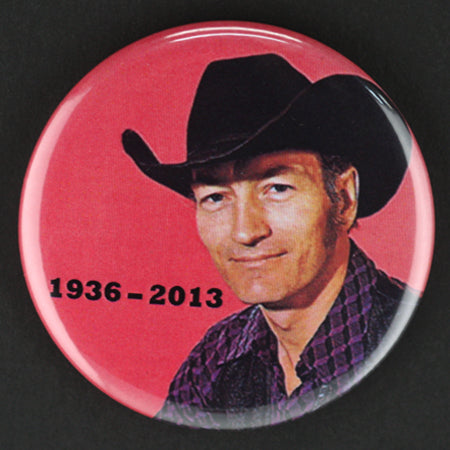
The folks at Winnipeg's 103.1 Virgin Radio had these tribute buttons made to celebrate the life and music of Canada's country and folk singer-songwriter "Stompin' Tom" Connors. Best known for his songs Sudbury Saturday Night, Bud the Spud and The Hockey Song,Tom Connors music will keep us Stompin' for years to come!!
Connect with 103.1 Virgin Radio:
Read more »
Compulsion Games, Inc: Contrast Video Game Buttons March 20 2013
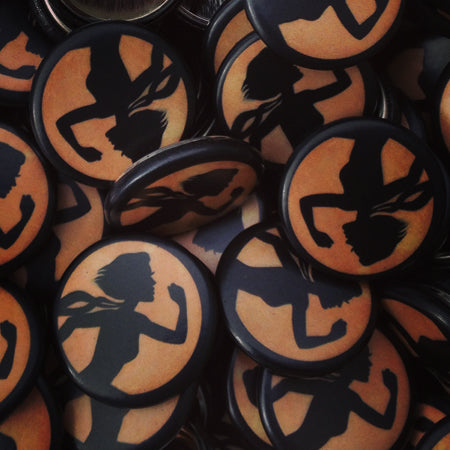
7/8" Custom Buttons for Compulsion Games, Inc Video Game: Contrast!
Compulsion Games, Inc, a Montreal based, small independent video game studio that is working on an upcoming game called Contrast! Contrast is a story about a little girl, Didi, and her imaginary friend Dawn. Normally, Didi and Dawn run around in a beautiful film noir, 1920s 3D world, but she also has the power to turn into her shadow at will, and run on a 2d landscape to help Didi out.
The button design is an iconic shot of Dawn's shadow running through the world and also the icon for the game - when you play it, that's the icon you'll double click. The design was made by their concept artist, Whitney Clayton, who works with them full time making outstanding art. Her personal website is being refurbished, but you can always get in touch with her through their website :)
Connect:
website: www.contrastgame.com
facebook: www.facebook.com/ContrastGame